Another Christmas....

Ever year I feature my Christmas decor…every year I think not much has changed.

But it does change…a tad here and there.

Last year I shared a few little changes…same this year…a few things here and there.

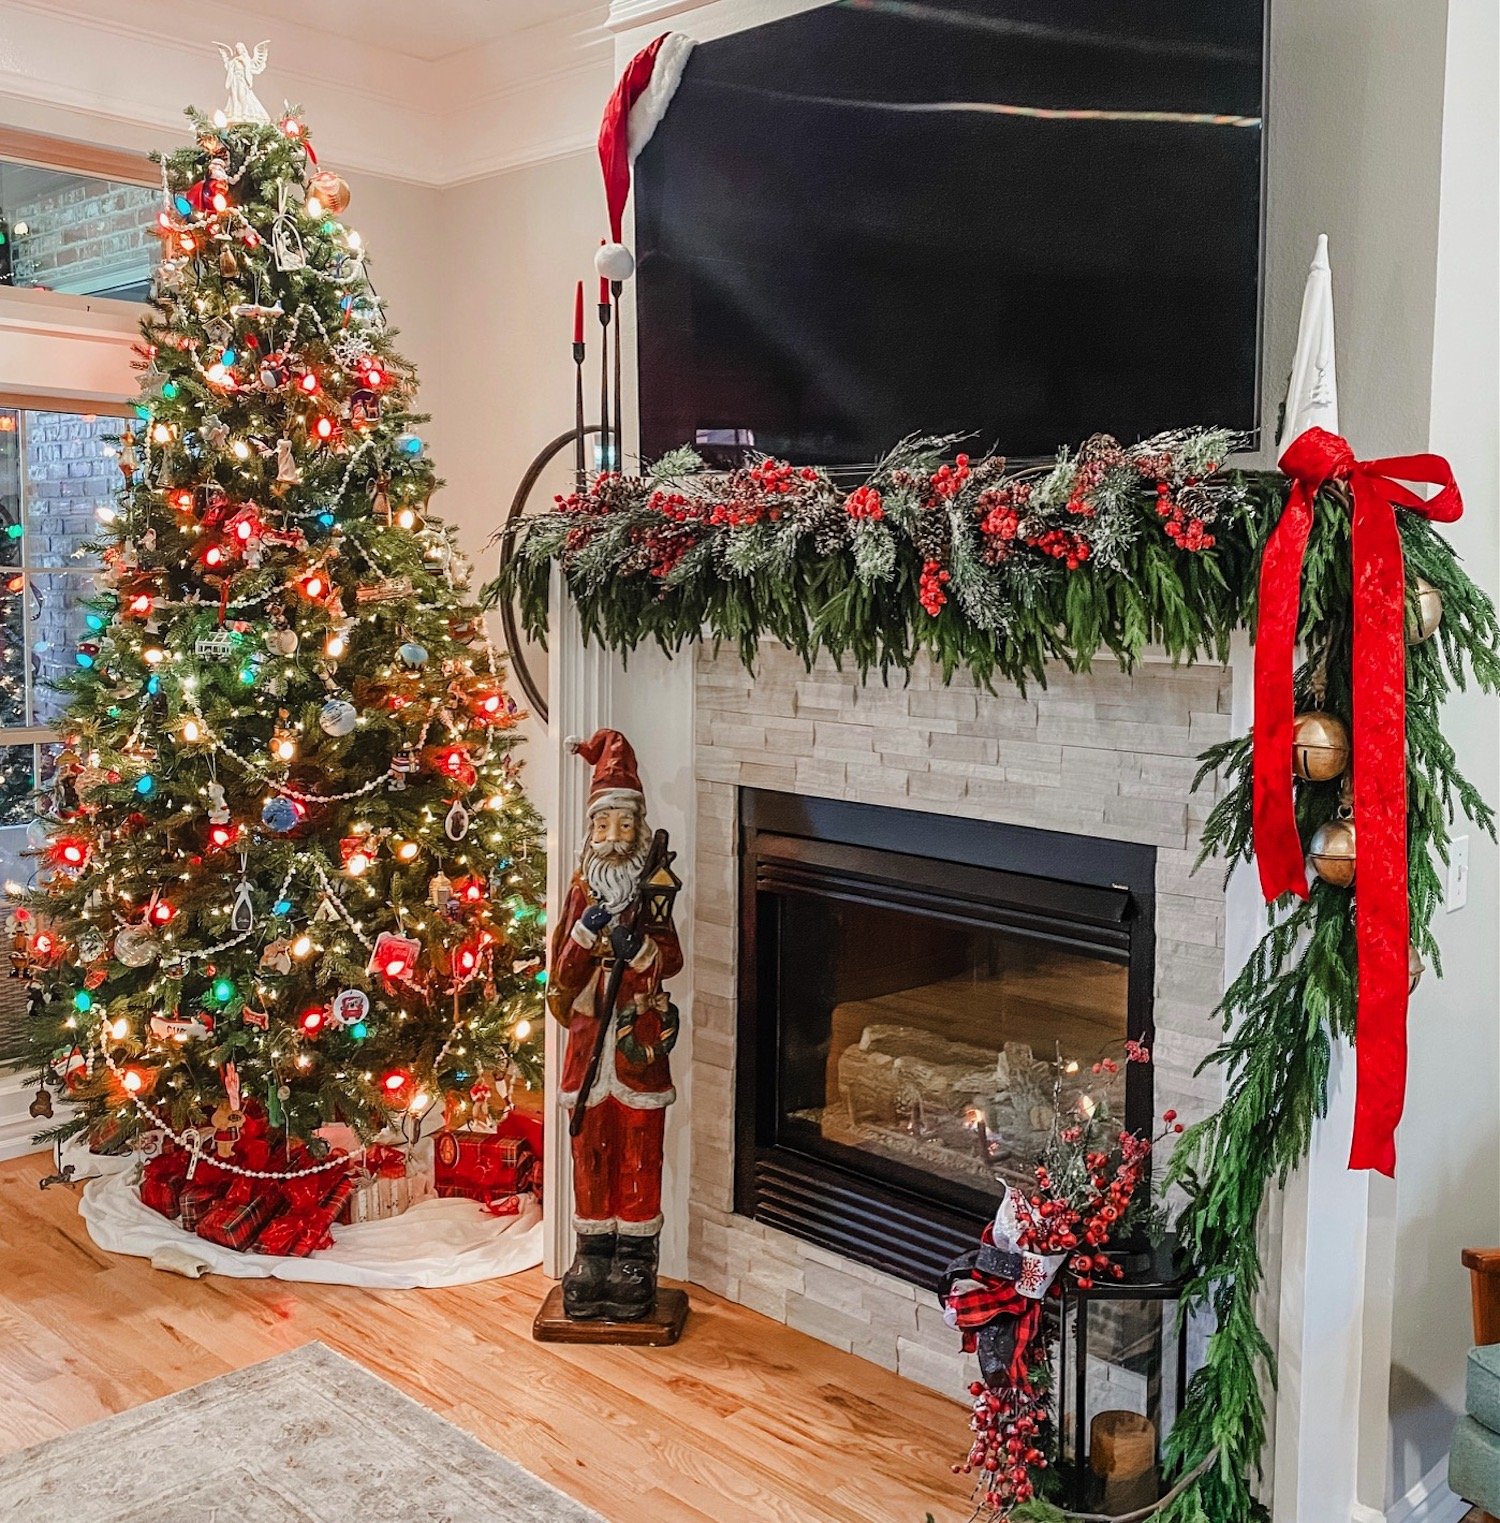
So what did I change this year? Probably the biggest change is the mantel decor….

Last year THIS soft touch garland was ALL the rage…everyone wanted it. Which is why it was sold out and on Ebay for mega bucks. So I waited until after Christmas and bought it when it was back in stock. Problem was, I forgot I bought it, several times, and by the time I brought down all my Christmas decor I had 10 strands of it along with three soft touch wreaths I have NO idea what to do with!

No biggy…while it is a beautiful garland, you really have to layer it to get a good thickness. On my living room mantel I have 4 5’ strands and 1 15’ strand.

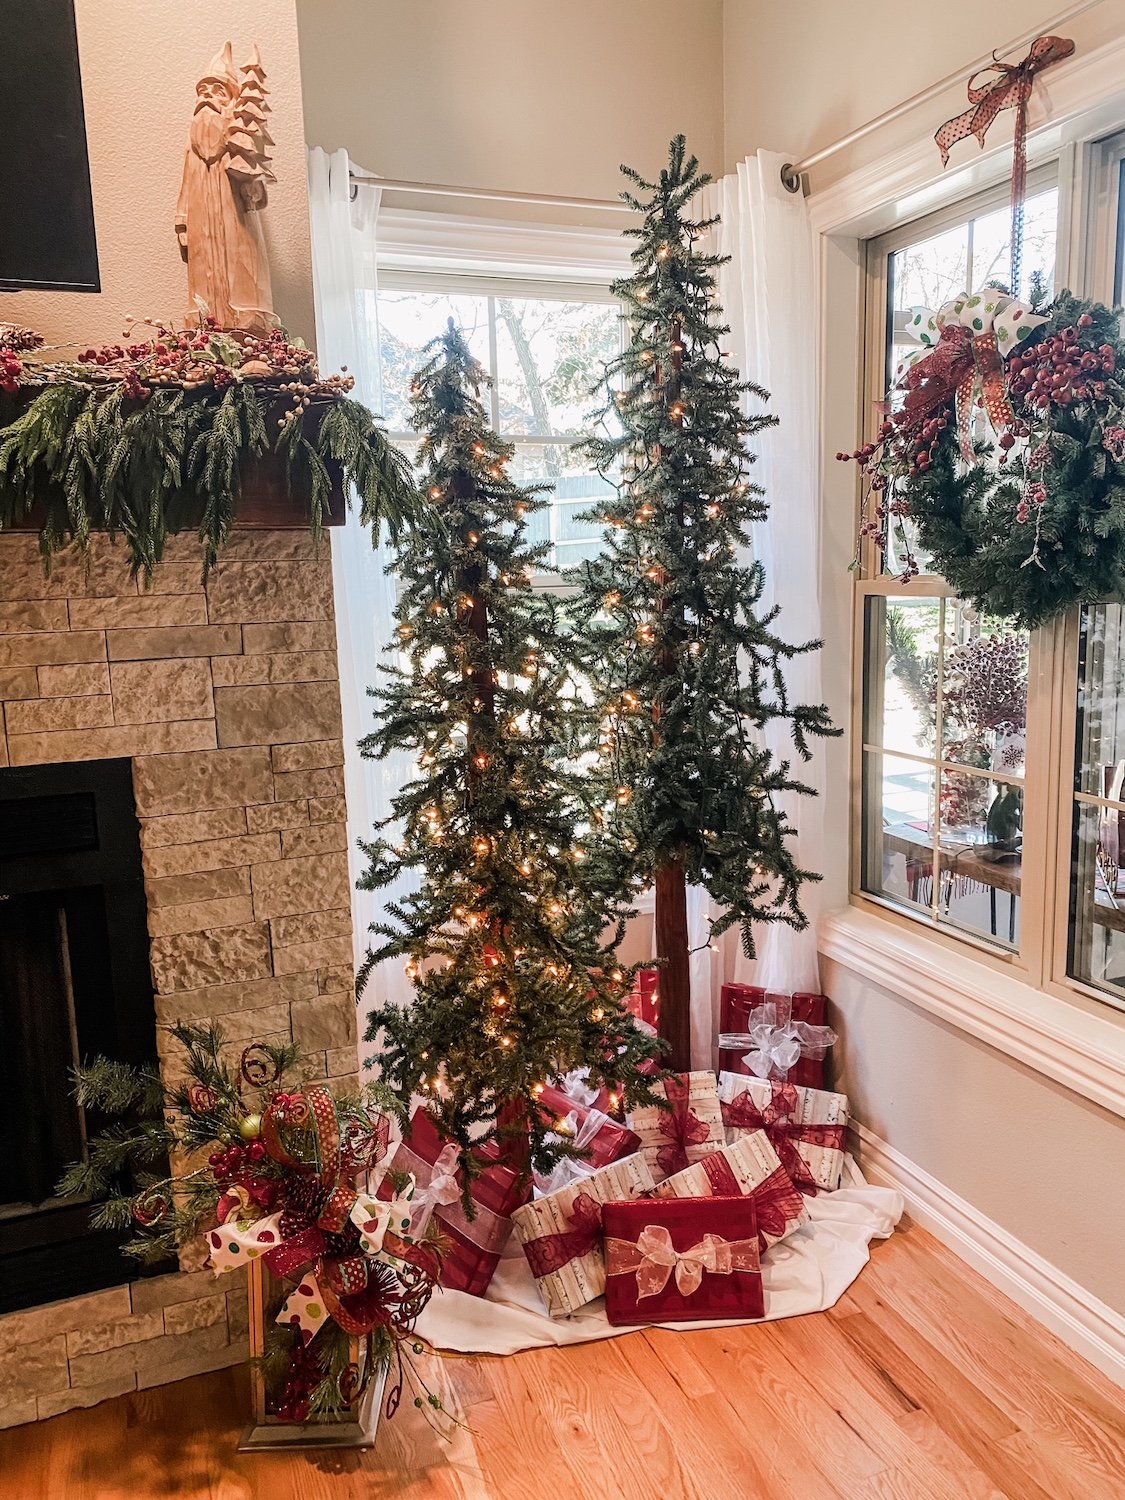
In the den I layered 5 5’ strands….

I used Command hooks about every 1-1 1'/2’ and floral wire to secure it.

I added a red velvet ribbon and these awesome bells….

I would love to link to the bells but as usual I have NO idea where I got them. I know I ordered them but from where? Not a clue!

Last year I layered the berry picks on the mantel…this year I layered them on top of the garland…just plain ole’ picks you can get at Hobby Lobby…four on each mantel.

Another new addition is this wood Santa….

I know WHO influenced me to buy it but have no idea WHERE he came from. I follow a couple of great ladies on Instagram…Deb and Danelle…and as influencers go they get me every time. Their style isn’t necessarily my style but they feature elements I love. Truthfully I think that is where the bell inspiration came from!

What drew me to this Santa was his “girth.” He’a skinny.

Okay, so here is the deal…ALL my Santas are skinny. I have NO idea what that is all about but it seems like every time I am drawn to a Santa he is on the anorexic side.

I kid you not.

Another element I added to my decor this year are the cabinets wreaths….

For several years I have wanted to add “mini” wreaths to my upper cabinets. I finally found am inspiration for what I wanted, but honestly, when I put it all together they came out a hair too big. Hardly “mini.”

So be it…maybe next year I’ll try again…for this year it is what it is….

The precious train!

This train was a gift from Brian’s grandfather to his dad in the 40’s…it was used then. Last year we displayed it above the dining room. This year we got it up and running and put it around the tree in the office.

We didn’t put it around the main tree in the living room because 1) too many gifts under that tree and 2) the SLIGHTEST bump derails it and the living room is a high traffic area.

Not sure Callum is really old enough to appreciate it but I sure love it!!!!

And now the pièce de résistance…the final tree in my life long dream of having a tree in every room!!!

For years I swore if I had the time AND the money, I would put a tree in every room of my house. Last year the goal was complete.

The master bedroom tree!

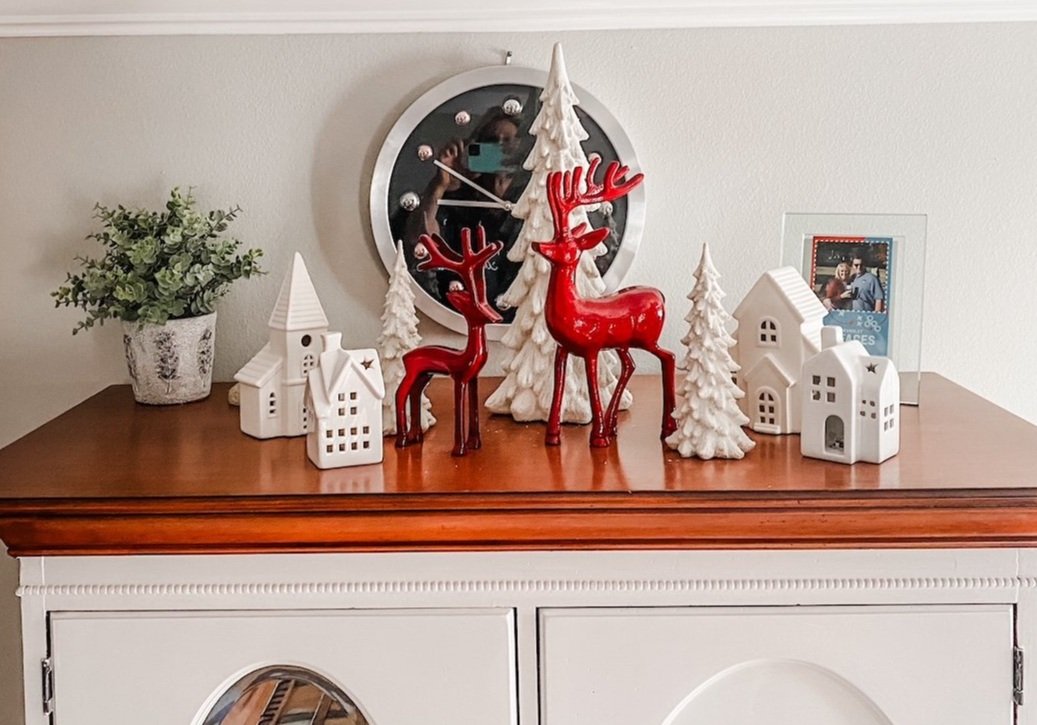
I added a few little knick knacks on the highboy. Just a few little things from Home Goods…nothing fancy.

The office….

The wreath is new…a tad over powering. Again, I tend to “go big” and then I’m not so thrilled with the result. Meh…next year I’ll change it!

The dining room….

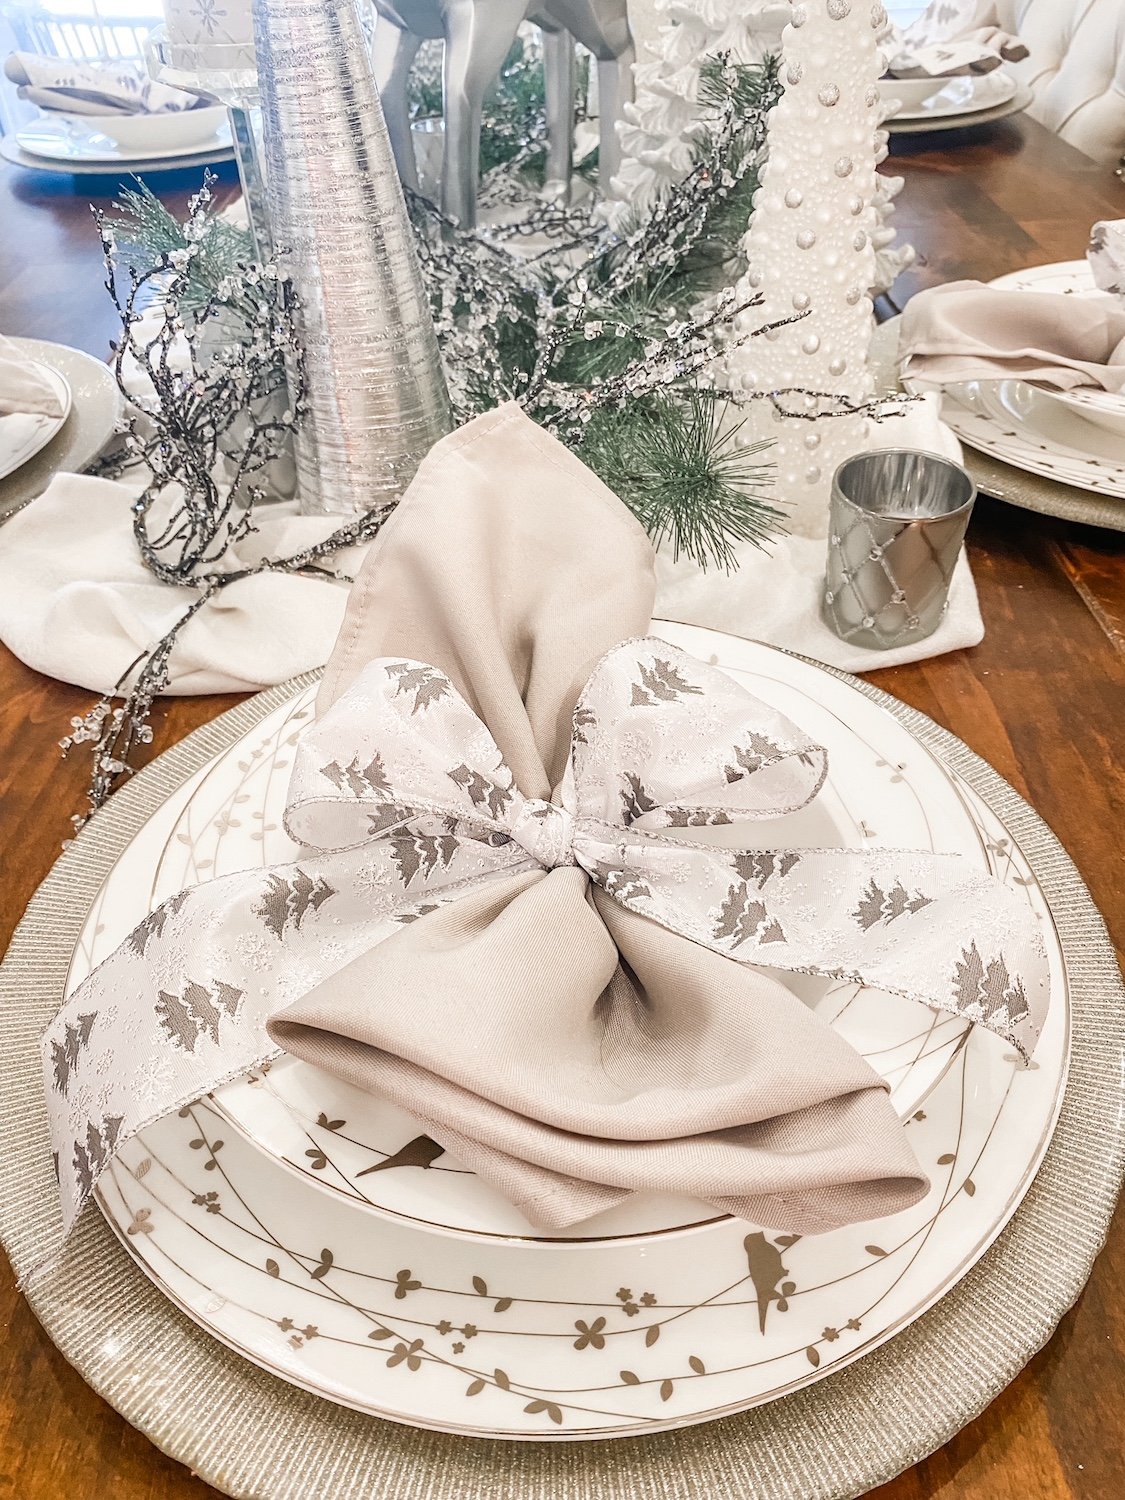
This is always one of my favorite rooms to decorate.. I love the neutrals even though I am drawn to all the vibrant holiday colors in the other rooms.

I like to keep the place settings out even though we don’t usually use these dishes because they have to be hand washed. Simple but elegant.

The sunroom….

I have shared this room before. It is my “Stewart plaid” room in honor of my “Stewart family.” Love it and I am always looking for more Stewart plaid elements to put in here. This year my sweet friend Carrie brought me this precious decoration from Italy!

The den…

The breakfast room….

Not all the trees have decorations…some just have lights. That’s okay. They are still pretty and the four that are decorated take enough time!

The entry…

Little has changed here…added some little wooden trees and a Christmas sign on the trim…another PJ pillow. Love the view into the office!

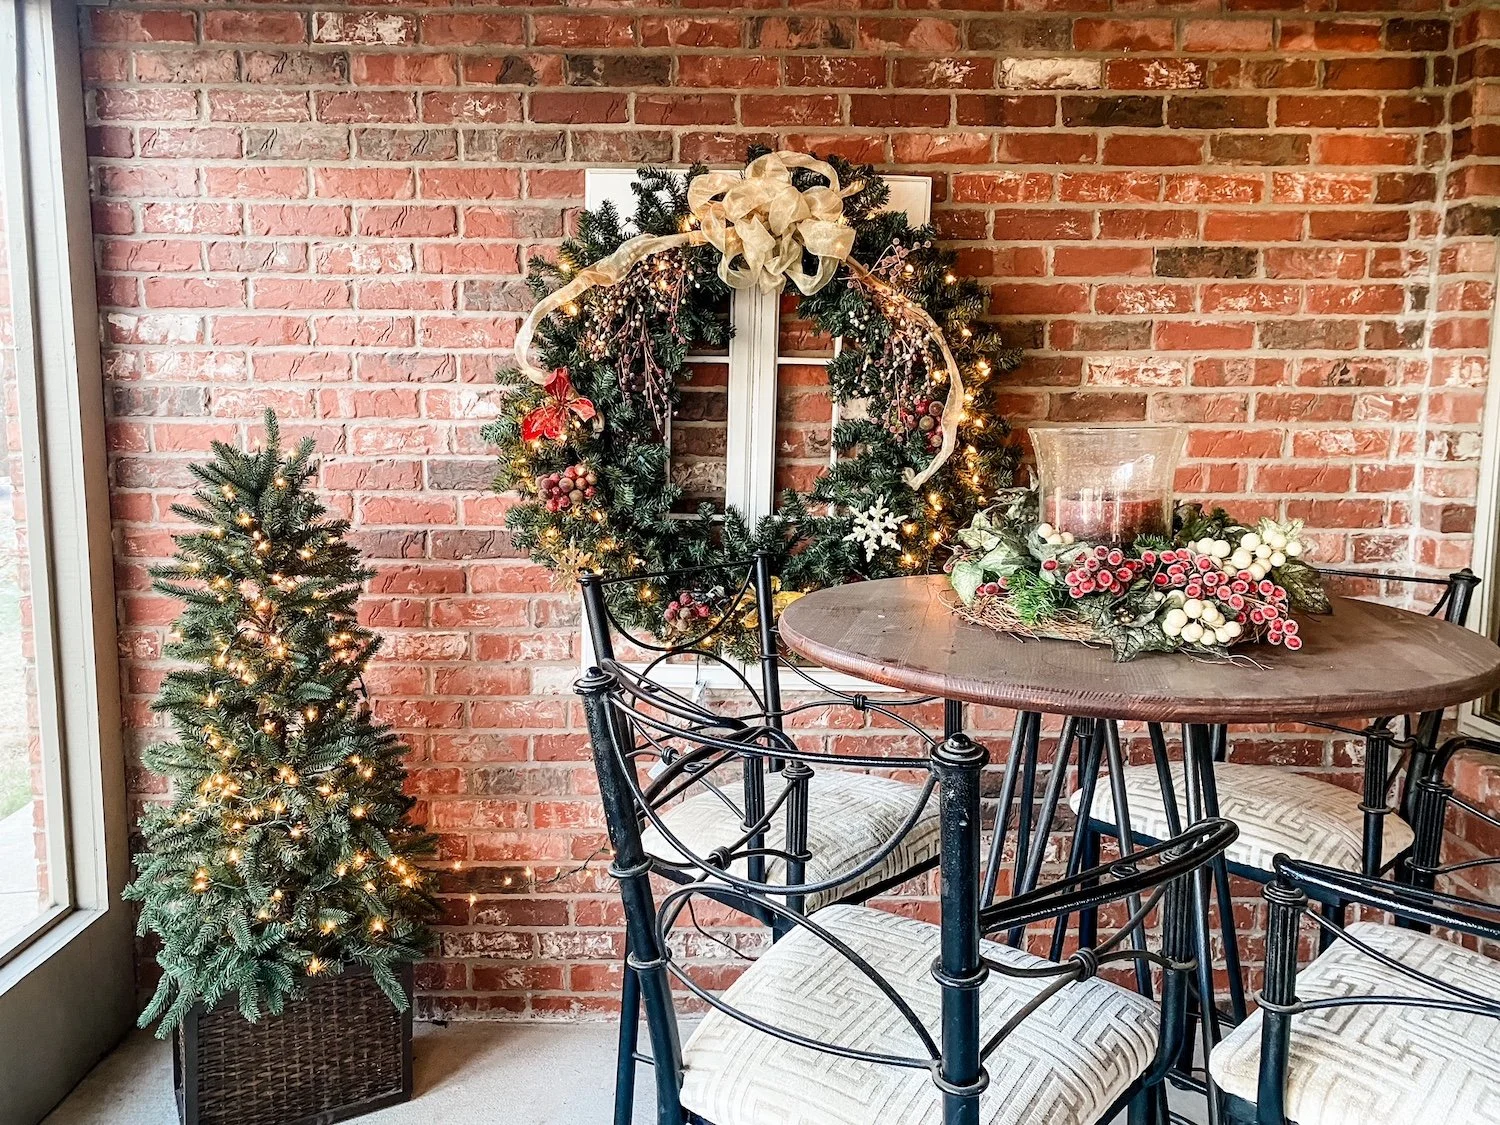
The screened porch….

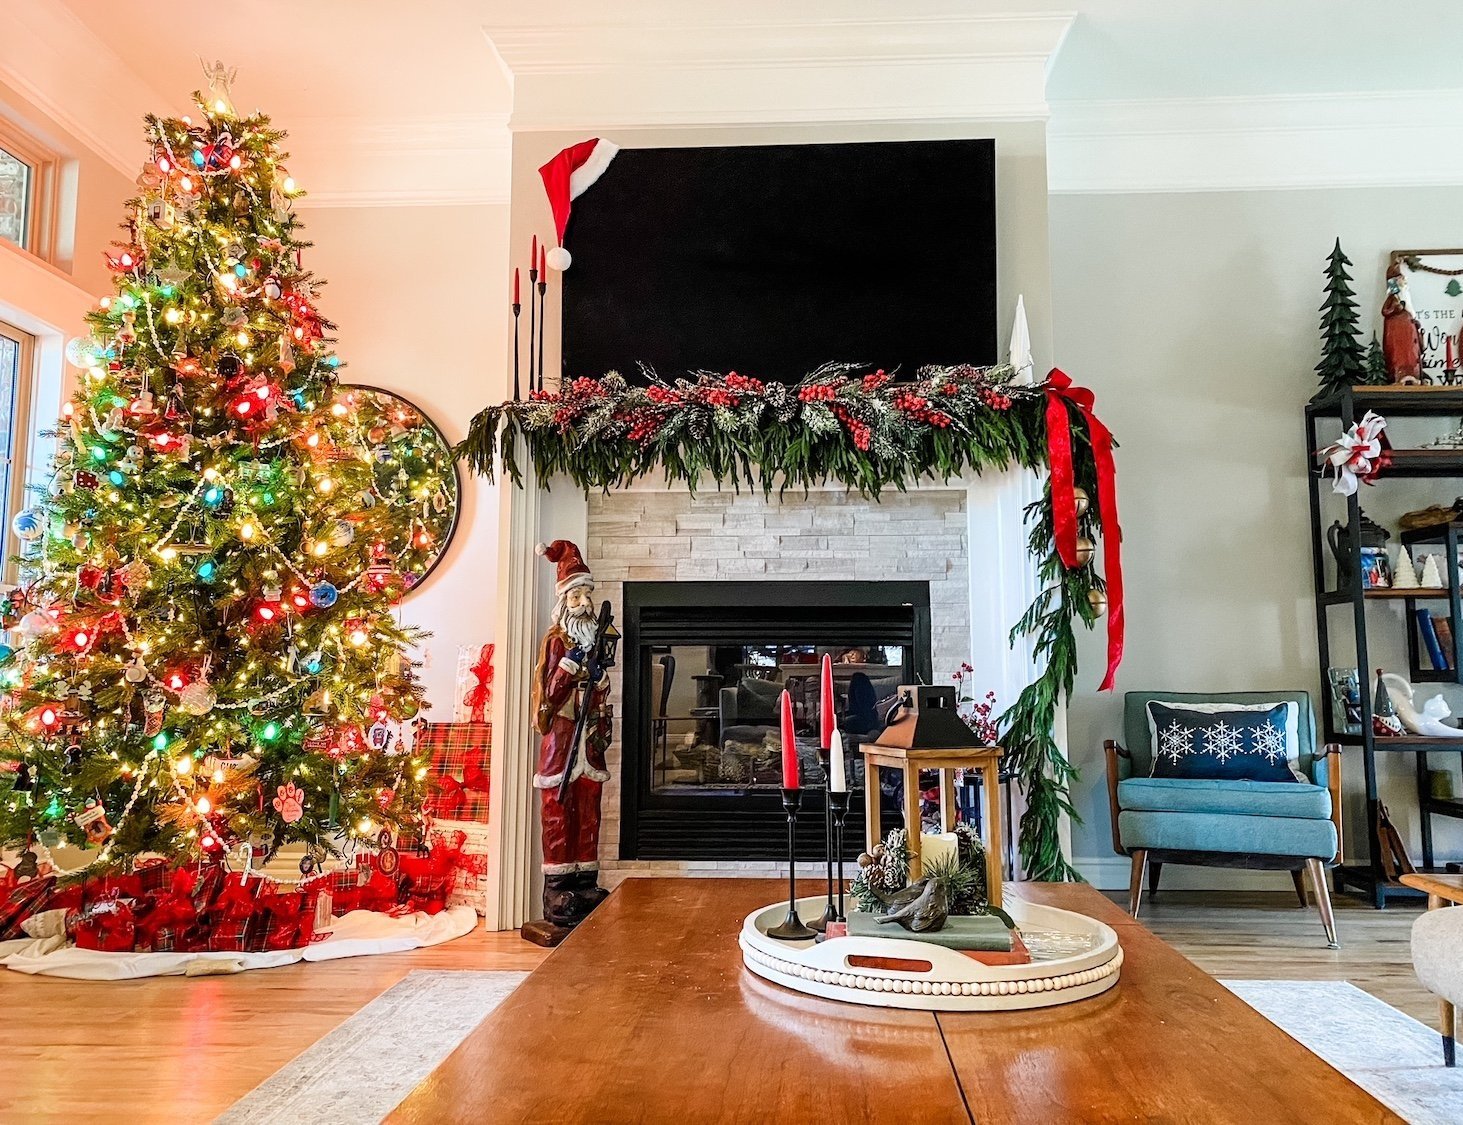
And of course the main tree in the living room….

All these trees are connected to remotes (THIS is one I use and LOVE) and are turned on every day. I don’t even want to tell you what my electric bill is for the month of December. Suffice it to say it is cheaper to cool this 3500 s.f. house than to light it up…lol!!!

But I love it and as long as I am physically able to do it, I will. Then I may hire it done!

I love this holiday and it seems that year after year I do indeed add something new. I hope something I did will inspire you to add a little more to your home.

Piece by piece...

I had a friend on Facebook ask where she could find much of my decor because we share a style.

Funny…as I walk around this house I see so many pieces I have cobbled together over the years. Pieces I bought at auctions and refinished. Some at flea markets. Some I bought new and tired of over time so I gave them a little facelift. Pieces I inherited. ( I am actually kind of shocked at how many pieces there are and how little I paid for them originally!)

Every room in this house has pieces I have refinished, refurbished or rehabbed.

My bedroom….

Twenty years ago I bought an entire bedroom set…bed, dresser, highboy and two night stands. Paid a small fortune for the matchy-matchy set so I couldn’t bring myself to get rid of it. Over the years I finally gave up the bed and dresser and the highboy and nightstands have had little facelifts. The furniture and our master bedroom got a full makeover HERE.

Before….

After….

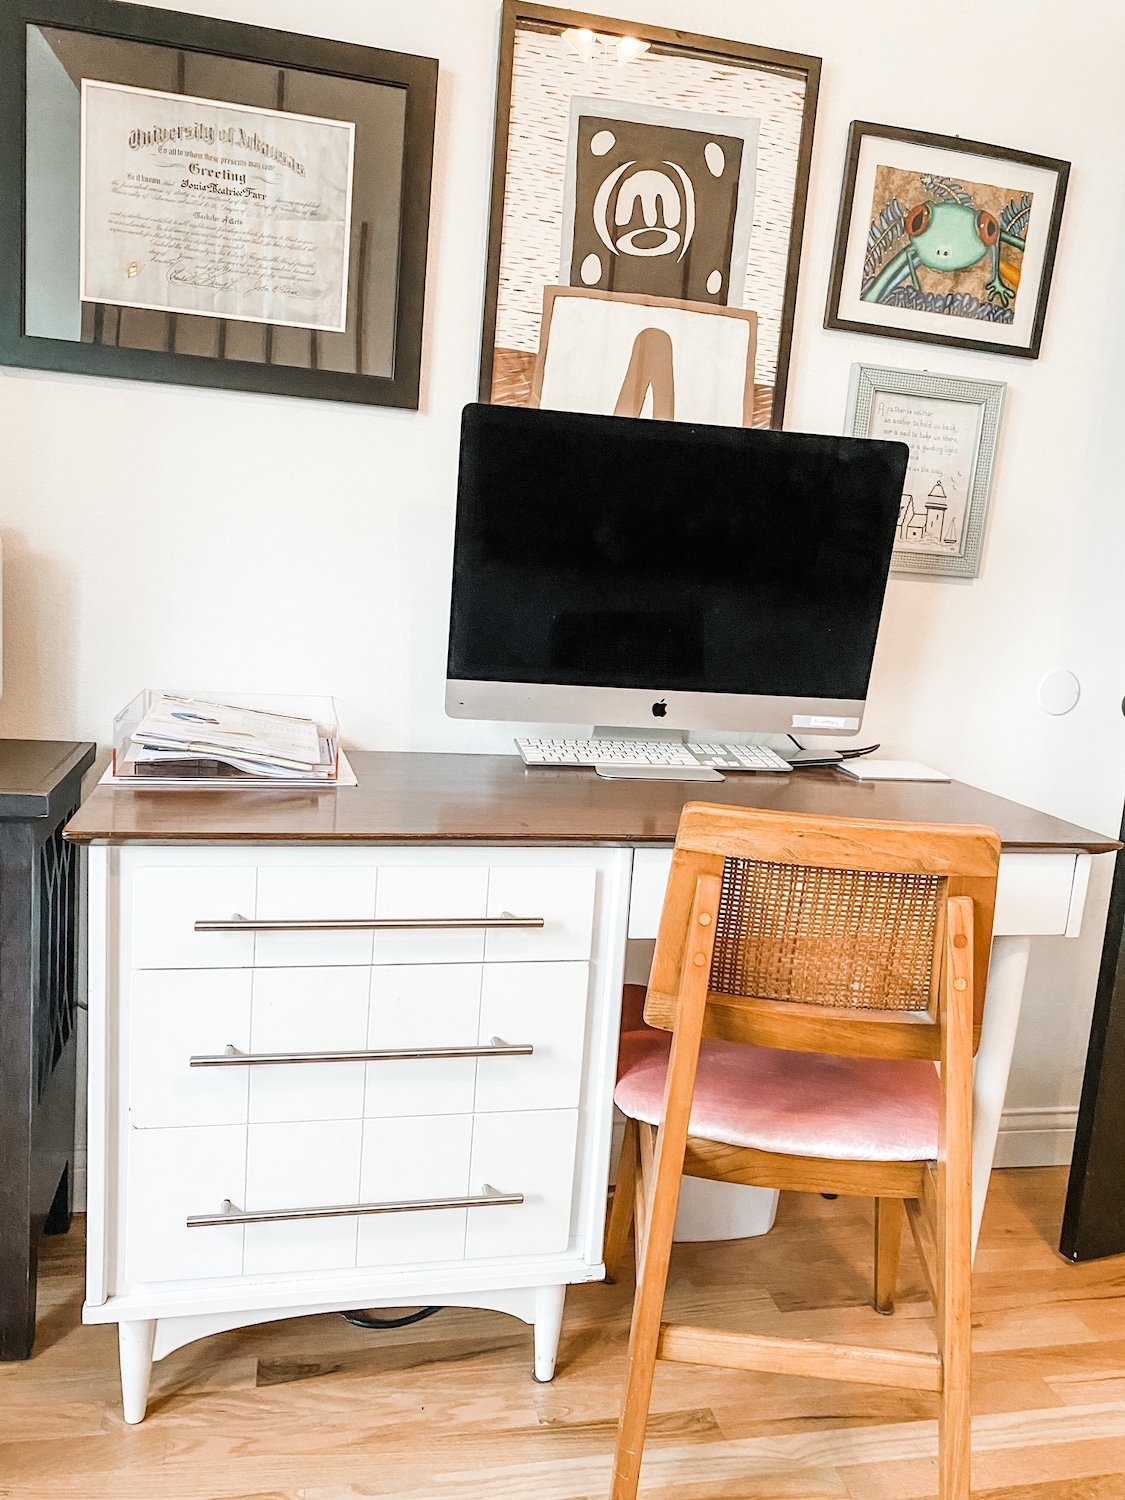
My office…

I bought this desk at a junk shop YEARS ago…I think I paid $25 for it.

Still love it although it could use a little refresh!

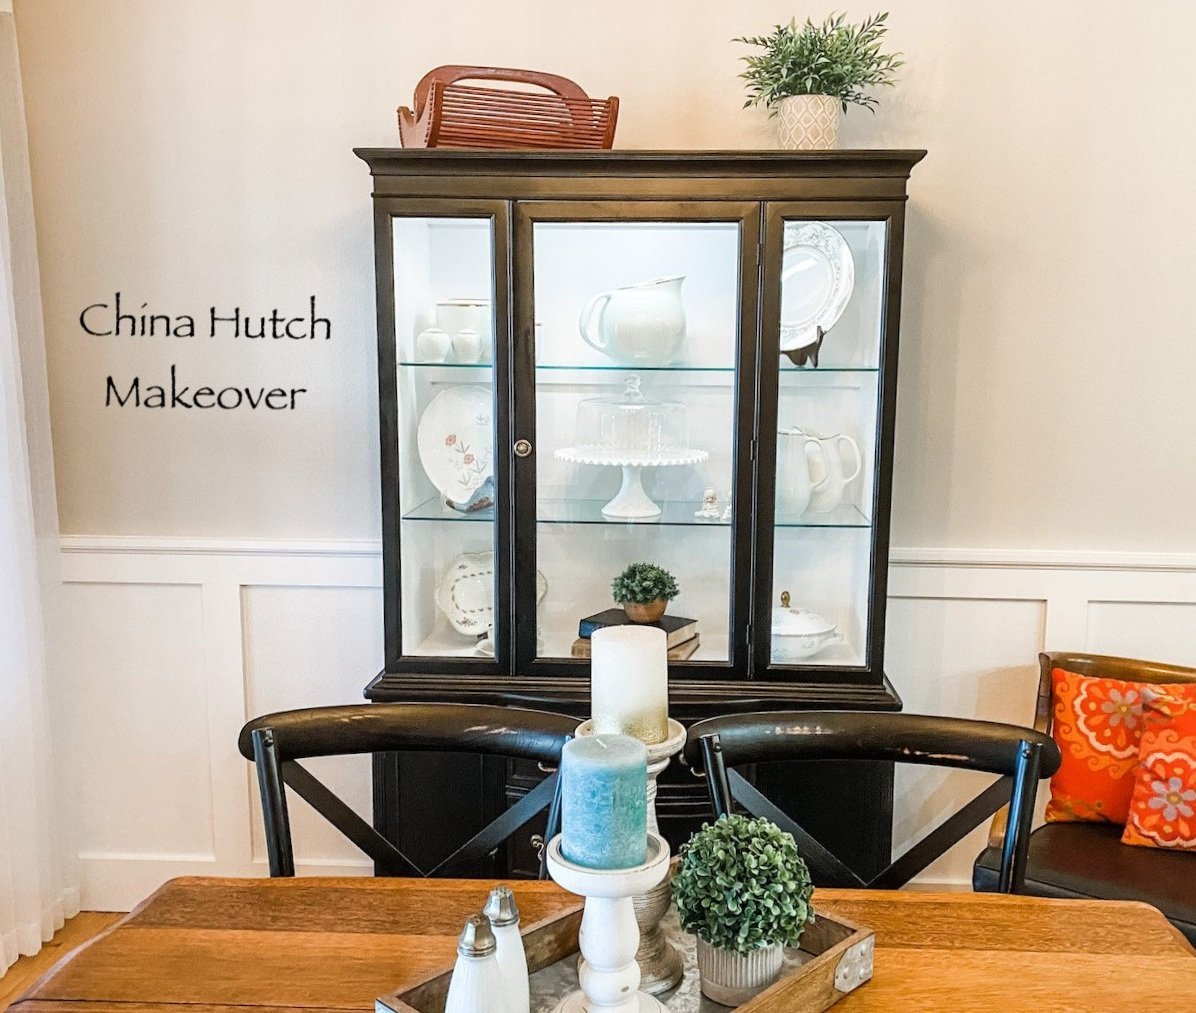
The china display cabinet in the dining room. This is a prime example of a piece that is not my professed style but I absolutely love it all the same…LOVE!

I had a vision in my mind’s eye of what I wanted and I knew this piece could be exactly what I wanted with a little time and effort….

It took a bit more time and effort than I anticipated but it really is one of my favorite pieces.

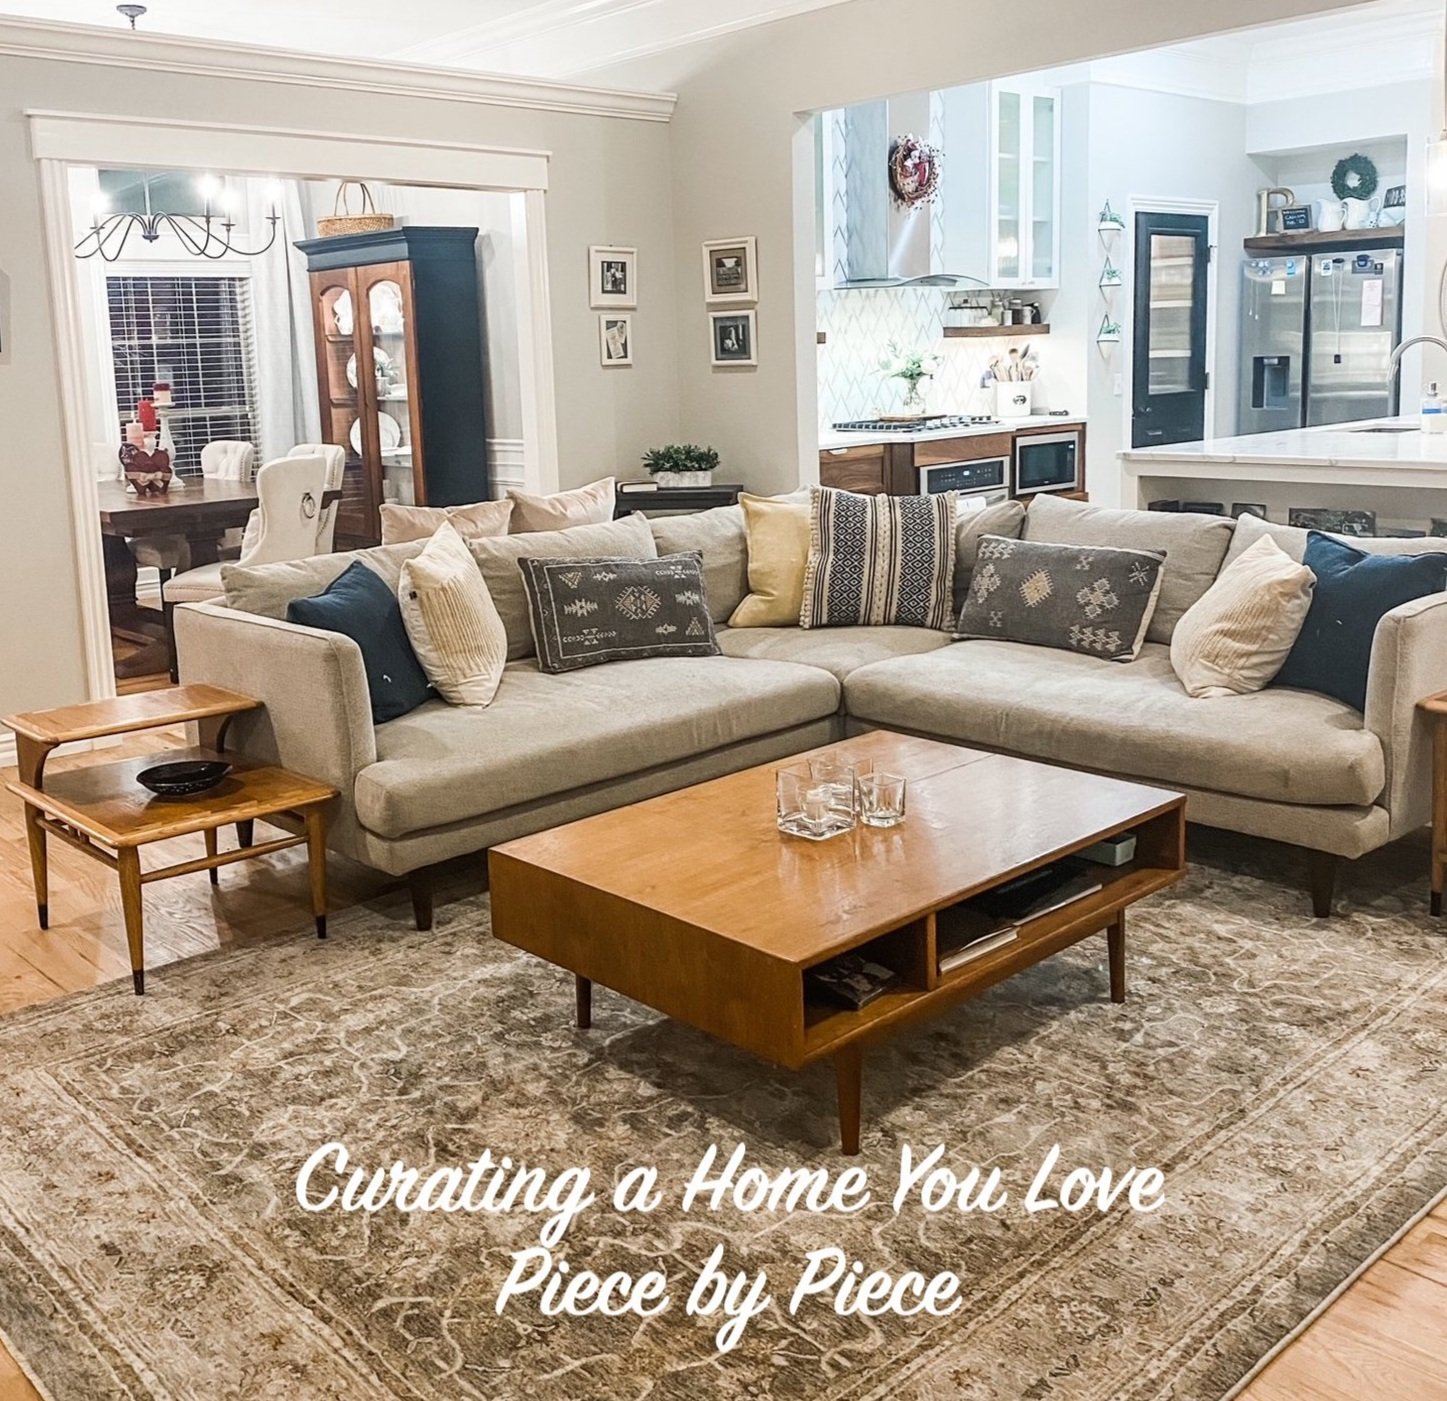
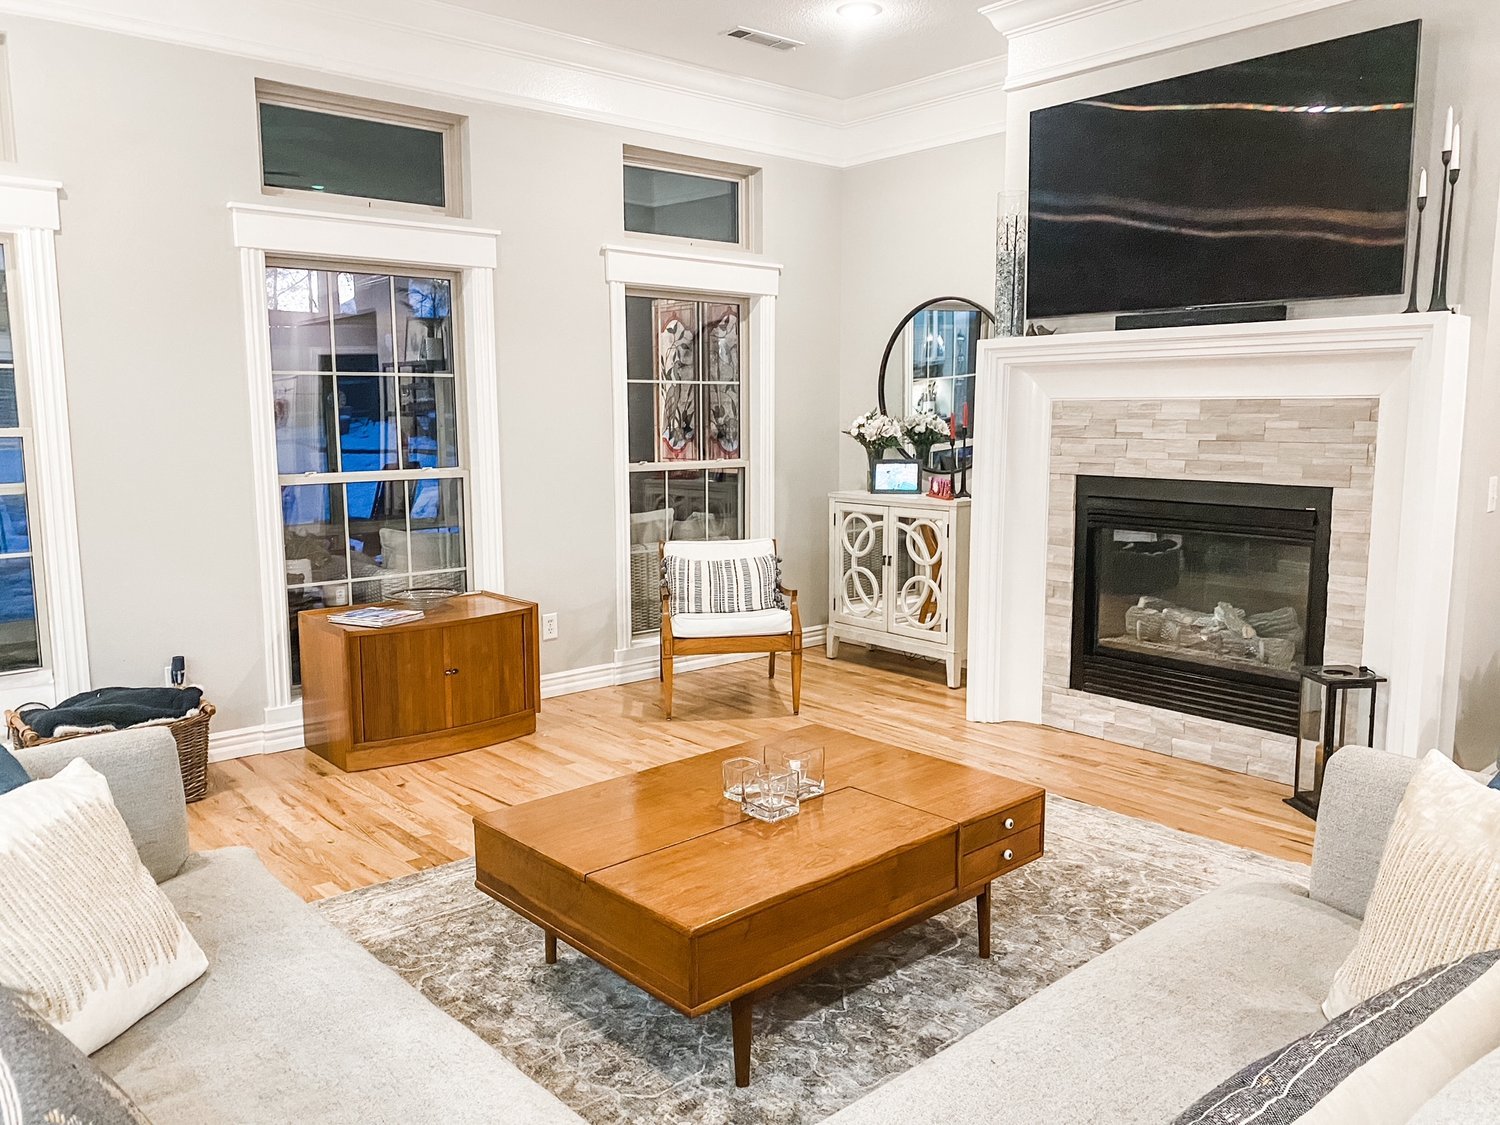
I have several pieces in the living room I have rehabbed over the years.

This AMAZING coffee table I picked up at an auction for $22!

I sometimes wish I had a round coffee table but I love this piece so much I just can’t bring myself to part with it!

Several Lane Acclaim tables I have picked up here and there and refinished.

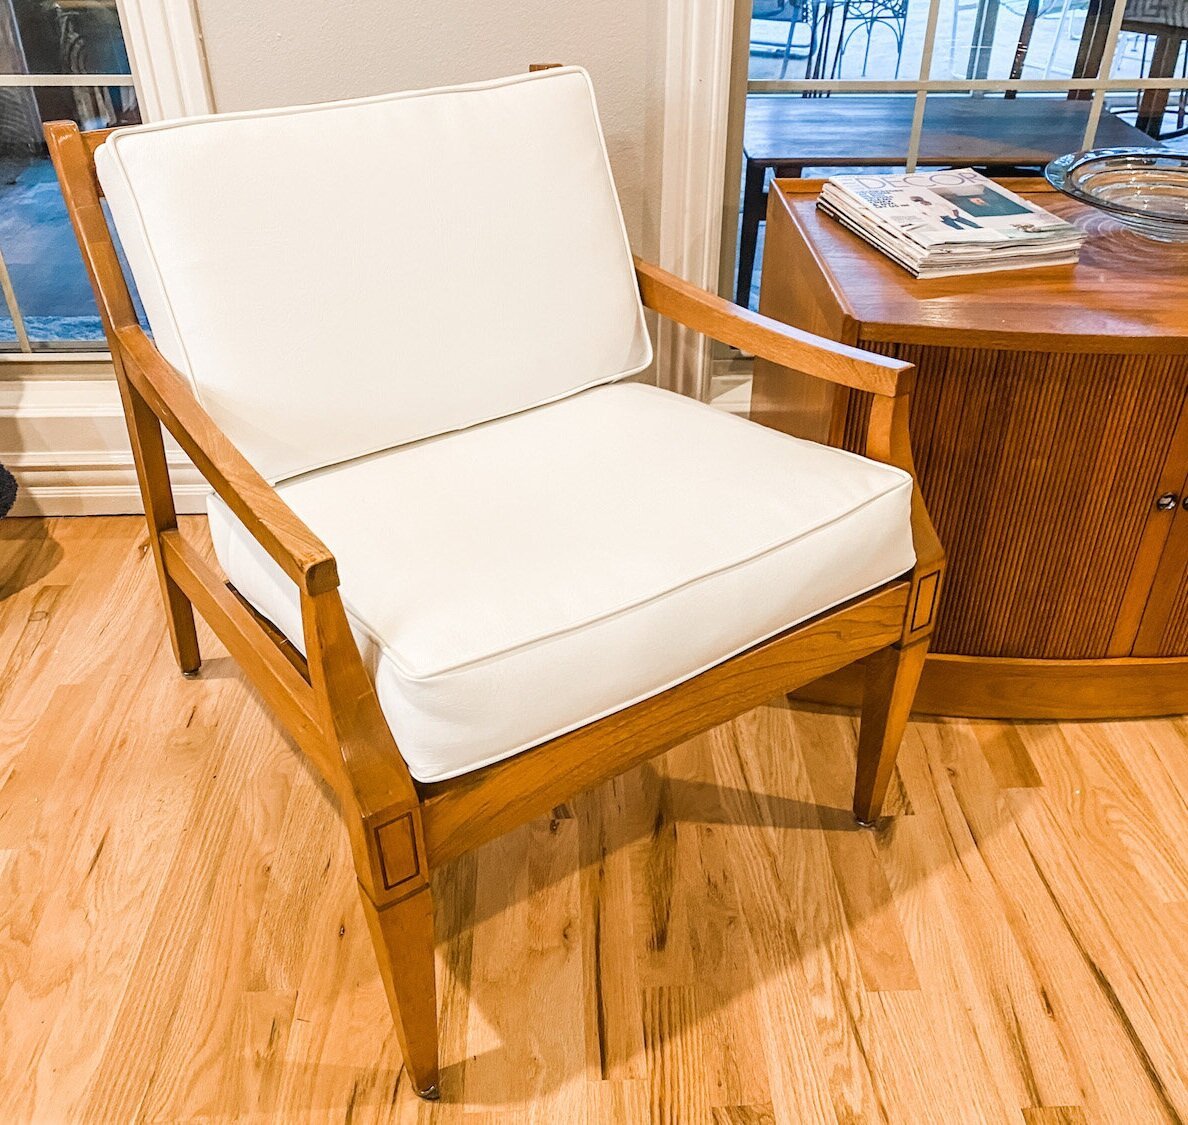
My grandmother’s little mid century chair has had two little makeovers. The teal chair is one I bought off Marketplace years ago and reupholstered….

My breakfast nook has several pieces as well.

The table….

The little china cabinet was a fun and relatively easy project….

They seem to work well together after their little facelifts….

There are so many more pieces I have curated and rehabbed over the years. Side tables, benches, chairs, dressers…every room has pieces I have refinished, painted or reupholstered.

It took years for me to collect all these pieces, bring them back to life and create a home I love with pieces that have purpose and meaning.

Most of the links are to the original rehabs where I share what I did…unfortunately I am NOT a good teacher so often I direct you to search the internet for good tutorials on how to repair, refinish and paint pieces. Find a tutorial that makes sense to you and begin curating your home one piece at a time.

It doesn’t happen over night! And it seems to be never ending…

Fall tablescape...

I have some hard fast rules for decorating for the holidays. Fall decor goes up the week before we leave for vacation…usually the last week in September. Christmas goes up the weekend after Thanksgiving.

It’s the rules.

This past week I broke the rules.

It wasn’t really my fault. I got an At Home magazine in the mail. It had a really pretty picture of a fall tablescape and I was compelled to immediately go buy MORE fall stuff for my formal dining room. I blame it all on their devious advertising.

I went upstairs and dug around in my stash of heirloom china. I also pulled out the fall box marked “formal dining” …then I decorated my dining room.

I used my china and added little glass pumpkins, some amber stemless wine glasses and green place mats from At Home and straw placemats from Amazon

I picked up a few fall table runners but they didn’t make the cut.

i stuck a few little fall doo-dads in the china cabinet…

I made the center piece last year…fall candles, pumpkins, fall picks and some cotton stems in a round tray.

LOVE!

(You can check our the china cabinet makeover HERE!)

My son insists we use this room during our Sunday dinners. Since this china has to be hand washed, I have no doubt it won’t actually get used…we will just have to sit in the other dining room or move this fancy stuff out of the way…but it sure looks pretty.

For those who advocate using the fine china for every day use and not just for “formal”….you obviously have never had to hand wash dishes after feeding your entire family.

Right now we are having to hand wash everything anyway…our TWO YEAR OLD dishwasher isn’t working. I have no idea why…I’ve googled…could be one of four things. But after having to buy a new washing machine because we couldn’t get a simple part, we decided we would just buy a new dishwasher rather than pay $150 to have a repair main come out and tell us we can’t get a part we need. A brand new one was installed Tuesday.

So back to fall decorating. I love it and every year as soon as the temp drops below 80 degrees, I get the itch to start digging out the pumpkins and fall wreaths. But like every year, the temps climbed back into the 90s this week so now I haven the dining room decked out but the rest will have to wait a few more weeks.

That is okay! I will just enjoy the glorious summer flowers! And they are glorious this year!!

The wardrobe makeover....

You may have noticed I have been MIA for a few weeks. Pretty unusually for me.

It is the “dog days” of summer…just too stinking hot to do anything major outside. Really too hot to do any projecting inside that requires me to go outside. Just plain HOT!

I have been working on a few little projects. My neighbor has been using her golf cart garage as a make shift office. A tiny little garage in her house with a tiny little garage door. It is heated and cooled and is a good little space for a small office.

No I did not take before pictures. Wish I had because after she had the garage door replaced with a large slider, I spent a few weeks repairing walls, painting and changing out the lighting.

SOOOOO darling. The large slider looks out over her flower garden and the space is just wonderful!

This was one of those “Giving what you have” projects. I can paint, repair sheetrock and do minimal electrical…and that was exactly what she needed.

I also started painting my interior trim. At some point, eons ago, I painted all the trim in the house a “whiter” white. Well now I have found a white that is even “whiter” and is my new “go to” white. BM Chantilly Lace. At some point I started using it on all my trim…when I gave my master bedroom a makeover….the laundry roommy office. I used the new whiter trim paint in all those rooms. But the main part of the house all has the old white trim. When I added the wainscoting in the dining room, I used the new white. No one but me could probably tell the difference….but I could. So now I have to repaint ALL the trim. Curses.

Good project for the dog days of summer!

A few early morning yard projects…a few “give what you have” projects…but really nothing earth shattering!

But that is about to change!

As I have shared, my days of major furniture makeovering are pretty much over. The ole’ back/knees/hands just can’t take it any more. But every once in a while I decide to take on something because, well, I want it.

For over a year a few “inspiration” photos have been on my computer. I just LOVE these cabinets….

(Again, no I don’t have sources…I found them on Pinterest and dropped them onto my desktop. I think the second one is an Etsy find and the third one has her watermark on the photo! She has a pretty good tutorial for the this makeover on her website!)

I just love these pieces and always knew if I could find the perfect piece, I would get it. Never thought I would, until I did.

A local flea market posted this piece….

It just so happens that last week I finally sold one of my office pieces….this credenza has been languishing in my home office since we moved in just collecting dust.

It is one of those pieces I LOVE and spent entirely too much money on…so the thought of selling it for pennies was painful. But it had to go…it no longer served it’s purpose as a flat screen tv credenza and was taking up space. So now I have moved my desk to that wall and have nothing on feature wall.

My plan was to put a mid century style credenza on that wall…the wall treatment is kind of “mid centuryist” and I do have a lot of other pieces in that genre. I absolutely love the style and was pretty much sold on the idea. Simple, clean, sleek. No frills or froo-froo.

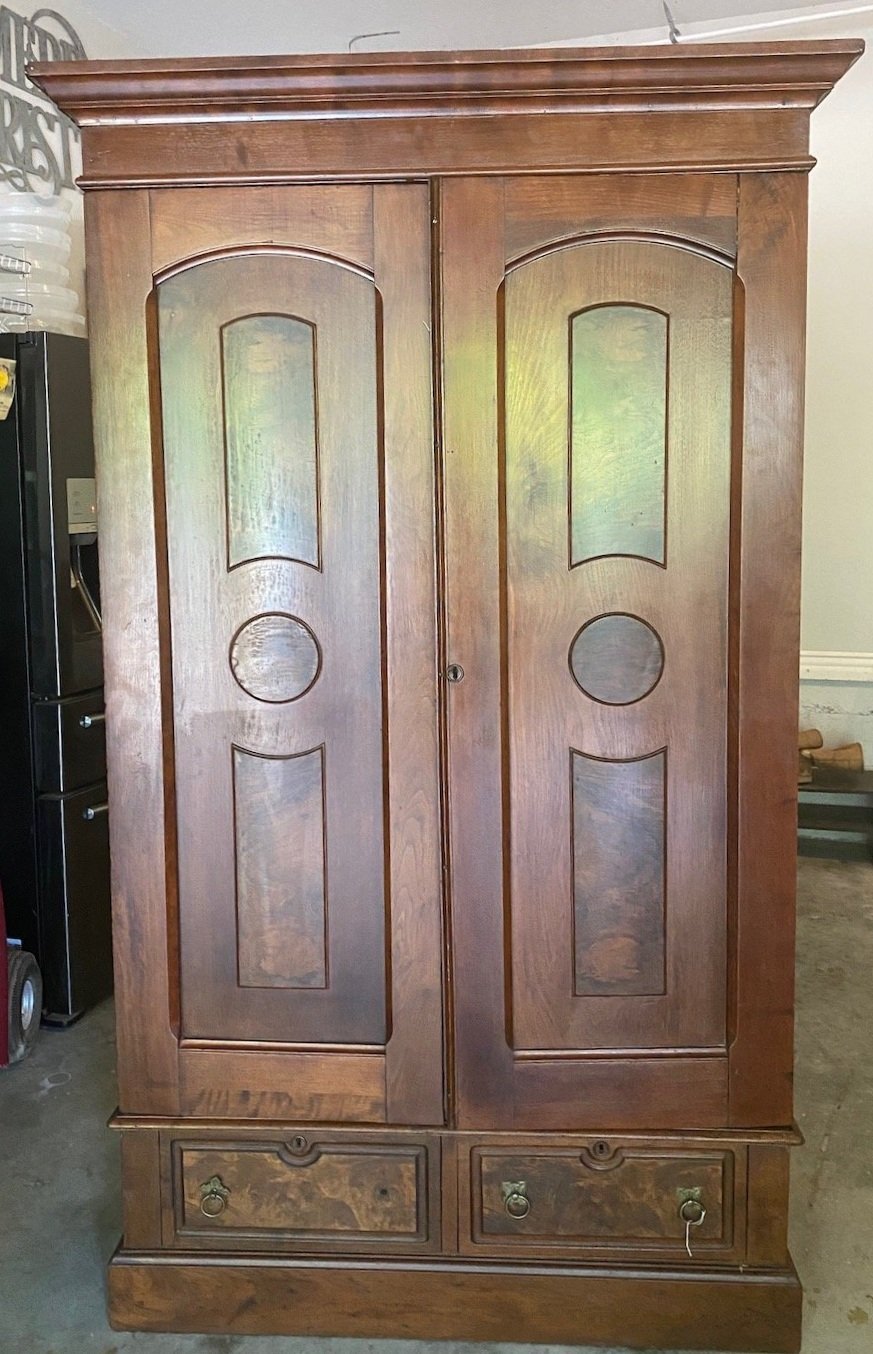
But when I saw this old wardrobe, I knew it was exactly what I didn’t know I wanted.

Okay, not EXACTLY…it needs some serious work!

I brought it home and parked it in my garage.

I love being able to park my car in the garage now so I RARELY use it for projecting. But this piece was just too big and hulking to haul back to my shop so I decided to give it a facelift in the garage.

The plan….remove the door inserts so I can add glass. Strip and oil the doors and drawers. Strip the interior and lighten it…either with wood bleach or a whitewash treatment. I don’t want it painted “white” but I want it lighter. Rework all the shelving and add glass shelves. Lighting is a must. Paint the cabinet black. Black cabinet, natural wood doors and drawers, lighter interior.

I THINK the doors and drawers are walnut but I won’t swear to it until I get it stripped….I CAN’T WAIT!!!!

I think it will be amazing!

Funny…I have spent the last 20-25 years leaning more towards simpler, mid-centuryish stuff. Moving away from “traditional” and all the old antique stuff I loved so much 25 years ago. Now I find myself drawn BACK to those styles.

Part of it may be this house…I have the space to accommodate larger pieces. But I think the real reason is “style influence.” As much as I THINK I do my own thing and don’t allow myself to be influenced by the trends of the day…if I was honest, I think I do. I use to believe “my style” was mostly eclectic…leaning more towards mid-century/transitional. If I REALLY look at how I have decorated this house, I think it is kind of “modern farmhouse”/traditional…still eclectic…just a different mix.

Hum…interesting.

Regardless, I still think there is something to be said for being “eclectic.” This is a piece that you wouldn’t think would work in a room with a “mid century” influence…the desk, the side table, the wall treatment. But I think it will look amazing!

But that is me…to each his own.

Maybe next week I will have this done and ready to share…maybe. It is still pretty hot outside!

china hutch makeover...

I originally bought this piece to makeover and sell…

When I gave my breakfast room a little makeover (featured HERE last week) I decided I kind of like the look and it gives me a place to display my heirloom china….

I didn’t take pictures while I was giving it a makeover because, well, I just didn’t….

But the process was pretty straight-forward.

I removed all the hardware. The drawer hardware was not the original so I ordered hardware that would have come with the piece originally. Fortunately the door hardware was still there so I just cleaned it up a bit with Brasso and SOS pads to highlight the engravings.

Before you go scrubbing on hardware with Brasso and SOS pads, make sure it is real brass. A magnet will NOT stick to real brass…if one doesn’t, scrub away.

I removed the shelving. I also removed the glass and decorative glass inserts. Not difficult because it was just held in place by some strips of tiny molding and nails…I just popped those right out and set them aside to paint and reuse.

The shelving was pretty warped and I tried my trick of laying them on the floor and placing weights on them…no go. So I ordered glass shelves to replace them. Honestly, I like the glass better.

The glass shelves where a lot heavier than the wood shelves. Originally the piece just had two little supports on each side for the wood shelving (no supports along the back for the span which might explain why the shelves bowed.) I didn’t feel comfortable with that so I added 1x3 support boards along the back, securing them with glue and staples. Now I feel confident that the shelving is properly supported and can handle the weight of dishes. (If you have ever had a glass shelf come crashing down on your china you would understand my concerns. Yeah, it happened!)

There were a few other minor repairs that had to be made…since I was painting the piece, I did them before primer and paint.

Remember, if you are staining, stain first then repair. If you are painting, repair first then paint.

I cleaned the piece well then I caulked all the “joints.” Remember if you are painting a stained piece you have to caulk all the places where wood meets wood…and you may even have to putty nail holes. If you miss anything it will show up when you prime the piece…just caulk and putty and spritz it with a little primer.

I sprayed the entire cabinet with Bullseye primer. Primer is MUST on mahogany pieces because it will bleed through the paint! If you paint a piece and see “red” or “shadows,” that is the mahogany bleeding through…or water stains, oils, etc…more layers of paint WILL NOT cover it. Prime it then repaint it. Or save yourself the grief and prime everything before you paint. Mahogany is not the only thing that will bleed through paint. Nail holes and “gaps” will show up and you will be able to fix them before you apply your paint.

Also, you will get a much prettier and durable finish.

I know some paints (like this one) profess to be paint and primer in one. Maybe so but I always prime with a primer. Usually Kilz or Bullseye.

I sanded it smooth then wiped it down well with tack cloth.

I decided to paint the inside white and the exterior black. I painted the inside with some satin white latex I had on hand, let it dry and cure then taped it all off to spray paint the exterior.

I painted the interior a satin finish but I wanted a flat black for the exterior. I went with Rust-Oleum Matte Farmhouse black.

After the black had cured (I usually give it a few days) I replaced the hardware, reinstalled the door glass (without the decorative doo-dads) using the small trim and silicone and moved it into the house. I gave it another few days to cure before adding the glass shelving.

I did not paint the inside of the drawers or the inside of the lower cabinets. I rarely do unless the piece has an odor or stains I can’t get rid of by cleaning. If you have a piece that has odors or stains sometimes your only recourse is to prime and paint!

I added a LED light to give the display a little glow! That entailed drilling a small hole in the top for the cord and mounting an LED light strip in the top of the cabinet….simple simon!

Lovely.

This is where I remind you that “cure time” is super important when working with painted wood. I always get annoyed when I watch those shows on HGTV and they paint and stage furniture the same day. DO NOT DO THAT!!!! Be patient…give paint time to cure. If you don’t you will scuff and scar your new paint job and will be seriously disappointed.

If you look back at this blog you will see I use to do this kind of thing all the time…I loved it.

I don’t do it much anymore and I forgot how much I love taking an old abused and neglected piece and turning it into something beautiful and useful again!!!


Board and Batten in the breakfast room...

This is a simple project I have wanted to complete from day one.

Board and batten in the breakfast room.

As I have said before, there are TONS of board and batten designs and tutorials on the webisphere. Watch videos, read blogs, search Pinterest…find a design you love and a tutorial that makes the most sense to you.

So here is a little before and after.

Before….

Not totally offensive but lacks a little “character.”

After….

Simple project for me since I have done this a time or two. (Check out the guest bath, the entry in the Lankford house and the Bogey house. )

You might notice another little change…the china hutch.

Originally I had the awesome mid century Drexel buffet but I thought I would change it up a bit. I read somewhere china hutches are making a comeback. I can see why…pretty and functional.

Eventually I would like to add some art on each side of the hutch…maybe some botanicals.

My original plan for this piece was to repair it, paint it and sell it but honestly, I kind of like the look in this room. I FINALLY have a place to display some of my heirloom china that has been boxed up and in storage for a year and a half!

Before…

After….

Next week I will share the steps I took to give this piece a little facelift! Not difficult and as you can see it made a HUGE difference!

Until then….

Accent wall tutorial...

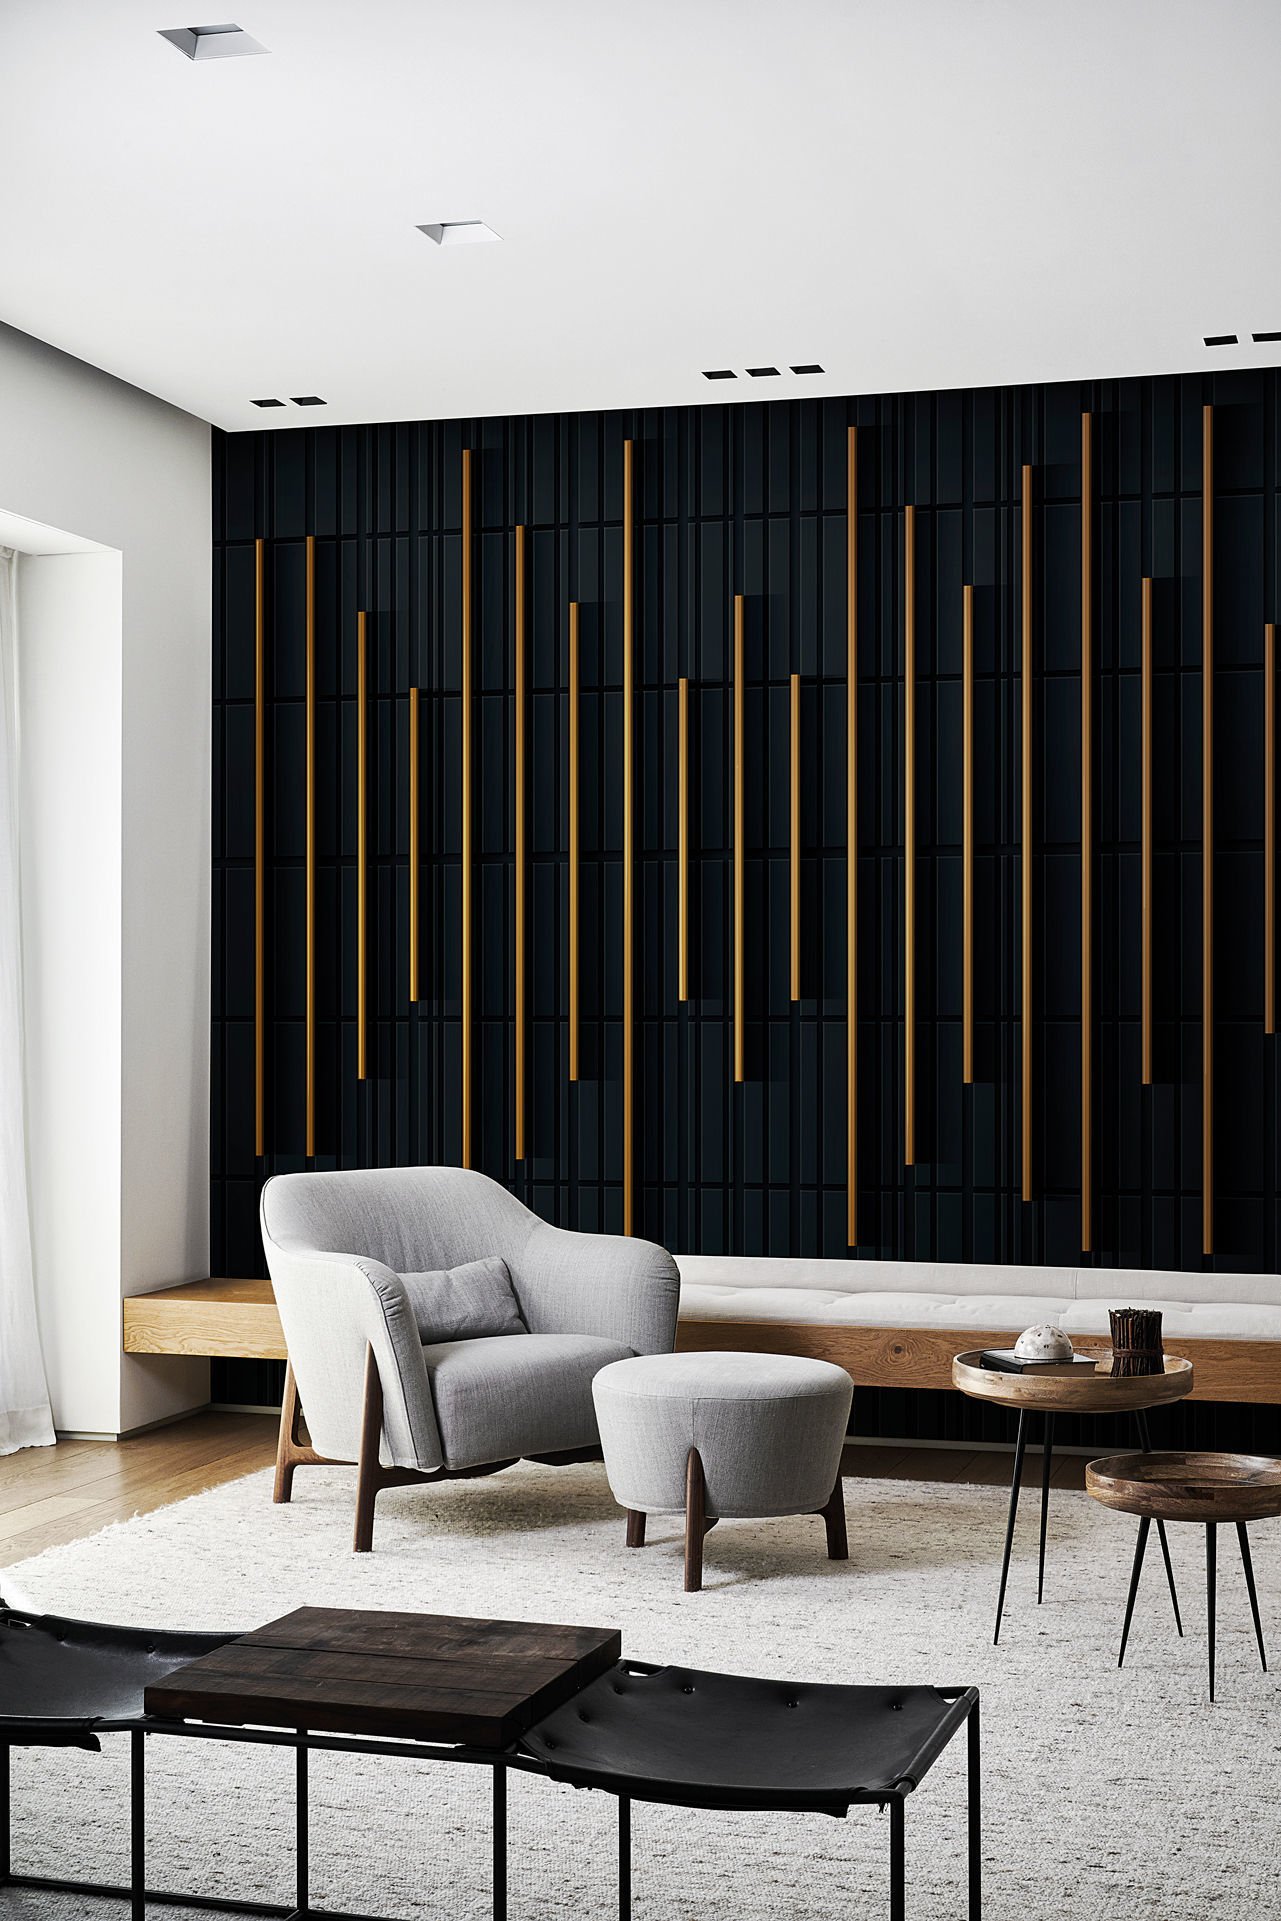
I shared HERE how I found inspiration for the accent wall in my office.

I shared HERE the office after everything was done. (Well, everything for NOW!)

At first glance, the accent wall may seem somewhat intimidating.

This is actually a wallpaper. I like the dark wall with lighter accent stripes. I think it gives the wall “depth” and makes a room look larger.

You could easily replicate this entire look with paint…just paint the wall then paint the stripes.

I kind of did the opposite…light walls, dark stripes. I knew from day one I wanted a pink accent wall and decided to make the stripes out of walnut. My office is a big room with tall ceilings…it can take an accent wall that makes the room APPEAR smaller.

Now if you have followed this blog for any amount of time you know I have a deep love for walnut.

I made my fireplace mantel out of walnut.

My kitchen cabinets are walnut….

I made my living room shelving out of walnut…

And most of my furniture is walnut. If it is any other wood there is a good chance I will paint it if need be…but not walnut!

So, pink wall, walnut stripes.

The first thing I did in this room, after a good purge and reorganization, was paint the walls.

The accent wall was painted pink and the three other walls and trim where painted white (BM Chantilly Lace…closest I can find to a TRUE white without an undertone.)

They were ready to go….

So here is a little tutorial for doing any accent wall.

Print off a picture of your inspiration wall…as large as you can get it on a full size piece of paper. I printed off the picture above.

Measure your wall then draw the wall to scale on a piece of graph paper. For me, this is a must any time I am doing a room makeover. I need to know the scale of the space I am working with and how each element fits in that space…on paper.

Since I wanted the accent stripes to be centered between the ceiling and the top of the baseboards, I measured and graphed from the top of the baseboard to the ceiling. I did NOT measure from floor to ceiling.

Identify and mark your center point on the wall…from there you will work out from center to left and from center to right.

I had to figure out the “scale” of the stripes. I did this by making the assumption that the longest stripe in the inspiration picture (#1) was 4” from the ceiling…just a guess. When I measured that with a ruler on the printed picture, it measured 1/8”…that became my scale…1/8” = 4”. The distance between the stripes measured 1/4” on the picture, so I determined the distance between stripes would be 8” (I actually did 8” on center (OC)…which means I drew my stripes 8” apart then centered the 1” strips of wood on that mark.)

All this information gets transferred to my scaled drawing.

I counted the number of each of the different sized stripes. The inspiration wall had 4 different sized stripes…so I assigned each size a number, 1-4. There were 5 #1s (the longest)….4 #2s…5 #3s…3 #4s (the shortest) that would fit on my wall, spacing 8” OC apart.

By using my 1/8” = 4” scale, I determined that each stripe was 24” shorter than the next (12” from the top, 12” from the bottom).

So #1 is 107” (top of baseboard to ceiling is 115” - 8” (4” from ceiling and 4” from baseboard)…#2 is 83” (107” - 24”)…#3 is 59” (83” - 24”) and #4 is 35”. (59” - 24”)

If #1 is 4” from the ceiling, then #2 would be 16” (4” + 12”) from the ceiling, #3 would be 28” from the ceiling and #4 was 40” from the ceiling.

All this was drawn, to scale, on the graph paper.

Man, this sounds confusing….but it really is not. If you draw it all out on a graph paper to scale, it makes perfect sense…I promise.

Then it was all transferred, in pencil, to the wall.

It is so much easier to erase something that is wrong than it is to tear glued and nailed boards off a wall.

So, now I have the entire plan drawn out on paper, to scale, and I have the measurements of each stripe.

I decided to make my walnut stripes 1” wide. I also decided to give them a “3-D” affect by placing them on 1/2” furring strips. Walnut is a pretty expensive wood so I made the furring strips out of plain ole’ poplar and stained the sides to match the oiled walnut.

Matt and I used his table saw to cut the walnut in 1” strips. We cut the poplar into 1/2” strips.

Using the graph paper with the accent drawn to scale as my guide, I used a pencil and level to mark the wall where each stripe would go. After marking the wall, I attached the furring strips using Gorilla Construction Adhesive and my nail gun. I let that dry overnight since the nails did not hit a stud (impossible!!) so the construction adhesive is what really holds the furring strips to the wall.

While that was drying, I prepped the walnut strips.

After cutting each piece the length needed, I sanded, then applied Waterlox. I LOVE this oil. It is a clear oil. It is my “go-to” wood finish these days. I first used it on my kitchen cabinets a year and a half ago and it has held up beautifully!!!! So I used it on the mantel and shelving. No stain…just 3-4 coats of this stuff will make any wood shine!!!

I applied two coats…steel wool and tack cloth between coats…and then applied a third coat after I had installed the strips on the wall and puttied the nail holes.

I applied the walnut strips directly onto the furring strips. Again, I used the construction adhesive and nails.

MAKE SURE EVERYTHING IS LEVEL AS YOU GO!!!! I made sure each furring strip was perfectly level and then I made sure each walnut strip was level. I worked top to bottom…wood, especially narrow strips, will bend…so make sure each strip stays level all the way down.

After I puttied the nail holes with wood filler mixed with stain to match the oiled walnut, I wiped on one more coat of oil.

After all this is done, go back and do wall paint touch up. You will scuff up the walls with the wood strips and the level.

Beautiful!

Now, this may seem like a really tough project. It really is not. It is like any other DIY project…it all hinges on the “prep.” In this case, laying it all out on paper BEFORE you start buying materials and cutting wood.

Changes I would make? I wanted a “3D affect”…in other words I wanted the walnut strips to “stand out”…which is why I added the solid furring strips. I think if I did this again (which I won’t) I would want to use spacers to make the walnut strips stand out. The only downside to that would be that wood has a tendency to “move”…twist, bend, warp. By attaching the walnut strips to solid furring strips, the walnut will not bend or warp! So maybe the way I did it is best…who knows…I just think I would have liked the look of “floating stripes” better.

Other than that, I am pretty happy with the results.

I have some leftover walnut so I THINK, when it warms up a bit (we got 8'“ of snow last night and it is still snowing), I may make some floating shelves for this wall…

Again, I eventually want to make a few other changes to the room (rug, chair, credenza) but I love this accent wall.

As with all DIY projects, the key to success is the prep and planning.

This week I planned, prepped and prepared for board and batten in the breakfast room….

My plan is to install board and batten at chair rail height and paint it white.

I also finished this nasty china hutch…

I know this looks pretty ratty but I painted it and did a little tweeking on it and it turned out super cute. My plan was to sell it, but I think I will move it into this room and style it first…I may even like it well enough to keep it. We’ll see.

Hopefully next week I will have the breakfast room done and in order and I can share that as well.

Until then….

Hutch makeover reveal....

I shared the china hutch I started HERE.

Not the prettiest piece of furniture I have ever seen but I knew it would be perfect for the space Matt and Hannah have in their dining room…with a little tweeking!

In this post I also shared a few important tips for painting any piece of furniture. Tried and true advice!

First thing I had to do was “find my inspiration.” It doesn’t matter if you are making over an entire room or a piece of furniture…you have to find your inspiration.

In this case I needed to find a similar hutch so naturally I searched Pinterest…I sent several pictures of “french provincial china hutches” to Hannah and she liked this one best (originally posted on 509 Design)…

…beautiful. I love the stained top and the Miss Mustard Seed boxwood green.

The kids did not want doors or dividers on the top so those were removed.

They also decided to paint the entire inside white.

The first thing I did was strip the old finish and stain on the top of the base. Keep in mind that the top and the base where attached pretty tight so I just left them as is and only stripped and finished the part of the top that was showing. I used this process and it literally took me less time to strip and re-stain than it did to tape it all off. I used General Finishes Brown Mahogany stain, then sealed it with poly.

After the the top had dried (a day or two) I taped and papered it well so I could prime the entire piece. I also removed the drawers and taped and papered those so I could just paint the fronts.

Removing the vertical dividers left a gap that had to be repaired…

Pretty simple fix…I just cut a piece of decorative wood from the pieces I had removed and glued and clamped it over the gap…

After primer, I sanded it well, wiped it all down with a tack cloth and then painted…first the inside of the top with satin white. After that dried I taped it off and sprayed the rest of the hutch with Kylon Satin Italian Olive paint….closest green in a spray paint to Miss Mustard Seed’s boxwood. Again, it SAYS it is a “paint and primer” in one but I always prime wood furniture with Bullseye or Kilz.

I mentioned the brass froo-froo hardware in the original post…I honestly didn’t think it would make the cut.

But after some serious scrubbing with Brasso and SOS pads, they shined right up and believe it or not, the kids loved them!

So….here is the final product in place….

The farmhouse table is one I featured HERE. I found the black chairs at the apartments and they just needed a little repair, paint and reupholstery (never featured those), the bench is one I made for Thanksgiving one year, the plaid scarf is like the ones I featured HERE and the candle sticks were used as the stands for their wedding cake! It took YEARS for all this tp come together and now that it has…cute as a bug’s ear!

I know the original brass hardware may be a tad “gaudy” but I love it!

The “gap fix” isn’t exactly perfect, but as my Daddy use to say “You’ll never notice it on a passing train!”

I love how this piece turned out…and it shows what you can do with a pretty, um, not-so-attractive piece of furniture with just a little time and paint…all in all I probably spent less than $20 on supplies!

Hannah and Matt aren’t into all the “knick-knack” and “froo-froo” stuff so I am sure they will style it to their tastes!

China hutch makeover...part 1..and paint tips!

Since I have “semi-retired” from DIY for resale, I have a little more time to take on projects for my family.

As I mentioned here, Matt and Hannah got married last month. This past summer he bought a larger home and went from a 1600 s.f. home to a 2200 s.f. home. When he bought his first home we stocked it with a few nice DIY pieces…this dresser and chest setthis oak trestle tablethis breakfast table.this dresser-turned-entertainment centerthis little vintage chair…and of course all the other pieces we have refurbished and built over the years.

A bigger house means more space and in his case he has a large dining area that has nothing but the trestle table…so it feels pretty empty.

This past week I found this “could be awesome” french provincial style china hutch on Facebook marketplace.

I can’t wait to shine up these solid brass pulls…even though I know they probably won’t make the cut!

They really need a “tall” piece in their dining room so I think with a few modifications this one would be perfect.

Of course the froo-froo doors HAD to go…when I sent a picture of the piece minus the doors and hardware, Matt messaged and wanted to know if “the pole things” could come off!

Yes they can…

…which of course means finding a way to “fix” the gap…oh well! Minor issue.

So the question then becomes….solid paint or chalk paint with distressing.

The reason this decision is important is because if you intend to paint the piece with latex or oil-based paint, you HAVE to prime it. If you are going to chalk paint and distress the piece you don’t have to prime.
It is a personal preference and one I left up to Matt and Hannah.

For chalk paint, I usually mix up a batch of homemade using flat latex paint and Plaster of Paris. The recipe I find works best for me is 5 tablespoons of Plaster of Paris, 3 tablespoons of water, mixed well then add 2 cups of flat paint…any color, any brand. I have also used a few different brands of chalk paint and found all of them to be acceptable. I use 220 grit sand paper to HAND SAND after the paint dries well and then I seal the paint with a flat clear coat. I never wax…personal preference.

Here are some paint tips I posted a few years ago for painting with latex or oil based paint. The first two tips apply to chalk paint as well!

1) Always clean the piece of any dirt or debris. Just wipe it down with a damp cloth and make sure you get all the "ick" off! If the piece is super grungy, you might want to clean it with ammonia or wipe it down with mineral spirits! If it has a lot of flaking paint or old finish, you can sand it down a bit or better yet, strip it using this process...just make sure the existing paint or finish is stable!

2) Make repairs. DO NOT waste your time making it pretty if it needs repairs. And remember, glue and clamps are your friend!!!! If you don't know how to repair something, google it or email me. MOST furniture repairs aren't that difficult...but if you do it wrong (or not at all) you will be wasting your time making it pretty! 

3) Primer....always a must if you are going to paint with spray paint or latex or oil paint. If you want your paint to stick and not chip or peel, prime. For smaller projects I use spray primer. For larger projects I roll on primer with a 4" foam roller. Even if your paint says "all in one paint and primer"...use primer.

4) Sand smooth after the primer has thoroughly dried. A 220 grit paper should do the trick...FEEL the surface...if you can feel it, the paint won't hide it. 

5) Use tack cloth. Most tutorials will tell you to wipe the piece with a damp cloth. That won't cut it! Tack cloth will pick up the finest grains of dust and debris you can't see until you paint the piece! Use it before you paint and between each coat!

6) If you are going to brush on latex or oil, use a quality brush AND TAKE CARE OF IT! I have brushes I have owned for years because I am religious about cleaning them thoroughly after use. And don't even think about using those cheap disposable brushes (chip brushes). They are great for many things, but not for getting a smooth paint finish on furniture!!!! 

7) ALWAYS use an additive....Floetrol for latex, Penetrol for oil based paints. 

8) Use quality paint. Especially spray paint. I know it is cheaper at discount stores but pay the extra few dollars and buy a quality spray paint at your home improvement store. Cheaper will NOT be better if it doesn't hold up to wear and tear!

9) I do 2-3 light coats (spray or brush) rather than trying to get solid coverage with one coat...trust me when I say, there is NO paint on earth that will get good coverage with just one coat!

10) Cure time is important. Seriously, I know they style their pieces on those HGTV shows within hours of painting a piece of furniture. Just don't! Just because the paint feels dry to the touch DOES NOT mean it has cured. Latex...a few days...oil...a week. Give your paint time to cure or it is going to peel or chip if you try to use it right away! Put the piece in place and chill!

11) Spray vs. Brush/roller. For me, it all depends. I have learned that large flat areas are tough to get an even coat of paint on with spray paint...and of course there is the expense factor for large pieces. A dresser can take 2-3 cans of spray paint. So it really depends of the piece. Sometimes I will spray the drawer fronts of a dresser and roll the top and sides. 

12) Keep a little spare paint for chips and dings...if you use latex or oil, just put a few tablespoons in a little container and stick it in the back of the drawer...just in case! If you are using spray paint, keep a can with a little paint. Manufacturer's change paint colors and you might not be able to find that awesome color in the future. Keep spare paint in the house...not the garage or storage shed!

If you follow these simple guidelines, you can update a dated piece with just a little time and effort. 

Now, back to the china hutch…at this point it is on hold…we are in a deep freeze here and there is really nothing more I can do. I did strip the top and shelves because Matt wants those stained. But it is too cold to prime or paint so I will patiently wait…not something I do well…lol! But I have learned that temperature matters so I will not rush this project!

Hopefully the weather will cooperate this week and I can share the finished project next week!

Until then….