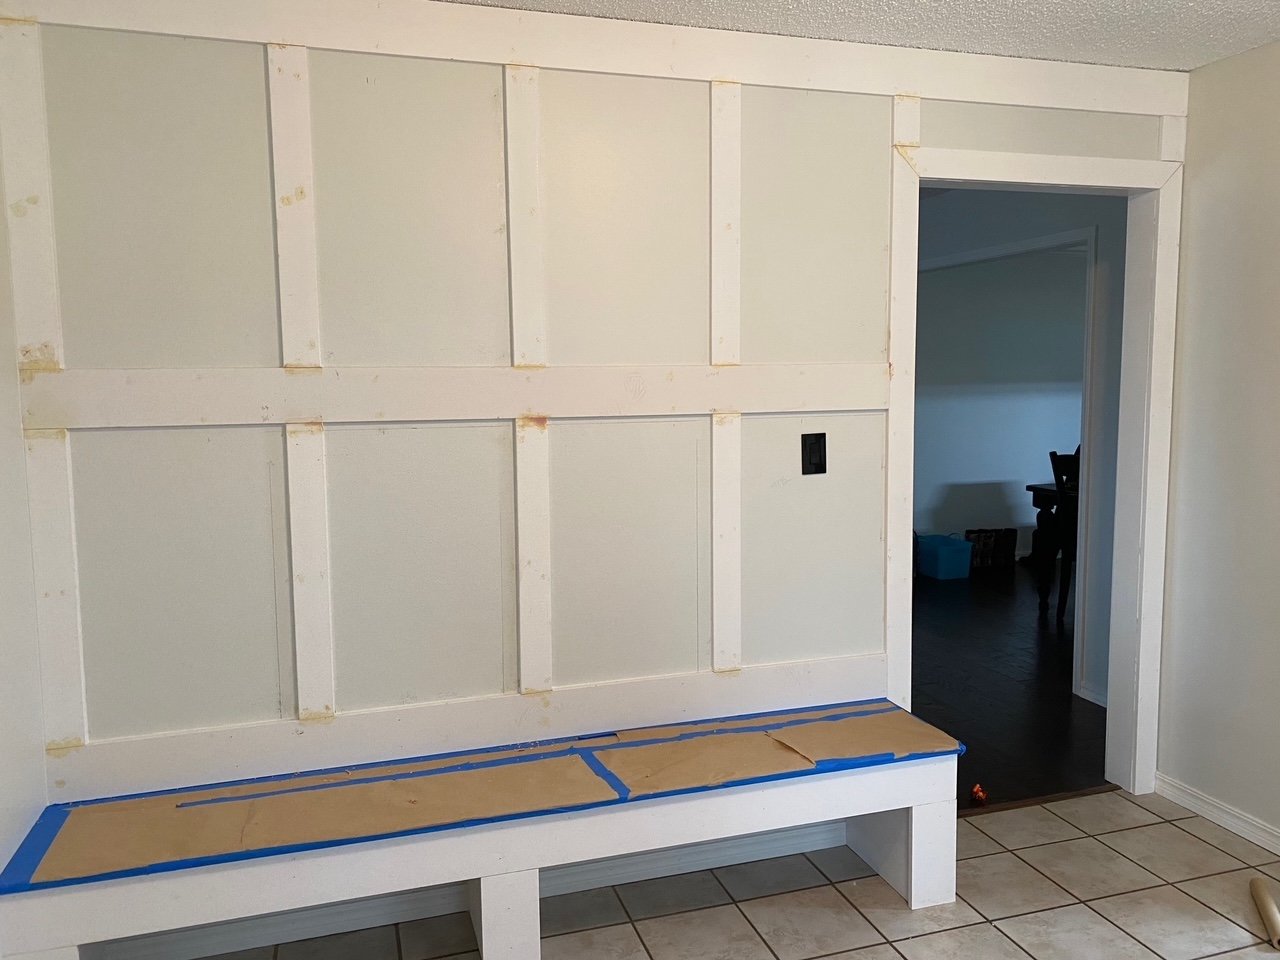
"Mud room" bench....

This is a project you see a lot on Pinterest and it is a super simple and functional use of normally wasted space.

Case in point…my daughter-in-law’s sister’s (Laura) house….

This room is next to her kitchen…designed to be the “breakfast room” space but is really used as a thoroughfare from the garage into the house and has become a general “drop zone catch all. “ With two small kiddos, it could be the perfect “craft room” and drop zone but as you can see there was no form or functionality to the space.

So she sent me this “inspiration” photo.

A functional and organized space for shoes, backpacks, coats, etc.

Heck, I can build that!

She likes the board and batten look of my entry more than the “panelling” look in her inspiration photo. No biggy. Remember what I have said before…the key to any project is first, your inspiration…..second, your plan and third, the execution.

So we had the inspiration…just a few tweeks and we had a plan…

Now it was time to execute!

I have said before I am not a “how to” kinda person…I am a “YOU CAN DO IT” kinda person. So find a tutorial for installing board and batten and building a bench that makes sense to you and works for your space.

First up…the bench. I had to off center the middle support because of an outlet but it was pretty basic stuff…2x4s, construction mastic and wood screws. Again, find a tutorial that makes sense to you! (Even I look at tutorials sometimes and say WTH!)

I build the legs of the bench out of 2x4s then clad them with plywood. Simple.

I used 1x6 pre-primed pine to trim out the front of the bench. MDF will “swell” if it gets wet so you can use it on wall treatments but I highly recommend using a solid wood product on anything adjacent to the floor.

I always use pre-primed or prime and sand before I install to avoid having to prime and sand inside the house!

I used 3 1x6 lengths of oak for the bench top. You can also use pine…MUCH cheaper but Laura liked the look of the oak. I used a rooter on the edges, just a hair, so when I joined them together they look more “plankish” than solid.

I built the bench top, using a biscuit joiner, in the garage… no stain just 3 coats of polycrylic, and then installed it before I moved on to the wall treatment.

For the board and batten wall treatment I used preprimed MDF.

I usually install the horizontal pieces first…making sure they are perfectly level. Then I go back and add the vertical boards. Putty all the nail holes and seams and make sure you caulk EVERY joint and crack…sand it all super smooth.

REMEMBER if you can feel it you are going to see it after paint…so sand and feel with your hands! Sometimes it can take 2-3 coats of joint filler to get good coverage.

We covered the wood bench top and painted with a brush and roller…three coats!

GORG!!!!

We added cute little hooks Laura picked out!

I was still loading tools and the littlest (3 y.o.) was already claiming all the hooks for his back pack and Hulk costume and mask! Probably should have added more hooks…lol!

Props to Laura…I really believe the vision and inspiration are the most important keys to any successful DIY project.

She did good and I have no doubt this little area will now serve her family well!

Comment
Share

Dining room wainscoting...

I keep thinking I have no more “major” projects to complete around this house…but inevitably I find something I want to do.

The dining room…a tad formalish but we actually use the room more than I thought we would for casual dining.

Like much of this house it has evolved over the last few years….the first Christmas featuring our new tablecurtainsthe new buffet….all relatively minor.

When we first bought the house the formal dining room was pretty blah…

Right off the entry…first thing you see when you enter the house.

This is the Christmas decor…LOVE! I love decorating this space for holidays and seasons!

As I have shared before, I replaced the arched transoms with rectangular ones, removed all the crown above the doors and windows and changed the light fixtures…all in an attempt to “detraditionalize” the space. It had chair rail and it was obvious it had wallpaper below the chair rail at one time. Before we painted, I had the painter repair some damage from where the wallpaper had been removed and add texture. Then we painted.

For months I have wanted to add wainscoting or SOMETHING to jazz up the space a tad. The only problem I have is that most of the wainscoting inspiration I can find is either really traditional/formal or casual “farmhousey” (like board and batten.) While I have made some changes to detraditionalize the entire space, I don’t want to go super casual. So not formal but not casual.

Don’t get me wrong…I like board and batten wainscoting.

I added it in the breakfast room

….and entry

…and I love it.

But it just seems a tad too “casual” for a formal dining space.

So…what to do, what to do.

I did what I always do when I am looking for inspiration…cruised Pinterest and the blogisphere.

There are a few issues with this room that will influence what I can do. First, the walls do not go all the way to the ceiling…so in my opinion, I need to keep the wall color above the existing chair rail.

Second, the existing chair rail. I really don’t want to remove it because then I have to do a bunch of sheetrock repair and truthfully, I think I can incorporate it into any design I pick…at least the height of it incase I find another trim i like better.

I know I don’t want to do any picture molding above the existing chair rail…kind of formalish.

I realize I have elements in this room that make it more “formal.” But I want to tone it down a bit.

So far my favorite look is this….

Timisha has a great tutorial HERE for this look.

Easy, relatively inexpensive…kinda formal but not so much that you feel like you have to set out the fine china.

Perfect.

Hopefully next week I can share the finished project!!!

Board and Batten in the breakfast room...

This is a simple project I have wanted to complete from day one.

Board and batten in the breakfast room.

As I have said before, there are TONS of board and batten designs and tutorials on the webisphere. Watch videos, read blogs, search Pinterest…find a design you love and a tutorial that makes the most sense to you.

So here is a little before and after.

Before….

Not totally offensive but lacks a little “character.”

After….

Simple project for me since I have done this a time or two. (Check out the guest bath, the entry in the Lankford house and the Bogey house. )

You might notice another little change…the china hutch.

Originally I had the awesome mid century Drexel buffet but I thought I would change it up a bit. I read somewhere china hutches are making a comeback. I can see why…pretty and functional.

Eventually I would like to add some art on each side of the hutch…maybe some botanicals.

My original plan for this piece was to repair it, paint it and sell it but honestly, I kind of like the look in this room. I FINALLY have a place to display some of my heirloom china that has been boxed up and in storage for a year and a half!

Before…

After….

Next week I will share the steps I took to give this piece a little facelift! Not difficult and as you can see it made a HUGE difference!

Until then….

Accent wall tutorial...

I shared HERE how I found inspiration for the accent wall in my office.

I shared HERE the office after everything was done. (Well, everything for NOW!)

At first glance, the accent wall may seem somewhat intimidating.

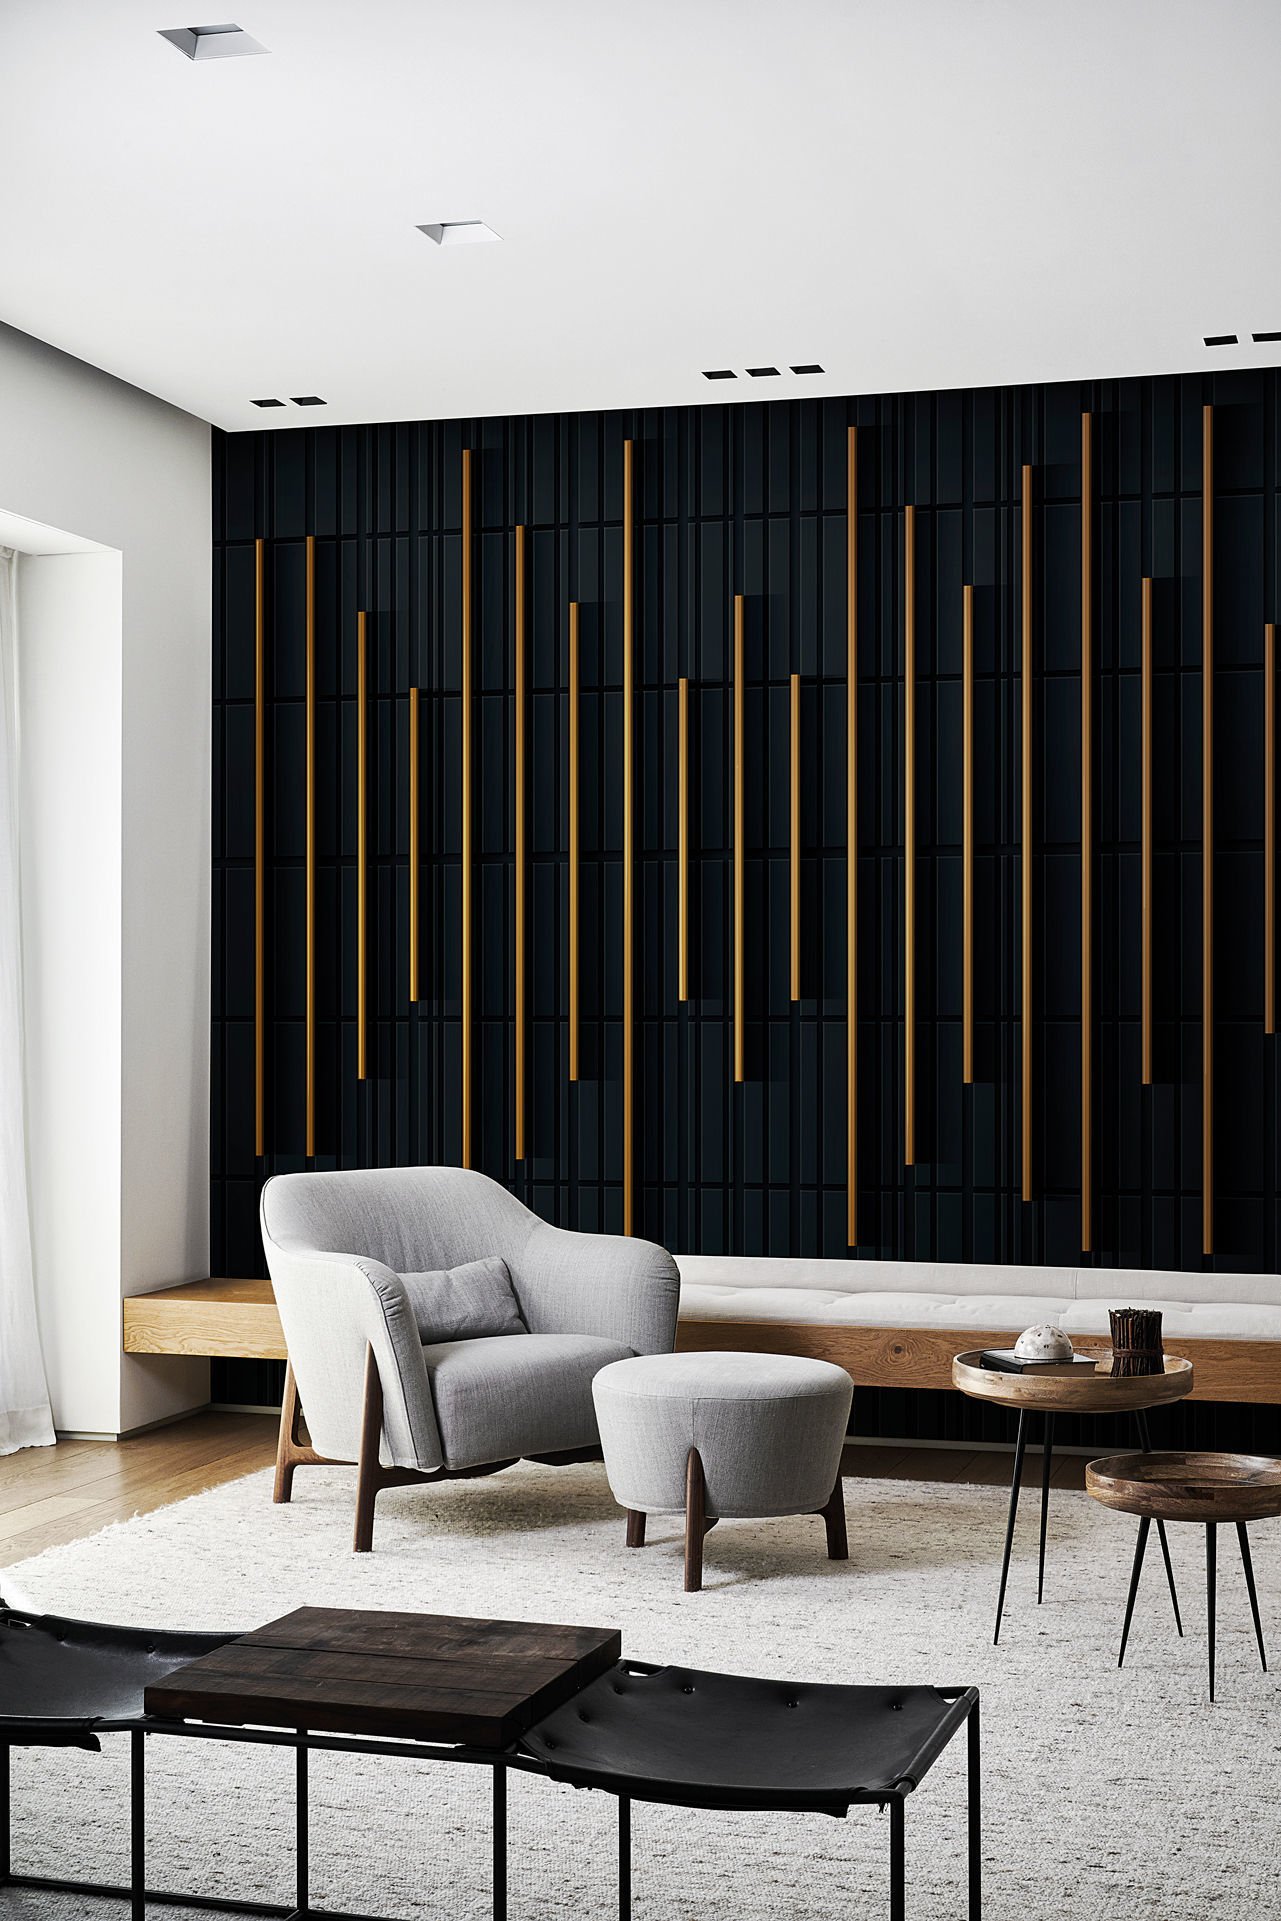
This is actually a wallpaper. I like the dark wall with lighter accent stripes. I think it gives the wall “depth” and makes a room look larger.

You could easily replicate this entire look with paint…just paint the wall then paint the stripes.

I kind of did the opposite…light walls, dark stripes. I knew from day one I wanted a pink accent wall and decided to make the stripes out of walnut. My office is a big room with tall ceilings…it can take an accent wall that makes the room APPEAR smaller.

Now if you have followed this blog for any amount of time you know I have a deep love for walnut.

I made my fireplace mantel out of walnut.

My kitchen cabinets are walnut….

I made my living room shelving out of walnut…

And most of my furniture is walnut. If it is any other wood there is a good chance I will paint it if need be…but not walnut!

So, pink wall, walnut stripes.

The first thing I did in this room, after a good purge and reorganization, was paint the walls.

The accent wall was painted pink and the three other walls and trim where painted white (BM Chantilly Lace…closest I can find to a TRUE white without an undertone.)

They were ready to go….

So here is a little tutorial for doing any accent wall.

Print off a picture of your inspiration wall…as large as you can get it on a full size piece of paper. I printed off the picture above.

Measure your wall then draw the wall to scale on a piece of graph paper. For me, this is a must any time I am doing a room makeover. I need to know the scale of the space I am working with and how each element fits in that space…on paper.

Since I wanted the accent stripes to be centered between the ceiling and the top of the baseboards, I measured and graphed from the top of the baseboard to the ceiling. I did NOT measure from floor to ceiling.

Identify and mark your center point on the wall…from there you will work out from center to left and from center to right.

I had to figure out the “scale” of the stripes. I did this by making the assumption that the longest stripe in the inspiration picture (#1) was 4” from the ceiling…just a guess. When I measured that with a ruler on the printed picture, it measured 1/8”…that became my scale…1/8” = 4”. The distance between the stripes measured 1/4” on the picture, so I determined the distance between stripes would be 8” (I actually did 8” on center (OC)…which means I drew my stripes 8” apart then centered the 1” strips of wood on that mark.)

All this information gets transferred to my scaled drawing.

I counted the number of each of the different sized stripes. The inspiration wall had 4 different sized stripes…so I assigned each size a number, 1-4. There were 5 #1s (the longest)….4 #2s…5 #3s…3 #4s (the shortest) that would fit on my wall, spacing 8” OC apart.

By using my 1/8” = 4” scale, I determined that each stripe was 24” shorter than the next (12” from the top, 12” from the bottom).

So #1 is 107” (top of baseboard to ceiling is 115” - 8” (4” from ceiling and 4” from baseboard)…#2 is 83” (107” - 24”)…#3 is 59” (83” - 24”) and #4 is 35”. (59” - 24”)

If #1 is 4” from the ceiling, then #2 would be 16” (4” + 12”) from the ceiling, #3 would be 28” from the ceiling and #4 was 40” from the ceiling.

All this was drawn, to scale, on the graph paper.

Man, this sounds confusing….but it really is not. If you draw it all out on a graph paper to scale, it makes perfect sense…I promise.

Then it was all transferred, in pencil, to the wall.

It is so much easier to erase something that is wrong than it is to tear glued and nailed boards off a wall.

So, now I have the entire plan drawn out on paper, to scale, and I have the measurements of each stripe.

I decided to make my walnut stripes 1” wide. I also decided to give them a “3-D” affect by placing them on 1/2” furring strips. Walnut is a pretty expensive wood so I made the furring strips out of plain ole’ poplar and stained the sides to match the oiled walnut.

Matt and I used his table saw to cut the walnut in 1” strips. We cut the poplar into 1/2” strips.

Using the graph paper with the accent drawn to scale as my guide, I used a pencil and level to mark the wall where each stripe would go. After marking the wall, I attached the furring strips using Gorilla Construction Adhesive and my nail gun. I let that dry overnight since the nails did not hit a stud (impossible!!) so the construction adhesive is what really holds the furring strips to the wall.

While that was drying, I prepped the walnut strips.

After cutting each piece the length needed, I sanded, then applied Waterlox. I LOVE this oil. It is a clear oil. It is my “go-to” wood finish these days. I first used it on my kitchen cabinets a year and a half ago and it has held up beautifully!!!! So I used it on the mantel and shelving. No stain…just 3-4 coats of this stuff will make any wood shine!!!

I applied two coats…steel wool and tack cloth between coats…and then applied a third coat after I had installed the strips on the wall and puttied the nail holes.

I applied the walnut strips directly onto the furring strips. Again, I used the construction adhesive and nails.

MAKE SURE EVERYTHING IS LEVEL AS YOU GO!!!! I made sure each furring strip was perfectly level and then I made sure each walnut strip was level. I worked top to bottom…wood, especially narrow strips, will bend…so make sure each strip stays level all the way down.

After I puttied the nail holes with wood filler mixed with stain to match the oiled walnut, I wiped on one more coat of oil.

After all this is done, go back and do wall paint touch up. You will scuff up the walls with the wood strips and the level.

Beautiful!

Now, this may seem like a really tough project. It really is not. It is like any other DIY project…it all hinges on the “prep.” In this case, laying it all out on paper BEFORE you start buying materials and cutting wood.

Changes I would make? I wanted a “3D affect”…in other words I wanted the walnut strips to “stand out”…which is why I added the solid furring strips. I think if I did this again (which I won’t) I would want to use spacers to make the walnut strips stand out. The only downside to that would be that wood has a tendency to “move”…twist, bend, warp. By attaching the walnut strips to solid furring strips, the walnut will not bend or warp! So maybe the way I did it is best…who knows…I just think I would have liked the look of “floating stripes” better.

Other than that, I am pretty happy with the results.

I have some leftover walnut so I THINK, when it warms up a bit (we got 8'“ of snow last night and it is still snowing), I may make some floating shelves for this wall…

Again, I eventually want to make a few other changes to the room (rug, chair, credenza) but I love this accent wall.

As with all DIY projects, the key to success is the prep and planning.

This week I planned, prepped and prepared for board and batten in the breakfast room….

My plan is to install board and batten at chair rail height and paint it white.

I also finished this nasty china hutch…

I know this looks pretty ratty but I painted it and did a little tweeking on it and it turned out super cute. My plan was to sell it, but I think I will move it into this room and style it first…I may even like it well enough to keep it. We’ll see.

Hopefully next week I will have the breakfast room done and in order and I can share that as well.

Until then….

Board and Batten Entry....

IMG_1171.JPG

The entry…the one place in your home EVERY guest will see. They may not see your awesome pantry…or even your darling guest bath or amazing kitchen, but when you open the door they will see your entry.

It is one reason I really stressed about what to do with this space. I wanted it to be warm and welcoming, and while it is a big space, there is very little “wall space” to allow for big credenzas or entry storage. I really don’t need either since we usually enter from the garage into the laundry room…great “drop zone” for our packages, coats, purses, shoes, etc….but I like the look of both in entry spaces!

Of course the first course of business was replacing the dated door, window and light fixture….relatively easy fixes and something I did before we moved in!

IMG_6549.jpg
This was after the window was replaced but before the door, light fixture and flooring!

This was after the window was replaced but before the door, light fixture and flooring!

I debated on the board and batten for some time…

IMG_0580.jpg

I just felt it needed a little “something.”

It only took me 16 years to get the entry in my last house the way I wanted it…I feel like I am moving at warp speed on this one…lol!

At one point I tried a larger rug…but I didn’t like it…I honestly like the little dinky rug that is probably too small for the space. This is a prime example of doing what I LOVE vs. doing what the “design experts” tell me I am suppose to do.

A hint of trouble came when winter hit and we needed a place for visitors coats…other than putting them in the closet in the office, there really was no place to hang them.

Coat racks are a bit out dated and just hanging a wall mount coat rack didn’t trip my trigger.

Board and batten allowed me to put a few hooks on the wall.

IMG_1172.jpg


But that led to a little problem with the table. I LOVED the little walnut table, but you can’t hang coats above a table.

IMG_1084.JPG

Again, it is NOT my style HOWEVER it was my grandparent’s and it is walnut…heirloom and walnut…my two favorite elements.

Truthfully I like the look of an entry table…but I really need the hanging space so I went looking for a simple bench.

And I found it….

IMG_1172.JPG

I LOVE this bench I found on Etsy. Not the least expensive bench out there (and I paid a tad more for walnut) but the quality and craftsmanship made it worth the investment.

Since the table is a family heirloom I didn’t want to get rid of it. The little wickerish bedside table in the guest room had no sentimental value so it got hauled to the bunk room and the table is now a bedside table in the guest room…perfect!

I love the look and feel of this entry now…warm, inviting, functional.

IMG_1173.JPG

I am currently playing around with the dining room table.

When it was set the other way, facing the living room….

….there was no room on the only large wall for a buffet or credenza.

So I have turned the table the “other” way, which gives me room for a buffet or credenza along the wall…

IMG_1176.JPG

But I am not sure I like it “that way.” So it will sit while I ponder.

That is just how I roll…sometimes I have to sit and ponder, like whether to put up board and batten or whether I should turn my table a different way. Sometimes I know almost immediately I am not going to like it. Prime example, the “river rock” I put in a flower bed for drainage. I knew immediately I did not like the white rock I put down originally!

So out came the white rock and I found some that I liked better…

IMG_1174.JPG

Sometimes it is okay to sit and “ponder.” I have learned that the more I really think about something, the more I tend to like it long term. When I just jump right in and start on a project without really visualizing it, living with it in my mind for a while, I tend to not like it as well. And that is a waste of time, energy and money!

Until next time….

Another new living room rug and my thoughts on board and batten...

Over the years I have been able to remove all the wall-to-wall carpeting and install hardwoods. I learned the hard way (after raising 4 kids and several puppies) that I never want to spend a lot of money on area rugs.

Unfortunately they are a necessity on hardwood and tile. What isn’t a necessity is spending A LOT of money on something that gets tons of wear and tear and may go out of style on a whim. So several years ago I started experimenting with indoor/outdoor rugs…and honestly., I have found that I get serious bang for the buck!

It started with this rug…

….an indoor/outdoor rug I picked up at a big box store for less than $100. I just needed something simple to pull the room together. Since this room only gets used a few times a year, I wasn’t too terribly concerned with having “super comfy” under foot!

I was so impressed with the quality and look of the rug I decided to give the “indoor/outdoor” thing a shot in the den! Let’s be honest…the den is really just a big romper room for the dogs! One reason we don’t even have a coffee table in the room!

I picked up this indoor/outdoor rug at my favorite home improvement store!

Not super comfy but it is neutral and has held up well. If I want “comfy underfoot” I wear my Ugg slippers.

I spent a little more and went a little more “fancy” on the dining room

…this rug doesn’t get a lot of wear and tear so I was okay spending a tad more. Still love this rug!

When it was time to change out the rug in the living room I found a really pretty and simple indoor/outdoor rug at a local home decor store.

I knew the minute I unrolled it I had a problem.

It was stiff and not at all pliable. It had some serious “crease marks” from being rolled up and the edges curled up. I went ahead and put it down and hoped and prayed the creases and rolled edges would eventually go away.

Nope.

Honestly, I think they got worse and I’m lucky I didn’t break a dang hip on the thing.

I tried steaming the edges and curling them the opposite way…nothing worked.

The rug just plain sucks.

If a rug looks like crud when you lay it out, good chance it isn’t going to get much better. I should have rolled it up and taken it back but noooooo….I just crossed my fingers and hoped it would get better.

So now that the holidays have passed and everything is back in order I decided it was time to find a new rug that wasn’t a tripping hazard.

Again, I just wanted something inexpensive that would pull the space together. We have moved the big (ick) brown leather couch back into the living room so I really wanted something relatively neutral. (Why do I still have the big (ick) brown leather couch…because it is Brian’s and he spent a ton of money on it so I can’t bring myself to get a different one)

I try to keep the furniture and rugs in this room relatively neutral so I can add splashes of color with pillows and throws…right now I am enjoying a “pink phase.”

Two major changes coming in this space…first, I have FINALLY ordered new windows for the front…the old ones are the 20 year old original aluminum windows that are terrible…can’t hardly open them and they leak some serious air! And as you can see they dominate this space!!

I would love to change the 1990s arched window to a simple transom but unfortunately I can’t get my brick anymore and changing out the shape of the window would require additional brick…curses!

Regardless, the window seal has broken in the arch window and there is condensation between the panes…nothing you can do about it but replace the window.

I COULD just buy a new window insert but since I am replacing the bottom aluminum window with vinyl I decided to change out the arch window as well.

I changed things up a bit on the style and design and I can’t wait to share! Hopefully those will be here in the next week or so and we will have a decent day to install them!

The second change is the entry. I shared it here….

I’m looking at the date of the original post…3 1/2 years ago….and sadly, little has changed.

But last fall I bought a nifty antique mirror at a local market…at Christmas I put a wreath on it, and honestly, I kinda like the look. So when I took Christmas down, I hot glued a hook onto the mirror and hung an olive branch wreath on it…

Hum…kinda like that look too.

So it looked funny to have a mirror on that side of the entry AND still have the blue “moroccanish” mirror behind the door, so I took that mirror down and gave it to my daughter!

So now I have a blank wall.

So change is coming…maybe…I think…some day. It only took me 3 1/2 years to get this far so what’s a few more years.

Truthfully I am kicking around the idea of extending the board and batten to this wall…from the door to the stairs. And then maybe put some little hooks on it to hang purses and such. I can’t do anything too bulky because the door swings into that wall.

My ONLY issue with board and batten is that I know it will go out of style in the coming years…and while I have the energy and time to install it today….what if I don’t have the time, energy or money to remove it in 5-7-10 years?

I know, I know….”Board and batten is timeless…it will never go out of style.”

Bull…hardwoods are timeless…but yet 40 years ago people covered them with wall to wall carpet. Subway tile is timeless…yet decades ago people ripped it out and put up olive green and harvest gold 4x4 tile.

My point, just because something was popular 100 years ago and came back around, doesn’t mean it is “timeless.” Trust me, something different will come back around and all those painted white cabinets and rooms full of board and batten will be the bane of our existence.

I’m not saying you should live with a dated carpet, tile or wall treatment if it makes you crazy. I’m just saying think carefully and spend wisely when “updating” your home decor!

And if you are like me and procrastinate long enough, you may miss the current bandwagon…but trust me, another will come along!

The upside is I save myself a lot of work AND money by being somewhat indecisive…lol!

UPDATE!!! I WROTE THIS POST WHILE I WAS ALL COMFY IN BED. I got up, put on my grubby paint clothes and had time on my hands.

Something is going down!!!!

Or rather UP!

Yep, board and batten in the entry!

And you know what, I’m kinda glad I did it. It only took about 2 hours to install it and another hour or so to paint it.

There are dozens of tutorials for installing board and batten…much better than anything I can do.

If you want it, JUST DO IT!!!!

And yes…I still believe it will go “out of style” in a few years but whatevs.

See, even I don’t take my own advise…so “grain of salt” people…lol!

Just another week in paradise....

Me: I lost my truck key but I have the VIN number and need a new one cut.

Dealer Dude: Okay, the key is $177.

Me: I expected it to be pretty pricey.

Dealer Dude: After we cut the key you will have to bring the truck in so we can program it.

Me: Will the key start the truck?

Dealer Dude: No

Me: Then how do I get the truck here to program the key?

Dealer Dude: You will have to have it towed in.

Me: So I have pay to have it TOWED? 

Dealer Dude: Yes, and there will be a $60 charge to program it.

Me: So I have to pay $177 for the key, the cost to tow the truck AND $60 to program it.

Dealer Dude: Yes

Me: (Not something I want to admit saying on my blog.)

Suffice it to say, I had no transportation Wednesday and sat around waiting on Waste Management to call me back to see if MAYBE I inadvertently dropped my keys in the recycle bin that was picked up first thing in the morning. I finally conceded and called a guy to come to my home and cut a new key. Fortunately, I decided to take one more walk around the yard. And there they were...on the brick ledge right where I had laid them. A day of frustration !

I would also like to add that while I have always prided myself in keeping a clean house, I pray no one ever looks under the furniture. N.A.S.T.Y!

My life.

On the upside, I made good progress on my entry. And just for the sake of healing time, I am grateful the travertine tile and new stair treads will not be in until next week! 

Sheetrock repair is done and all the paint is done. The switches may have to wait until Thanksgiving when my SIL comes...makes my brain hurt just looking at all those wires!

I am still debating whether I will just put down new trim or if I want to go all out and add wainscoting or board and batten. I can't decided and since it is the last thing to be done, I think I will wait until the new flooring is down and the stairway is reconstructed before I decide on trim and lighting.

I have finished several pieces lately, and even managed to remember to take a few before AND after pictures...so I will share those in the next few weeks. Until then, I am going to enjoy a weekend with ALL my babies....Sarah is coming in for her birthday and Mitchell is headed home for a short visit! 

Comment
Share