Another Christmas....

Ever year I feature my Christmas decor…every year I think not much has changed.

But it does change…a tad here and there.

Last year I shared a few little changes…same this year…a few things here and there.

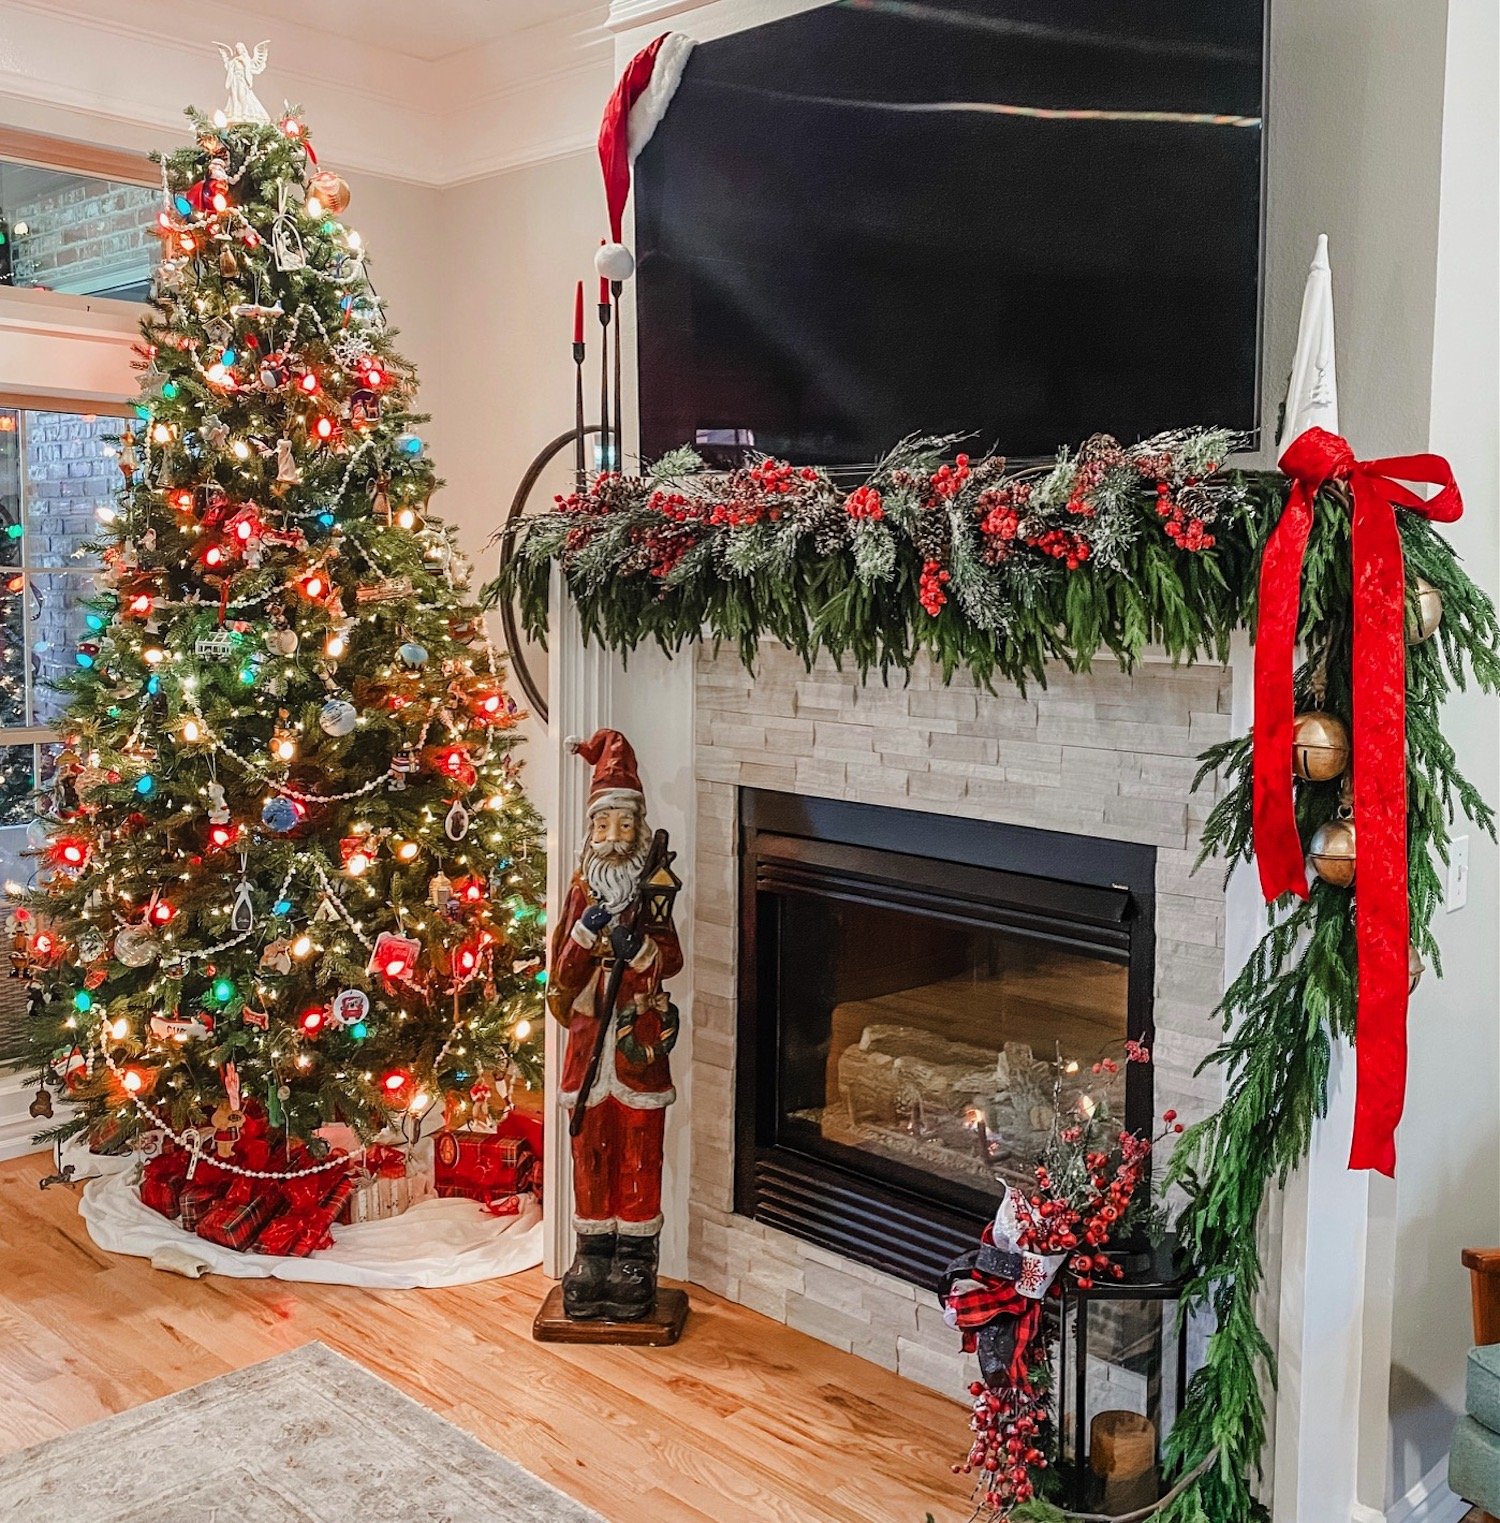
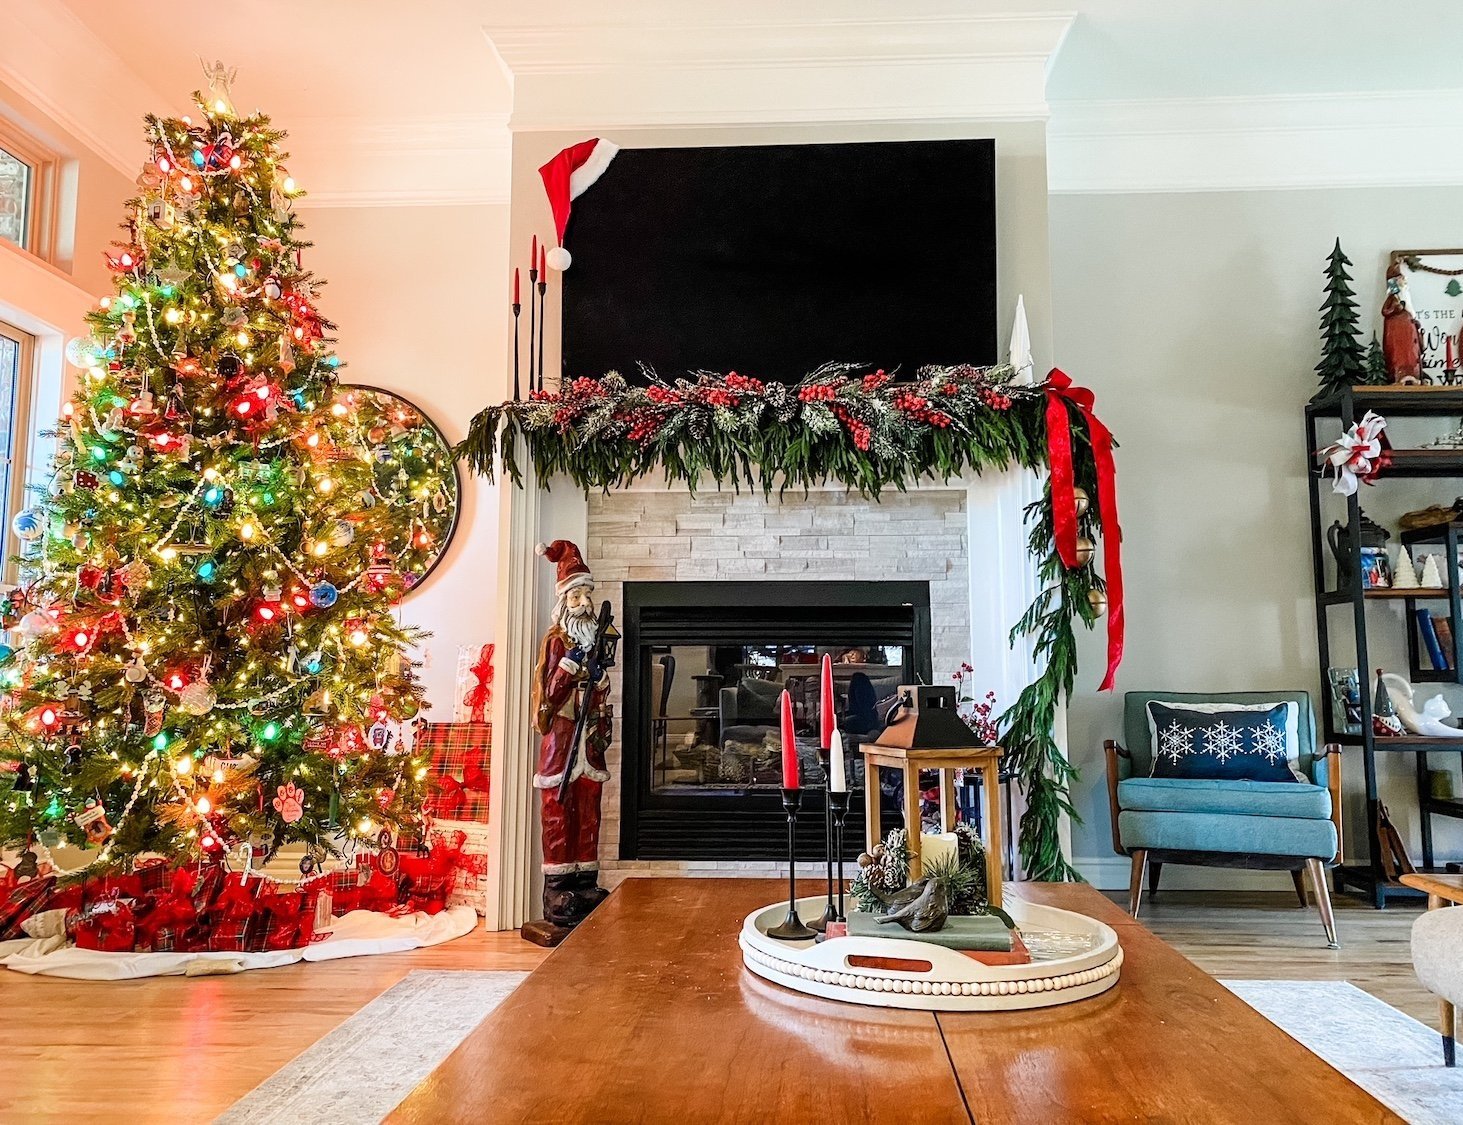
So what did I change this year? Probably the biggest change is the mantel decor….

Last year THIS soft touch garland was ALL the rage…everyone wanted it. Which is why it was sold out and on Ebay for mega bucks. So I waited until after Christmas and bought it when it was back in stock. Problem was, I forgot I bought it, several times, and by the time I brought down all my Christmas decor I had 10 strands of it along with three soft touch wreaths I have NO idea what to do with!

No biggy…while it is a beautiful garland, you really have to layer it to get a good thickness. On my living room mantel I have 4 5’ strands and 1 15’ strand.

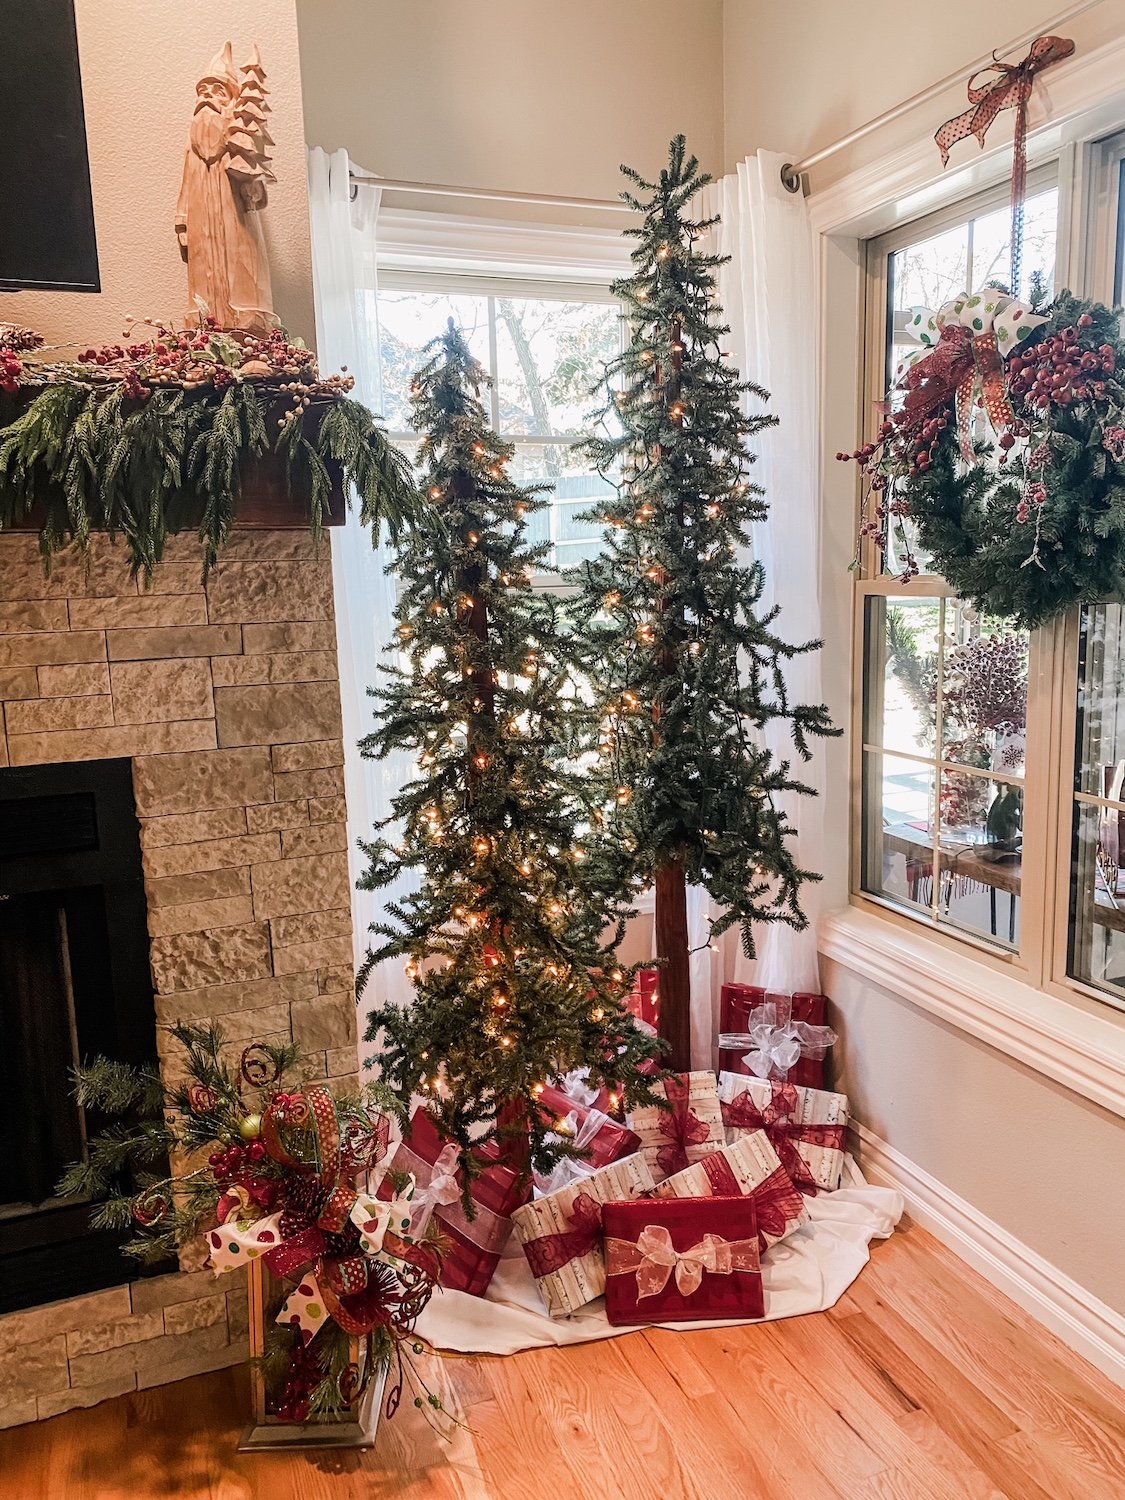
In the den I layered 5 5’ strands….

I used Command hooks about every 1-1 1'/2’ and floral wire to secure it.

I added a red velvet ribbon and these awesome bells….

I would love to link to the bells but as usual I have NO idea where I got them. I know I ordered them but from where? Not a clue!

Last year I layered the berry picks on the mantel…this year I layered them on top of the garland…just plain ole’ picks you can get at Hobby Lobby…four on each mantel.

Another new addition is this wood Santa….

I know WHO influenced me to buy it but have no idea WHERE he came from. I follow a couple of great ladies on Instagram…Deb and Danelle…and as influencers go they get me every time. Their style isn’t necessarily my style but they feature elements I love. Truthfully I think that is where the bell inspiration came from!

What drew me to this Santa was his “girth.” He’a skinny.

Okay, so here is the deal…ALL my Santas are skinny. I have NO idea what that is all about but it seems like every time I am drawn to a Santa he is on the anorexic side.

I kid you not.

Another element I added to my decor this year are the cabinets wreaths….

For several years I have wanted to add “mini” wreaths to my upper cabinets. I finally found am inspiration for what I wanted, but honestly, when I put it all together they came out a hair too big. Hardly “mini.”

So be it…maybe next year I’ll try again…for this year it is what it is….

The precious train!

This train was a gift from Brian’s grandfather to his dad in the 40’s…it was used then. Last year we displayed it above the dining room. This year we got it up and running and put it around the tree in the office.

We didn’t put it around the main tree in the living room because 1) too many gifts under that tree and 2) the SLIGHTEST bump derails it and the living room is a high traffic area.

Not sure Callum is really old enough to appreciate it but I sure love it!!!!

And now the pièce de résistance…the final tree in my life long dream of having a tree in every room!!!

For years I swore if I had the time AND the money, I would put a tree in every room of my house. Last year the goal was complete.

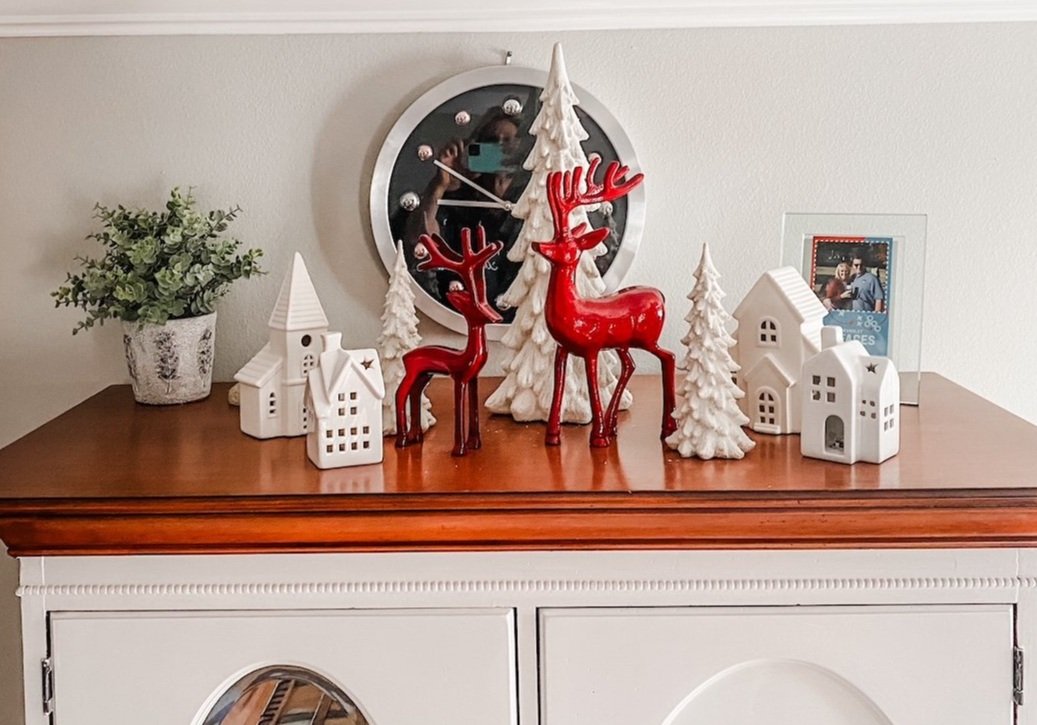
The master bedroom tree!

I added a few little knick knacks on the highboy. Just a few little things from Home Goods…nothing fancy.

The office….

The wreath is new…a tad over powering. Again, I tend to “go big” and then I’m not so thrilled with the result. Meh…next year I’ll change it!

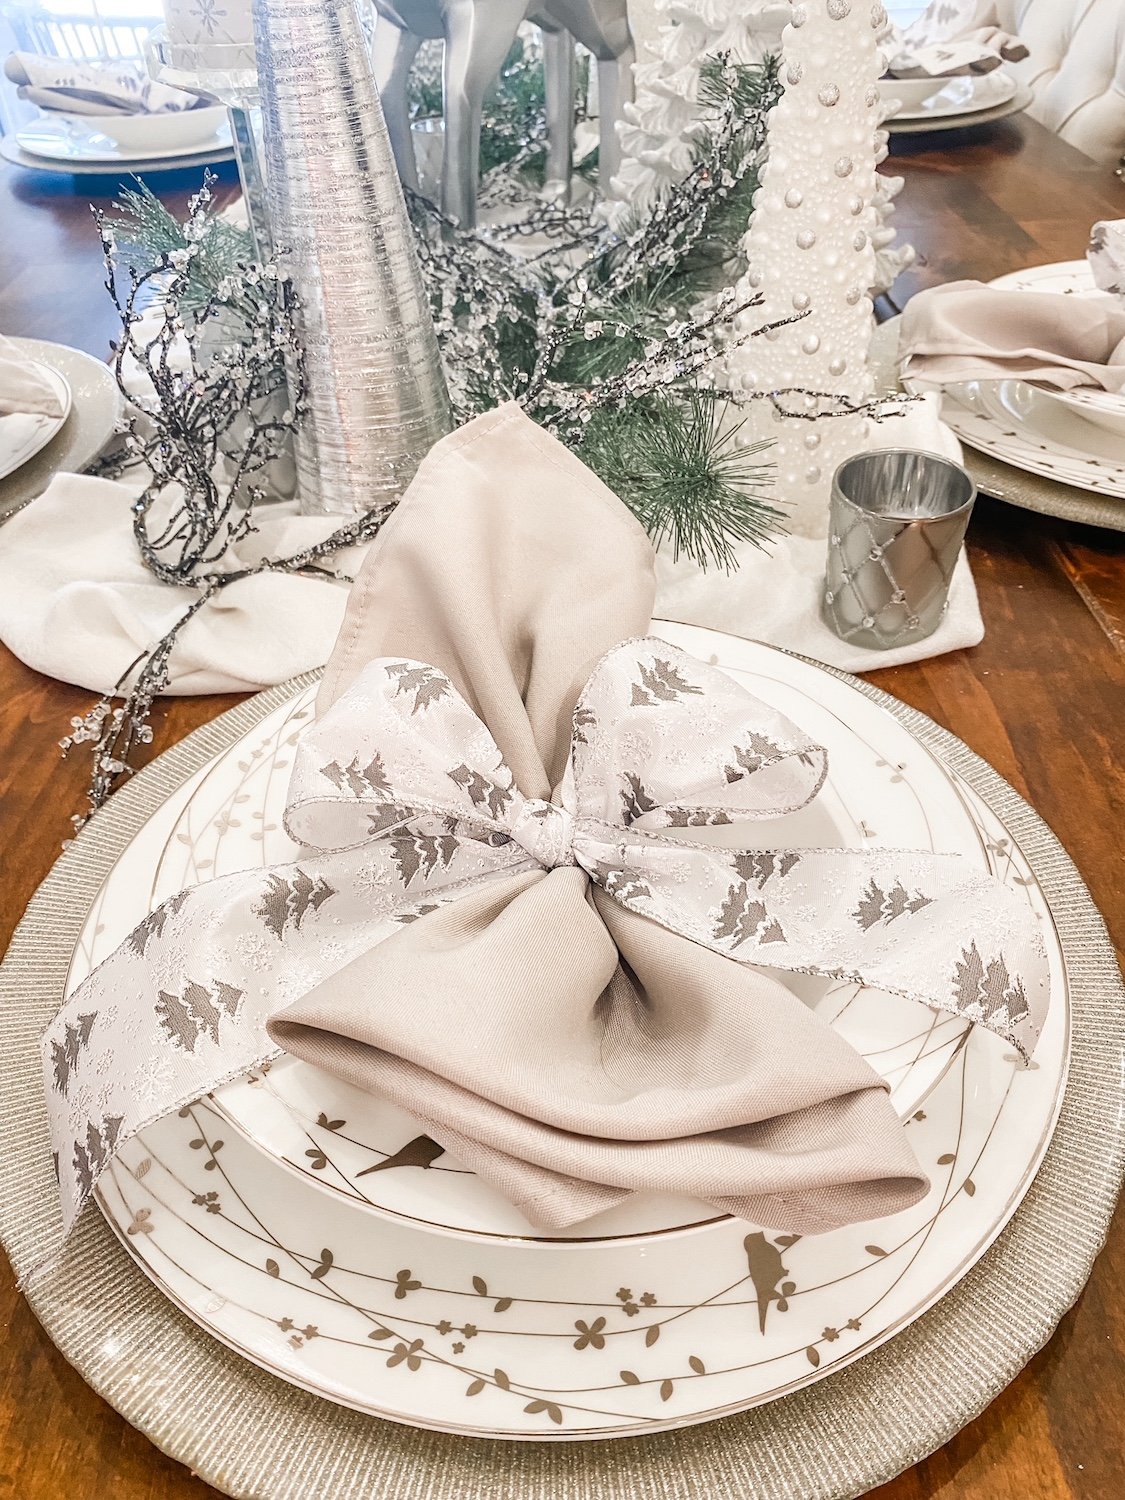
The dining room….

This is always one of my favorite rooms to decorate.. I love the neutrals even though I am drawn to all the vibrant holiday colors in the other rooms.

I like to keep the place settings out even though we don’t usually use these dishes because they have to be hand washed. Simple but elegant.

The sunroom….

I have shared this room before. It is my “Stewart plaid” room in honor of my “Stewart family.” Love it and I am always looking for more Stewart plaid elements to put in here. This year my sweet friend Carrie brought me this precious decoration from Italy!

The den…

The breakfast room….

Not all the trees have decorations…some just have lights. That’s okay. They are still pretty and the four that are decorated take enough time!

The entry…

Little has changed here…added some little wooden trees and a Christmas sign on the trim…another PJ pillow. Love the view into the office!

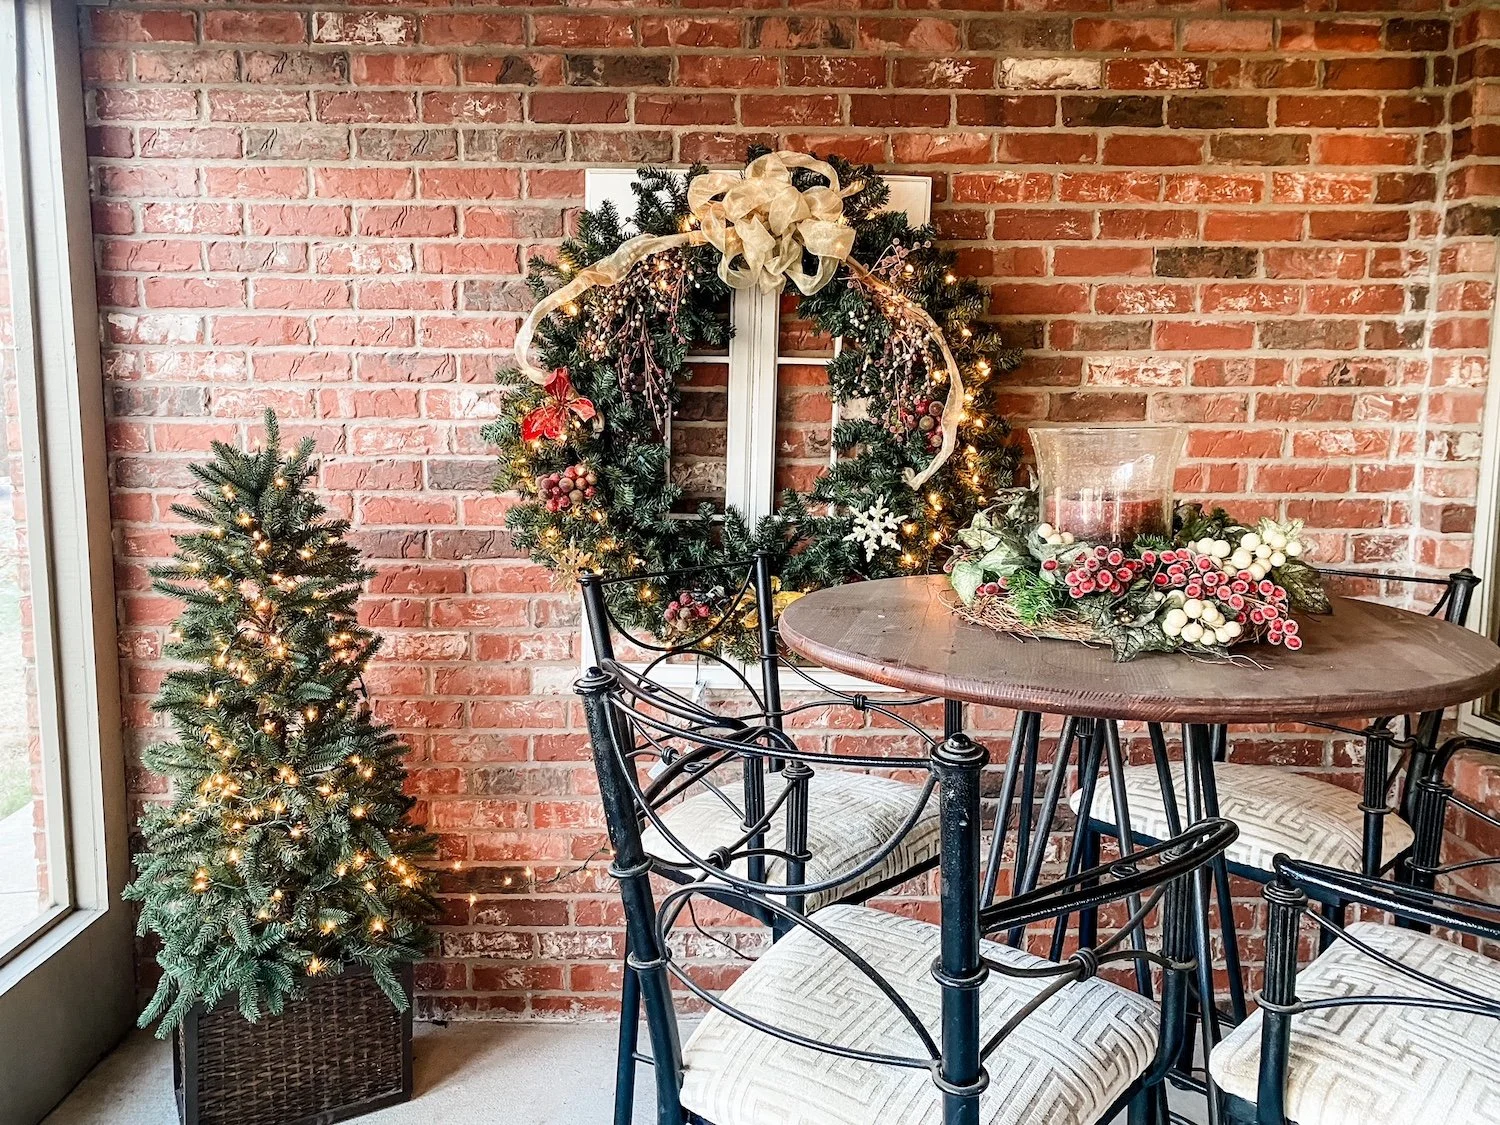
The screened porch….

And of course the main tree in the living room….

All these trees are connected to remotes (THIS is one I use and LOVE) and are turned on every day. I don’t even want to tell you what my electric bill is for the month of December. Suffice it to say it is cheaper to cool this 3500 s.f. house than to light it up…lol!!!

But I love it and as long as I am physically able to do it, I will. Then I may hire it done!

I love this holiday and it seems that year after year I do indeed add something new. I hope something I did will inspire you to add a little more to your home.

The never ending project....

Six months ago I shared a project I was working on …quilts. Sewing…UGH!!!!

As I pointed out in the original post, it was for a good cause…a way to show off the years of Christmas PJs my family wears every Christmas.

I finally finished the first SIX quilts I tackled.

Four are throws that are being given to my daughter-in-laws and my grandsons for their birthdays. I know they should probably be Christmas gifts but I want them to have them for the Christmas season. I also made a twin size and a full size for the upstairs bunk room.

This past week I added shelving and organized our spare room closet so that Brian can move all his “stuff” out of the guest room closet and into the spare room closet. While in the process I finally decided to organize the boxes of leftover fabric from the massive quilt project.

Well, low and behold, I had enough panels to make a throw for Katie…might as well whip that up…

…and Sarah wanted pillows…I didn’t have any panels for those so of course I had to whip those up as well…

…and I wanted a pillow using some scrap green velvet I found…whip that up. Two days of “whipping” and I am WHIPPED!!!

But I managed to use up a good bit of my leftover scraps and get everything organized. I still have a bunch of plaid pieces left I may do something with…someday!

It has been a few weeks of “giving what you have.”

One neighbor wanted a counter top over her washer and dryer…done!

Another wanted a walnut mantel… (similar to mine)

…and a storage divider for her baking sheets…

Done and done.

And of course I have a long list of things I want to get done before we head out on vacation in a few weeks. So little by little I am chipping away at the list on my refrigerator.

No, the closets and the sewing projects weren’t on the list.

That reminds me, I need to add them to the list so I can check them off!

The living room fireplace reveal....

FIREPLACE MAKEOVER!

I have known from day one that I wanted to give each of the fireplaces a little makeover.

HERE I shared the den fireplace….

Now it was time for the living room fireplace.

The original fireplace wasn’t totally offensive. It just wasn’t “my thing.” Whatever that is! A little dated…just blah.

My original plan was something like this…

SOURCE

I really loved this “cove molding” look but this surround is stone…and SUPER expensive. I decided to try to recreate the look with wood.

First thing I had to find was the “cove crown.”

I found it HERE. The only issue I had with it was the fact that it is a “polyurethane” material…basically styrofoam with a plasticish shell…hum. I did some research and it is SUPPOSE to withstand heat up to 200 degrees. That should hold up to the heat put off by my fireplace….should. I guess I’ll find out next year!

So as I mention HERE, I found my inspiration, took measurements and made a tentative plan.

What is the old saying about “best laid plans?”

No matter how carefully we plan, not all will go right.

Case in point.

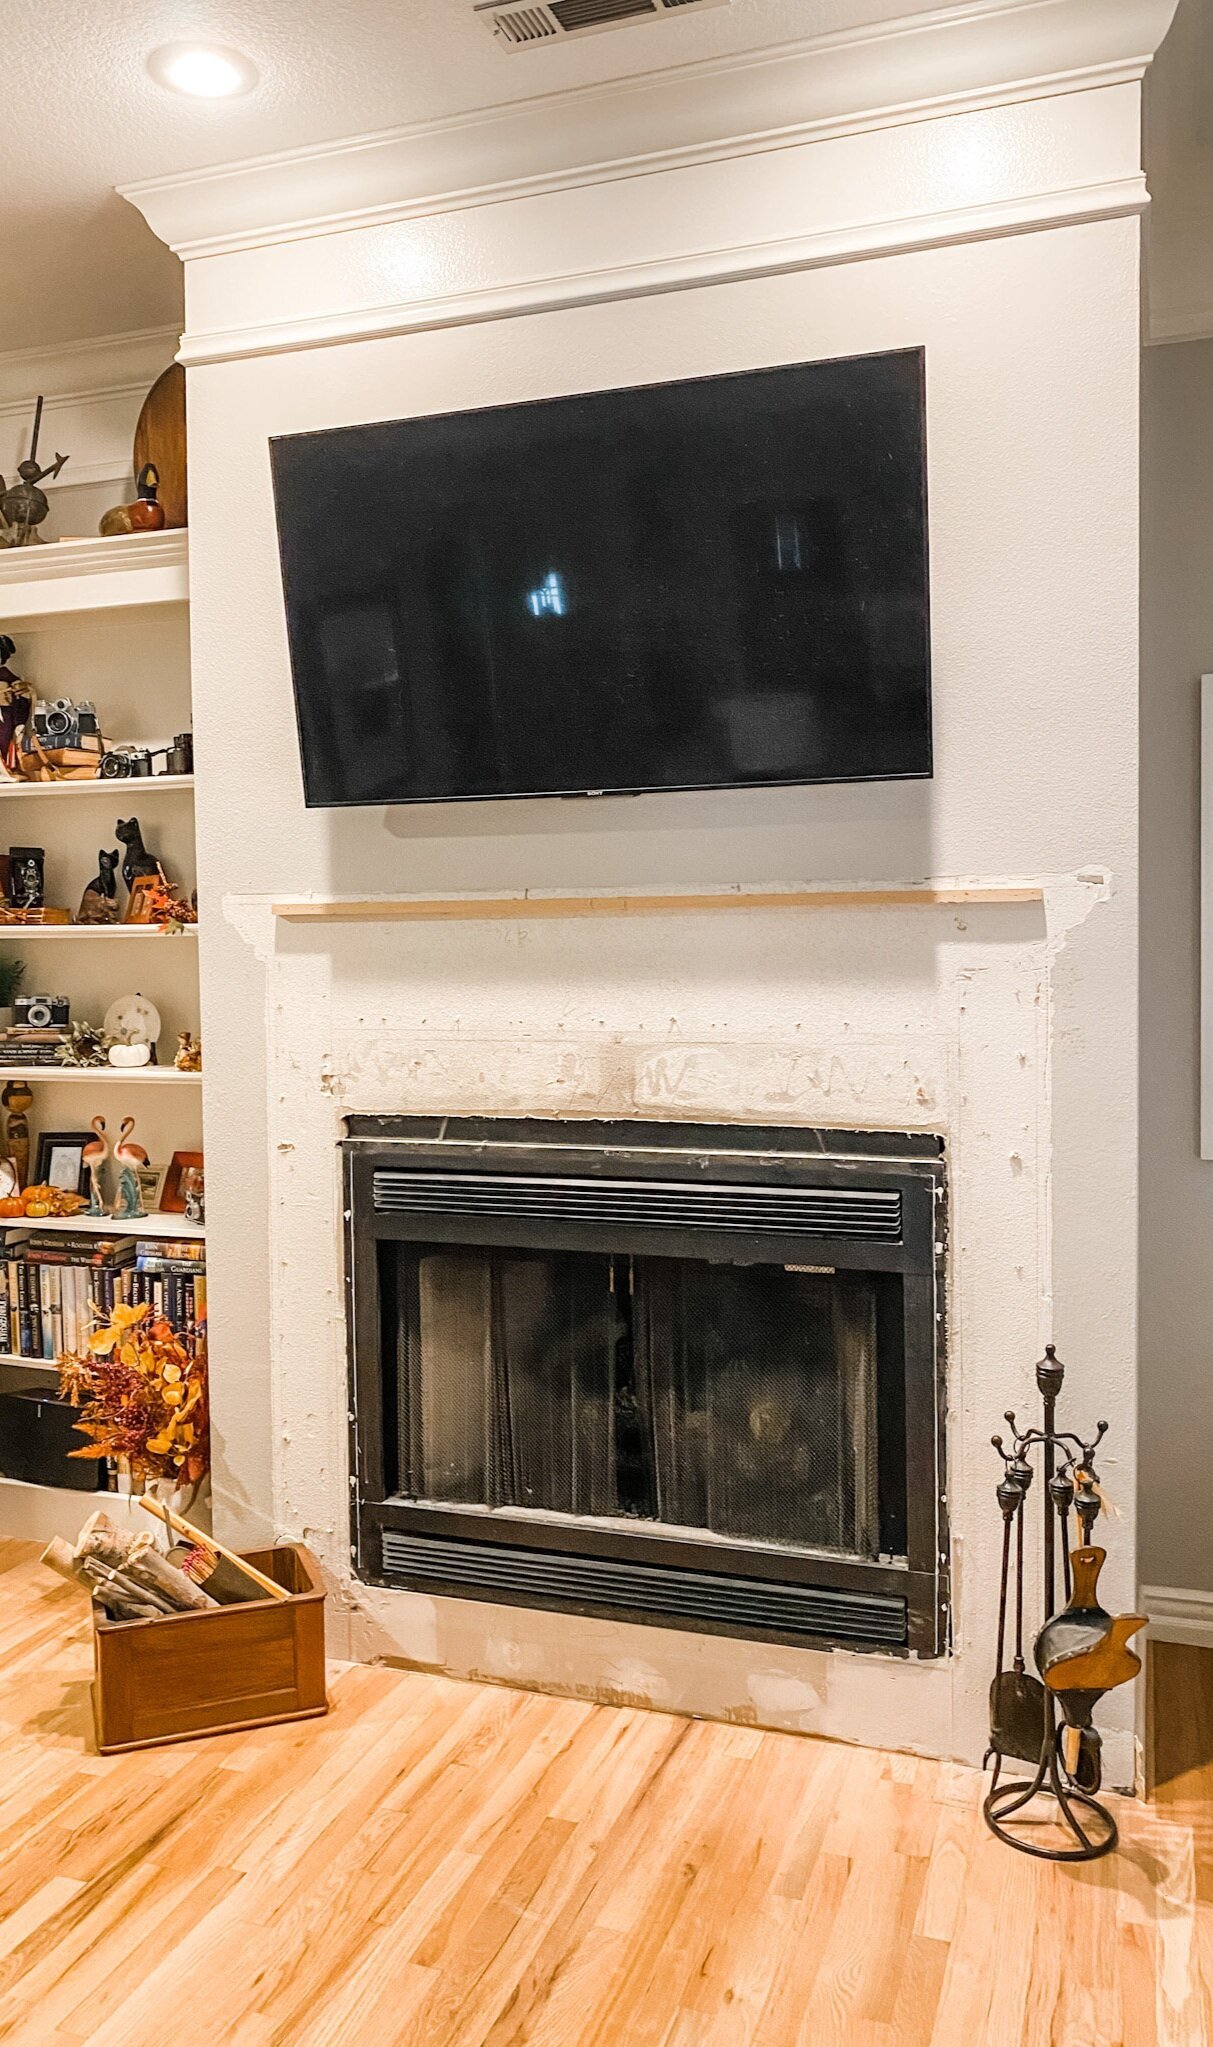
So I started by removing the old surround….

TIP! When you remove wood trim from a wall, first score the joint between the wood and the wall with a utility knife. It should have caulk between the wood and the wall and if you don’t score it, you may tear the paint finish. If there is still caulk on the wall, just take a chisel or putty knife and gently scrape it off. Also use a board behind the pry bar so you don’t bust through the sheetrock…I did it just for demonstration purposes…NOT!

When I removed the old surround, I discovered this….

I forgot this room originally had carpet. When they added the hardwood, they had to work around the existing fireplace surround which sat on the slab, so of course when I removed it there was a gaping hole in the hardwood flooring.

“Best laid plan” #1….

Not a big deal for me. First, I always keep “spare.” The problem was remembering where I put the spare pieces of hardwood. Once I dug it out from behind all the stored Christmas decorations I went to work patching these floors. Since much of it was going to be covered by the new surround, I didn’t worry about “lacing” it in like you would a prominent area. I glued and laid some 3/4” material as a subfloor, then cut a few pieces of the oak and glued them to the subfloor with construction adhesive, using wedges between the wood and the wall to fit them tight until the glue set up. I sanded and applied one coat of polycrylic before installing it. After installing it, I used wood filler to fill the gaps, gave it a light sanding, then applied another coat of polycrylic.

Hardly noticeable…or as my daddy use to say, “You’ll never notice it on a passing train!”

I decided to build the surround on the wall vs. building it as a unit and then attaching it to the wall. Just personal preference honestly.

I used a stud finder to find all the studs and marked them on the wall.

I put up 2 x 4 “bracing/supports” on the wall using THIS construction adhesive and deck screws. I was able to hit a few studs, but not as many as I would have liked…hence, the adhesive. I like this construction adhesive better than most because I have found it is tackier and less likely to “slide” before it dries.

Since these were the “supports” that all else would be attached to, I made sure they were perfectly straight and level.

I strongly suggest priming and sanding all your materials before installing it…this will save you from a serious dust storm IN the house! First course of business.

I began building the surround by attaching 1x material to the supports I had secured to the wall, using adhesive and nails. I used 1 x 8” poplar material on the outside and faced the edge with 1 x 2 poplar. I attached a 1 x 4 pine on the inside of the supports. Then I added spacers between the two to provide additional support and nailer for the trim.

(At this point the cove crown is just “propped up”…not attached.)

My “best laid plan” was to use crown between the outside board and the inside board….

Okay, here is the problem and where my “plan” completely fell apart.

I was THINKING I would just take plan ole’ crown and “cope” the inside corners. Works on a ceiling, right?

Right…but on the inside corners of a wall/ceiling, you have two pieces of crown joining in the corner, both laying “horizontal.” On the inside corner of this fireplace, you have one piece laying horizontal and one piece laying vertical.

Now, you might not think that is a big issue.

Well it evidently is. I googled, I cut, I made mock ups…I spent an entire day trying to make this work. Evidently this is not a “doable” thing…at least not what I could find.

This might explain why ALL my inspiration pictures were stone or masonry.

I think the reason it worked a bit with the cove crown ( I say a bit, because there were still gaps I had to sculpt with putty and caulk) was because it didn’t have the “fancy” profile of a crown. Smaller cove molding will cut on a 45 on inside corners without coping. The larger cove molding had minimal “gaping.”

If you know anything about cutting trim and coping you know exactly what I am talking about. If you do not, do a TON of research before attempting to trim inside corners…or you too will learn the hard way!

Soooooo….best laid plans.

I rarely just give up, but…..

Time to punt.

I found another “inspiration” that appeared to be “less decorative.” I decided to give this look a shot since it would entail using basic 1x material vs. crown.

Truth is, this is one of those “happy accidents.”

I like the look more than I did the original plan!!!!

I used a 1 x 4 material, then stacked on a 1 x 3 material, then a small cove molding…LOVE.

Moving forward….it was time to attach the large cove crown.

First issue. In all my inspiration photos, I really like the “one piece” look. Since again, they were all stone, the material adjacent to the fire box was the same as the surround. If I recreated that look I would have to use painted wood adjacent to the fire box, and I just didn’t feel comfortable with that. Not that this box gets terribly hot, but it does get a tad warm.

Soooo….what to do. I really wasn’t loving the look of high contrast tile between the box and the surround.

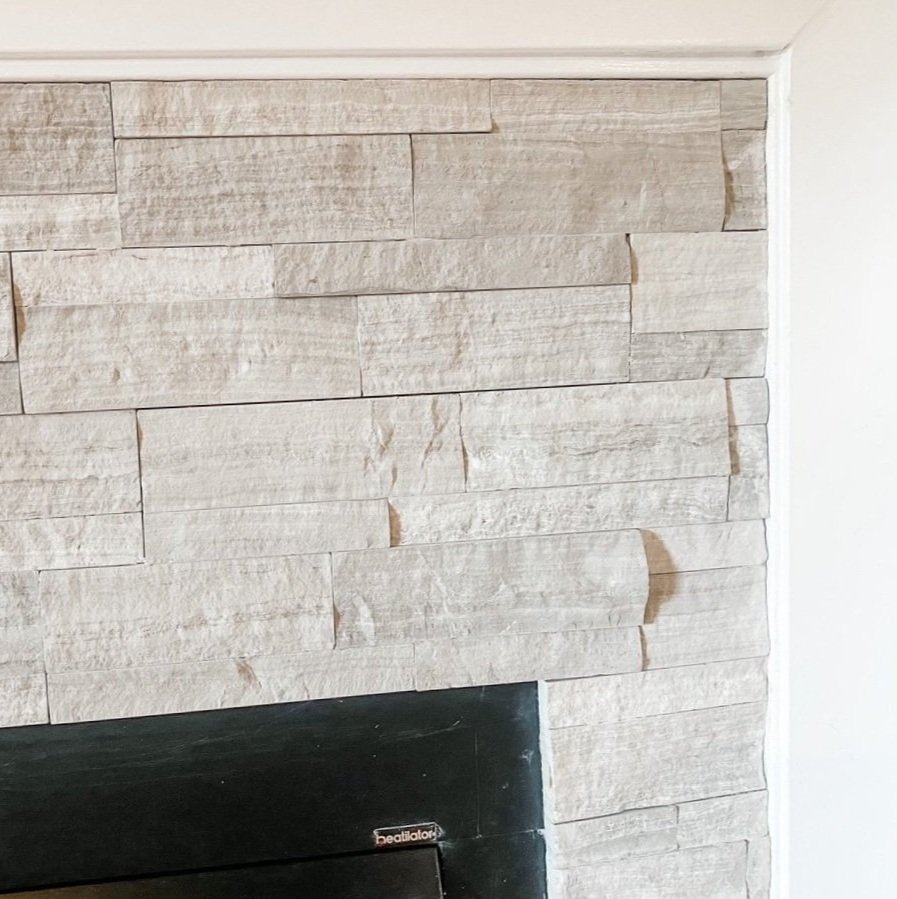
When I was looking at tile, I found a split face travertine tile I really liked.

If you remember the Lankford house den fireplace I installed split face travertine…and I LOVED it. I still do…so I went with it.

Now, travertine is not “all the rage.” So this is a prime example of doing something I LOVE vs. doing the in thing.

Since I decided to go with tile, I used a 1x material for the inside of the cove crown to sit on…just to give it some lift so that the tile wasn’t butting up against it’s 1/4” edge. I glued and nailed 1 x 4s on the wall, then installed the cove crown on top of that.

Second issue…since the cove crown is “polyurethane” and not wood, I couldn’t attach it using a trim nailer. Trust me, I tried. I had to use construction adhesive, then tape it and constantly “press” it until the mastic finally set up. Pain.

Once all that was done, I caulked all the joints, puttied holes, gave it a little sand and then painted it BEFORE I installed the tile surround.

I used a latex paint because my research said that latex is a better product to use in areas where “heat” might be a factor…I guess it has a tad more flexibility. Makes sense.

Don’t forget the Floetrol…makes a world of difference in your paint finish.

After the paint had cured, I installed the tile. Again, there are amazing tutorials out there for installing tile…find one that makes sense to you! Installing tile around a fire box is NOT a difficult DIY project. But you want to make sure you have the right tools (wet saw, properly sized trowel, etc) and that you use a thin set or mastic that works with the type of tile you are using and is heat resistant. RESEARCH!!!!!!

There were a couple of scuffs and marks on the black fire box from scraping the old mastic off. I used a black Sharpie to cover those…works like a charm.

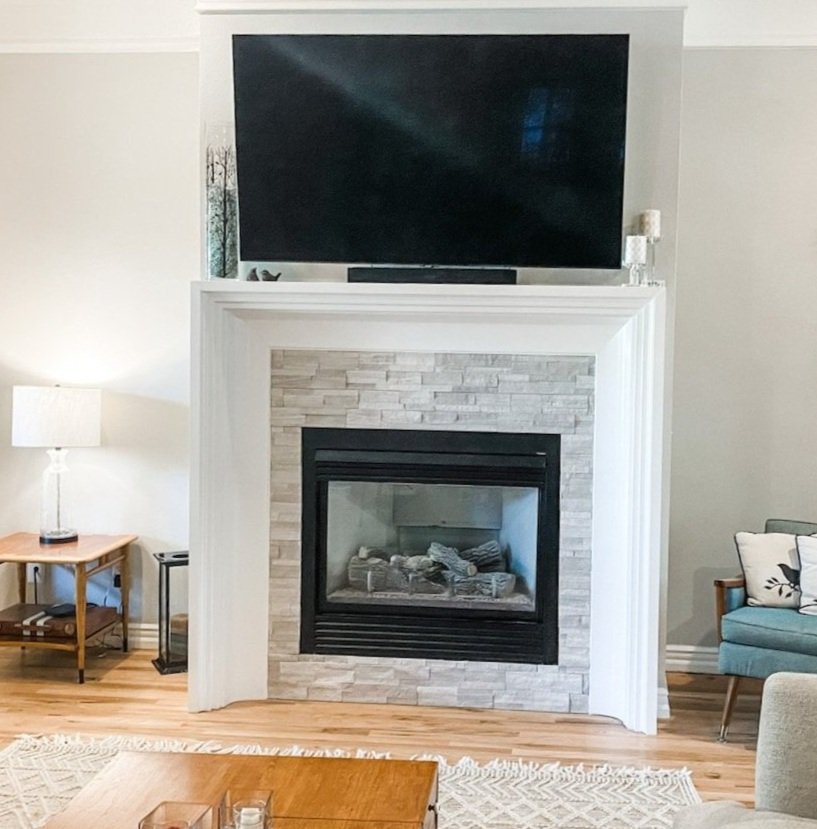
And presto, bingo….a new fireplace surround.

I like it much better than the old one. Bigger but simpler. Not quite so “traditional” looking. Again, I like it much better with the “stacked edge” than I would have with the crown. See, no mistakes, just learning as I go. A lifetime of doing this stuff and I am still learning!

I am EXHAUSTED (just look back at all the projects in the last few months) so I doubt I will be starting any new major projects anytime soon. Course I say that and I am already eyeballing and sketching a few things I have been thinking about starting. Hum….

So until next time…

Fireplace reveal...,

It is done.

As I mention HERE, I had several goals for this room.

The first was easy…replace the paddle fan. Check.

IMG_2074.JPG

The second was a tad more difficult. Reface the fireplace.

Difficult only because I couldn’t “see” what I wanted which resulted in a spur of the moment “demolition” of what was there….

As I have said time and again, often what “is there” keeps us from seeing “what can be.” I see stuff on Pinterest and in magazines all the time that I love, but I can’t visualize it in my own space because what is there clutters my vision. I have equated it to trying to paint a landscape on a canvas that already has a portrait painted on it.

That is when I advocate painting the canvas white. Base neutral. Painting the piece of furniture or wall white or taking all the furniture and fixtures out of a room so you can visualize what you want rather than what is there. Even if it is a piece of furniture you plan on keeping, take it out…that way you can “see” it in a different spot or even painted a different color.

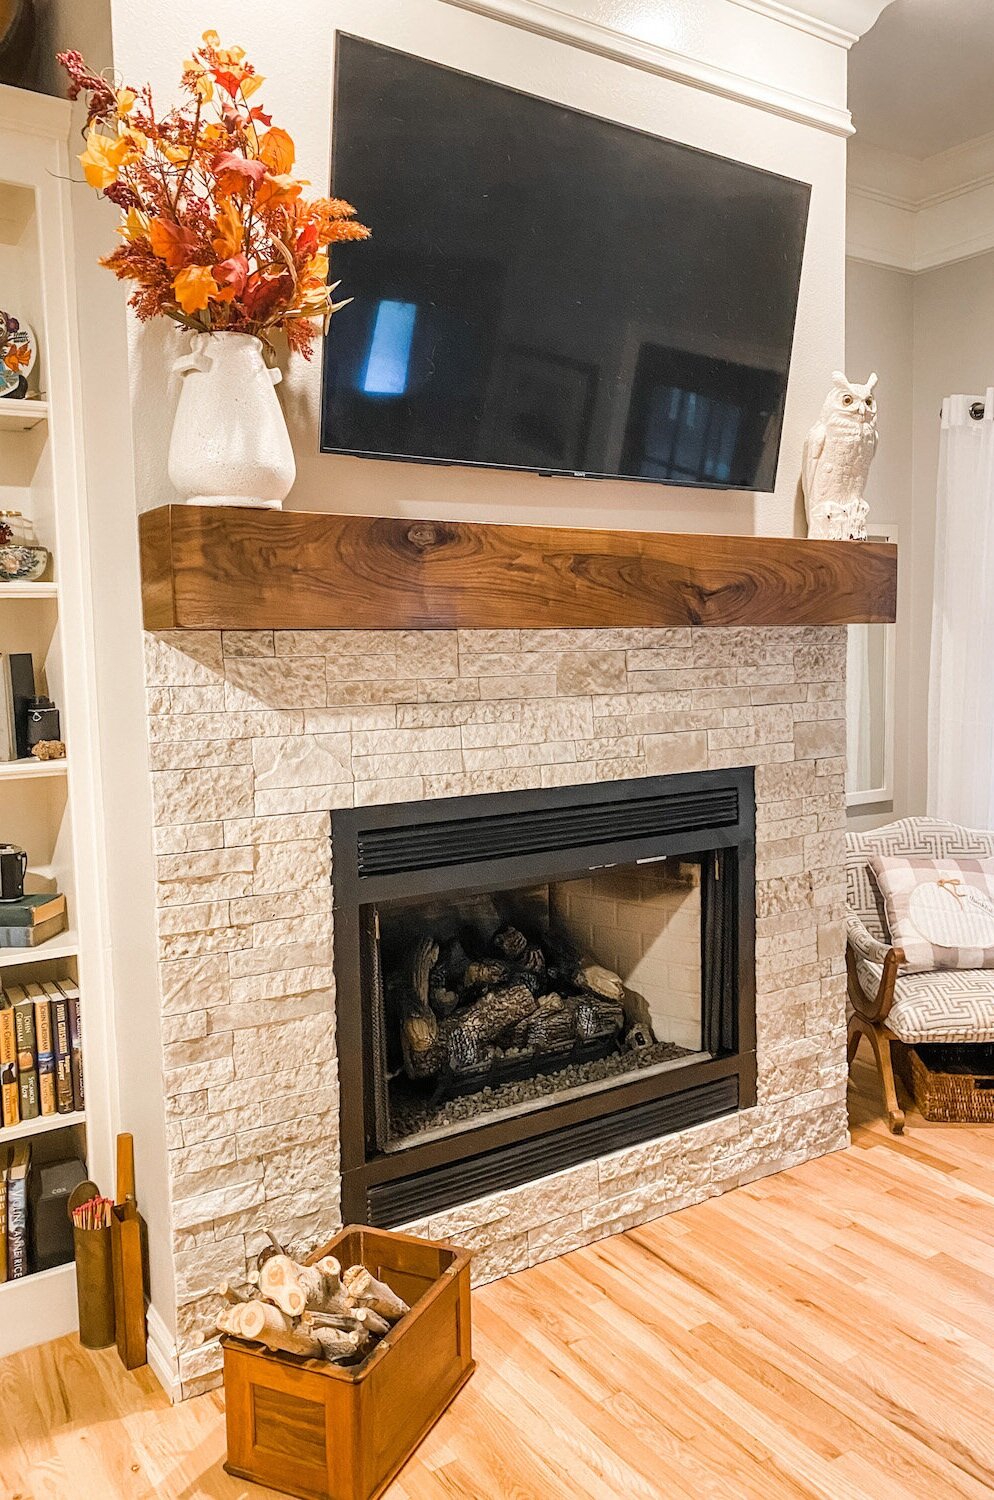
Once I did that with this fire place, I could visualize “the plan.” Rock the bottom…big beefy walnut mantel.

I shared the stone HERE.

Last week Matt and I dragged out the table saw and chop saw and went to work on the mantel. Four coats of Waterlox (I LOVE this stuff) and presto-bingo….the vision came to life. Waterlox is my new “go to” finish…a tung oil finish that gives any wood durable protection while allowing the beauty of the wood grain to shine. And it is SERIOUSLY idiot proof! Just sand, clean the entire piece with a tack cloth and wipe it on. Use 0000 steel wool and tack cloth between each coat. I usually apply 3-5 coats. LOVE!!!

IMG_2040.jpg

I intentionally choose walnut with tons of grain and a few knots…”character.” This house doesn’t lend itself to the “farmhouse look” but I didn’t want formal and fussy either.

The final result was exactly what I envisioned…and I LOVE IT!

Here is the BEFORE (obviously last Christmas)…

image-asset.jpg

And AFTER….

IMG_2073.JPG
IMG_2071.JPG
IMG_2072.JPG

Sometimes we get so wrapped up in getting a project finished as quickly as possible, we fail to live with the results in our minds for a time. Trust me, you will love any DIY project sooooo much more if you will get rid of what is there and take time to live with what you think you want in your mind before you start slathering paint or ripping out walls.

Remember every space is different….just because something looks amazing on Pinterest or in a magazine doesn’t necessarily mean it will work for you. It might, but spend the time to tweek it in your mind before you jump head long into what can be a time consuming and expensive “oops.”

static1.squarespace.png

The fireplace makeover...Part 2...Airstone Faux rock.

The stone work is done….

…and I love it.

I highly recommend the Airstone product. At least as far as installation. It is a relatively easy product to install. Lightweight and exceptionally natural looking.

When we fire up the fireplace in a few months I will let you know how it holds up to heat.

This stone product would work well for a kitchen backsplash, fireplace face or a covered porch area. It SAYS you can use it for exterior application…I can’t attest to that since I did not use it outside.

I think this is a relatively easy DIY project.If you choose to install this product find a tutorial that works for you. More importantly though, FOLLOW THE DIRECTIONS!!!!

I do have a few tips.

Start at the top. Then the sides…them the bottom. That may seem backwards, but it is the way to do it. Start at the top by adding a temporary level brace….I just used some scrap 1x4. I let that dry over night, then did the same on each side, then the bottom. The Airstone mastic sets up fairly quickly.

IMG_2011.jpg

I used pennies as spacers between the floor and the stone. I do this because wood swells and moves and you don’t want the rock sitting on something that has movement. Same would apply if you were using it as a backsplash…don’t set any wall product (faux rock, tile, marble, etc) directly on a top or floor.

Use a tile saw to cut it. I have a wet saw so if you do not, rent one. Makes easy, precise work of tricky cuts.

Pay attention to how to apply the mastic…it’s like frosting a cupcake, not buttering toast.

The tub of mastic specific for the faux stone SAYS it does 30 s.f….it does not. Maybe I “iced” to thickly but I would suggest buying more than you think you will need…you can always return it.

Layout the rock on a template or floor before applying it on the wall and number each piece so you know how to property transfer it to the wall. Also, make sure you pull from different boxes…mix it up. Each box has several different “colors” and “textures”and each box may come from a different run…so you want to make sure you mix it up!

I used the “edge” pieces around the face of the fire box…I think it looks neat.

IMG_2025.jpg

I should have wrapped it around the entire bump out. I would have loved to take it to the ceiling. I am still debating on adding a hearth.

But the “coulda, shoulda, woulda” is always a brain worm until the project is finished.

I didn’t want to take it to the ceiling because I don’t want to remove the crown then have to paint the entire ceiling. I don’t think I want to add a hearth because this is a small space and I don’t want to crowd the space. I didn’t wrap it around the entire wall because, well, I just didn’t.

Hopefully when I get the mantle on, it will all come together.

So the mantel. I think I thought I knew what I wanted but now I not so sure.

My plan is to make a beautiful walnut mantel…smooth…perfect grain…low sheen. Now I am debating on a more “rustic” look with a lighter finish.

What to do, what to do.

As usual, I have searched Pinterest and found dozens of looks…I like them all!

This house style really does not lend itself to that “farmhouse/rustic” look so I think I am going to go with a more smooth, low sheen look. Sometimes you have to “read the room” when making decor decisions.

I bought some walnut boards (dang that stuff is expensive!) and specifically picked pieces with lots of grain and a few shallow knots. Just a smidge rustic but still the beauty of walnut. I know if I apply Waterlox (like I did here with my kitchen cabinets) it will have a dark finish. And I think I am okay with that. The stone is light and I think the dark walnut will be a nice contrast.

Now I am just waiting on my son to have a day we can work on his table saw. I shared HERE about my phobia of table saws. I bought him one for Christmas last year so I have one available and have a “saw buddy.”

Hopefully next week I will have a beautiful new fireplace to share!


The fireplace project...taking it to base neutral!

As I mentioned when I first shared the den, one of my “eventual projects” was to reface the fireplace.

image-asset.jpg

But as I have said before, often “what is there” blinds us to “what can be.” So the absolute best thing you can do with any mentally blocked project is to take it to “base neutral.” Whether it be a room, a dresser, a fireplace….take out what you don’t want or paint it all white…and start with a blank slate.

After months of being mentally blocked, I took a hammer and crow bar and took it to “base neutral.”

IMG_2004.JPG

I love that this house has two fireplaces…and the one in the living room is fine ….for the time being….

IMG_2007.jpg

(Yes, fall puked in my house!)

But the den is a “less formal” space and I really want something less formal looking…like stone and a big beefy wood mantel.

I’ve dropped a few “inspirations” into a computer file…

Screen Shot 2021-09-27 at 2.49.47 PM.png

…and I have found several looks I like on Pinterest.

I like the look of stone or brick to the ceiling but that would entail removing the crown, which would then mean I would have to paint the ceilings throughout the entire space…kitchen, den and breakfast room. And that is just not a project I want to even think about at this time.

My plan is brick or stacked rock and a big beefy wood mantel…preferably walnut. I have been researching the Airstone product (sold at Lowes) and if I go with the stone look, I may give it a shot. But I also like the brick look so I am looking at brick tile as well….

That’s the plan…I think…maybe…

I don’t know. What I do know is it will be much easier for me to visualize what can be now that what was is gone.

I better get to visualizing because as you can see, I will need both mantels for stockings in about two months!!!

static1.squarespace.png

BIG LIFE CHANGES

I know this is a rare Monday posting, but I can finally share the big changes that are happening in my life.

A few months ago I woke up one morning and decided it was time to sell my apartments.

I called a realtor I had worked with last year and told him I was ready to sell. At 3:30 that afternoon he brought me an acceptable offer.

I have owned these apartments for 23 years.

At first I was a bit “sad.” After all, they have been my “career” for 23 years…they are what I do!

The income has provided me with the ability to provide for my children and give them a good life.

I’m only 56…I still feel like I have a few good years in me.

Yes, I am giving up a decent income. I have to roll the profit into other investment properties, specifically rental homes, but they will not produce near the income the apartments have. But that is okey…sometimes you have to sacrifice quantity for quality. The “quality” of my life will be greatly improved.

Yes, I am “starting over” at 56. The new rental homes will not take up near the time the apartments did…so the question now is what will I do with all this free time. Trust me…I am not one to sit around on my hands. I have no doubt I will find SOMETHING to do!

It’s been a stressful few months…I’m usually awake and ticking by 3 a.m. and at this point I feel like I am running on fumes.

So naturally I did what I do when I am stressed and frazzled…I went out and found something else to fret about.

We bought a new home.

For years I have wanted to “down size.” Now that we are empty nesters we don’t need a big house with three empty bedrooms upstairs and a huge yard to care for.

So naturally I went out and found a house that is WAY bigger than what we have now and has a large yard that needs TONS of work.

After a lifetime of owning “projects” I wondered if I might have ONE MORE project in me. I guess I am getting ready to find out.

The new home is waaay more “traditional” than I like…but it has soooo much potential. It has good bones and a workable floor plan!

The kitchen and master bath are complete gut jobs…and after a lifetime of living in “remodel messes” I have decided that this work will be contracted out and we will not move until the big, messy work is done!

The big wall between the kitchen and living room will go away, as well as all the cabinets, and I plan on putting a humungus island smack dab in the middle of the existing kitchen.

The wall on the far right with the glass cabinets will become the “cooking” center with a cook top, wall oven and microwave. And the coolest tile backsplash in the whole world. I can’t wait to share!

No need for lots of upper cabinets because it has a huge walk in pantry!

This is the “sitting room” adjacent to the kitchen…

One way to “detradionalize” this home will be to replace the arched transoms with rectangle ones…a bit of work since it will require brick and sheetrock repair. This is on my list of things to do, but closer to the bottom.

The quickest, simplest and cheapest way to “detradionalize” is to remove all the crown molding around the cased openings and windows! The crown around the ceiling will stay!

Another way is to change out light fixtures…that is closer to the top of the list along with removing carpet and adding more hardwood flooring (yes they are REAL hardwood floors) and refinishing them all with just a clear coat…no stain!

The fireplaces? Yes those will eventually get redesigned…again, not something I will tackle right this minute but it is on “the list!”

The master bathroom…ICK!!!! Suffice it to say, it is a gut job!

Right now I am in the process of “making the plan.” Meeting with tile guys and cabinet makers and flooring companies…getting quotes and ideas. Making a list of what HAS to be done…wants vs. immediate needs.. As always there are things I WANT to do but I might not be able to do right this minute…they stay on the list, just closer to the bottom.

I have a life time of inspiration to pull from but I am still grabbing pictures from the Pinterest and the internet. I pretty much know what I want…

Now that we have closed, it is time to “execute the plan.” We start this week with demo…and then I will work the plan from there.

One by one I will be closing the new rental houses and hopefully creating a “new career.”

These are the big life changes that are going down in my world! Huge!

While the apartments have been stressful and back breaking at times, they were my “career”…they were what I did to provide for my family. Saying good-bye is like retiring and moving on to another career.

This house has been our home for 20 years…it is where I raised my children and I have poured my money, talents and time into this house to create a home.

It will be tough to walk away from both…but that is what is going on in my life and I am super excited about the next chapter…whatever that may be!

Styling a master bedroom....

It is no secret I have struggled to “restyle” my master bedroom for years. Truth is, it’s not that I struggled to “restyle” it…I struggled to give it any style at all!.

If you follow the links you can see the transformation over the years!

It started with my grotesquely expensive, heavy, dark and somewhat dated bedroom furniture I bought in 2001!

I don’t know why it took me so long to FINALLY paint it, but when I did it made a huge difference!

The next big change was the flooring…we finally installed hand scraped laminate flooring in both the bedroom and adjoining office.

I love this flooring but after living with it for a few years I will make one observation…avoid dark flooring if at all possible. It is beautiful but shows EVERYTHING…not a good thing if you have a big yellow dog who sheds…or kids with dirty feet! But this was the last room with carpet and I can not tell you how happy I am to have NO carpet in this house!

Next up, changing out the chairs.

LOVE them! But they were a bit on the “grey” side and the walls were more on the “cream” side…so….

Paint…finally got around to doing that.

At one point I even changed out the bed frame….

It had a “distressed” treatment and if you know me that is NOT my thing…but I kinda liked the look for a time.

All of the color choices stemmed from the one color inspiration I found on Pinterest….

It originated on designseeds.com. This site is a source of endless inspiration and in my opinion it is one of the first sites you should visit when designing a room. If you have an element you HAVE to decorate around it will help you find colors that will enhance and even mask it....like that ugly brown couch or the wing back chair your mom gave you. 

You can see as I moved forward with each new element, I managed to work in these colors…on the walls, rugs, pillows, chairs, etc.

Eventually we transitioned to a king size mattress…so the queen bed frame no longer worked. I searched high and low for one I would love and finally settled on a simple frame.

I have said time and again…go “neutral” with the big ticket items. Use pillows, throws, rugs, art, and accent furniture to make your “design statement.”

On one of my Pinterest email feeds there was a link to the “Top 10 Fixer Upper Bedrooms.” The bedrooms featured are all “Fixer Upper” bedrooms. I love to look at sites like this because they give me inspiration.

This bed is very similar to mine yet the whole room looks SO much more cozy and inviting.

So why doesn’t my space look as cozy and inviting as this space?

I bet you look at blogs and Pinterest and see all the amazingly styled and perfect spaces…bedrooms, mud rooms, laundry rooms, kitchens…and you just know yours could never be as glam because, well, you live in your house…and so do your kids and animals and spouse…and there is NO WAY you could keep your space looking as dreamy and beautiful.

All the beds on Pinterest and on the blogs are beautifully staged and styled with the pillows, throws and blankets. Like no one every sleeps on it…no baby pees on it…no dog sheds on it…

I GET IT!!!

My room isn’t staged for photos…it is “real life.”

I have a real mental block when it comes to wall decor in my room. Seriously…if you followed the links and looked at the dates you may notice I have been trying to style this room for almost 5 years. To date, I have hung one round mirror…

a canvas…

and two other mirrors….

I absolutely LOVE the 4 prints above the bed in the inspiration photo.

It has only taken me 18 years to find 3 square matted frames I like.

I did not like the artwork in the frames but I love the frames and the “3-D” matting. My original plan was to replace the prints with something “light and airy.” Maybe botanicals or black and whites. But I decided to pick out a few photos from our trips to Colorado…photos that have meaning….places we love!

If you have been around long enough you know I make my bed every day. I firmly believe that making your bed sets a positive tone for the rest of your day (and there is the whole “I might die and people will think I am a bum if my bed is unmade!” thing.) Since I might not be inclined to make my bed every day if it takes more than 60 seconds, I keep my bedding super simple…no froo-froo! Sheet, comforter, top quilt, throw for the animals (who never sleep on it) The dogs and cats sleep on the bed and pillows and yes, they all shed. So I need bleachable and washable bedding. I sleep with 4 pillows so there really is no time or room for fancy designer pillows and shams.

I brought my throw pillows down from the guest room and “staged” the bed…it looks AWESOME…but again, not happening…just too much froo-froo!

I really thought the guest room throw pillows would be the wrong color…but I like them and it has convinced me that I may have too much of the “frosted berry” in the room. I was going for a “pop” of color, but honestly, I think there is too much “pop.”

I really need new lamps…mine are Hobby Lobby lamps from 18 years ago that got a little paint treatment years ago. I couldn’t find lamps I love but I did find lamp shades I like better…unfortunately they aren’t “tall” enough…back they go!

I think big area rugs under the bed make a huge statement…I don’t have that. I went with two scatter rugs on each side of the bed. I did that primarily because this room has two distinct areas…the sitting space and the bed space. I threw down the rug Brian had in his living room and it works pretty well in the “sitting” space. I think maybe if I want to “cozy” up the entire space and make if feel a tad more cohesive I could use two identical rugs in the spaces. But again, serious mental block on what to use so I just live with what I have.

But again, the scatter rugs are the “frosted berry” color and now I’m kinda not liking that…that may be something I change in short order!

The paddle fans were pretty awesome (and expensive) when I hung them 18 years ago. Now they are kind of “meh.” I love the chandelier style lights in the inspiration room but honestly I HAVE to have a paddle fan above my bed…I just can’t be comfortable with out a little air movement. Since I have recess lighting I could probably change these out to a less “in your face” fan.

Window dressings! One of the things I noticed about all the “inspiration rooms” are the beautiful window dressings. Almost all have beautiful, full curtains. Truth is, I really don’t like curtains. Don’t know why. I only have curtains in the front window because sometimes I need to close them to block out the hot sun…but since I live at the end of a cul-de-sac I really don’t need them for privacy. And truth be told, the ones I have are too short…I believe I mentioned that here and yes, I have managed to ignore them for well over a year.

Truthfully I have been waiting on Candice Olsen or Joanna Gaines to come knocking on my door but since they have not, I guess I will have to keep trudging along in this space.

What is my point to this rambling post?

Life…life happens in our homes and while we would love to live in the “inspiration rooms” on blogs and Pinterest, we live in the “real world.” We have to style our spaces to fit our life styles and needs, in the time and budget we have available. We have to accept the fact that sometimes it can take years (or decades) to make a space feel “cozy and inviting”…and that is okay.

Yes, look to the blogs and Pinterest for inspiration…but don’t get frustrated when your space doesn’t look or feel like the inspiration photo after a weekend of hard work or a few trips to the home interior store.

I have been working on this space for 18 years and I still have a lot I want to do!

How do you eat an elephant…one bite at a time…how do you style a bedroom…one element at a time!

Decorating for fall and Mr. Jinx....

Since it is time to decorate for fall and Halloween I thought I would take a minute and formally introduce one of my “rescues.” Mr. Jinx…

All fall decors should include a black cat…right?

I shared pictures of him last year at Christmas…black cats are super tough to photograph. When I look at pictures of him I understand why black is a “slimming” color…he is WAAAAY bigger than this picture reveals. The kids say he is fat…I argue he is just big boned and really fluffy.

Half the time his little fangs are showing…he can’t help it…he has big fangs. Kinda scary looking but super cute when he is stretched out on his back asleep with his little fangs and tongue sticking out…

I have more than a few pictures of him on my Iphone!


Funny story about how I acquired this kitty. He hung around the apartments for months…I knew he wasn’t a feral kitty because he was super friendly. He would rub against your legs and then roll over for a tummy rub. He loves to have his tummy rubbed!

One day I was sitting in my car talking with my manager and mentioned that we should probably take him to the shelter since he was a super friendly and beautiful kitty and someone would certainly adopt him. About that time he jumped in my car and made himself at home on my shoulder.

What was I to do?

Naturally I couldn’t bring him straight home since I didn’t know what I would be exposing my other cats to…so I took him to my vet and had him tested for all kitty diseases. Clean. My vet thought he was about 2 years old and because of his size probably a Maine Coon.

I told the vet to neuter him and give him shots.

At that point I had a small fortune invested in this cat…so I couldn’t very well take him to the shelter.

What was I to do?

Brian was NOT happy that I brought home another cat…

So I told Brian we would foster him. I promptly named him Mr. Jinx…because, well, he’s black…and black cats are suppose to be jinxed right?

This was two weeks before Christmas so with the whole family and their dogs here and all the chaos that goes with the holidays, Mr. Jinx’s nerves kicked in.

Another visit to the vet, a few nights stay, a staggering vet bill…now I REALLY had a small fortune invested in this cat.

What was I to do?

I couldn’t very well just GIVE him away…right?

Brian was still not happy there was another cat in the house (seriously, I only have four…that isn’t TOO many, right?)

But after the holidays, calm was restored and Mr. Jinx settled in…and promptly fell as madly in love with me as I was with him.

Two years later we are still “fostering” him…truth be told, you would have to pry this cat out of my cold, dead hands.

EVERYONE loves Mr. Jinx…even the dogs. He is the coolest, most chill cat I have ever owned…and while Molly was a tough cat to top, he ranks right up there with one of the best cats EVER!

Even Brian has fallen in love with this kitty!

What was he to do…lol!

DECORATING FOR FALL!

It is really tough for me to break out the fall decor when it is still in the 90s every day. But it’s my rule…the week before we leave for our annual trip to Colorado, I decorate for fall.

HOPEFULLY, when we get home it will be a bit cooler. Rarely. Usually I have to put the jeans and Ugg boots back in the depths of the closet for a few more weeks. But the decorating is done and I can sit back and enjoy my favorite time of the year!

Not much changes from year to year…a few years ago I painted these little pumpkins and changed up the window decor…

Refurbished pumpkins, deer antlers, fall picks…nothing fancy! Still like this little vignette so it won’t change this year!

A few weeks ago I changed out the dining room light fixture

I love the new fixture and I love even more that I can still add the fall garland!

I’ve added a few new elements to the den mantel…a tall vase and new candle sticks….

…but the garland and Mr. Owl are still the focal points. The same but different!

The entry…usually void of much because I still haven’t “decorated” it after it’s little makeover…but it’s a great place to infuse a little fall decor…

The seasonal box I featured here…still one of my favorite super simple projects!

I changed out a few pillows and throws….

Even grandmother’s chair got a little pop of fall…

Every year I find pieces of garland, wreaths and picks at the bottom of my storage tubs…I just scatter them here and there for little touches of fall!

Again, little changes, but I love it all the same!

So many don’t decorate for fall because of the cost of buying “stuff.” As I have mentioned before, I usually hit the home decor stores at the end of the season (which seems to be before Halloween these days) and pick up a few things here and there for pennies on the dollar! You may not get to enjoy it for a long time this year, but you will get to enjoy it for years to come!

This is also one reason I strongly recommend sticking with “traditional” vs. “fad” seasonal decor. As much as you might love those teal pumpkin pillows and chevron throws, I promise you won’t love them in a few short years.

I actually bought teal pumpkin pillows this year…

….knowing that I will tire of them quickly. No biggy…they have good forms I know I can reuse in the future!

There is no harm in spending a little money on the latest “fads” but be selective and thrifty. Create small vignettes with the latest trends but don’t blow your entire seasonal budget on it! And check out the blogs and Pinterest…there are thousands of nifty ideas for inexpensive seasonal projects that take little time, effort or money!

Fall may not be “in the air” just yet, but it is certainly “in the house.” Maybe this year it will actually feel like fall outside when we get home!

Painting a brick fireplace....

The house Matt bought (here) was a "flip." That didn't stop us from making a loooong list of little DIY projects...installing floating shelves in the kitchen, painting the fireplace and replacing the dated floor tiles, adding additional lighting in the living room, painting the kitchen cabinets, opening up the entry, replacing the master bath tub with a walk in shower...and the list goes on!

So I had Matt prioritize...what is important to him and what would his budget allow. 

The first thing we did before he actually moved in was build floating shelves in his kitchen...I will share that a bit later!

The fireplace was second on the list for several reasons. It was a pretty big eye sore and it was a relatively easy and inexpensive fix.

I'm going to give Matt all the credit on this one...he did this ALL on his own.

The first thing he did was remove the old brass cover...he could have painted it and reused it but there really was no need. 

He scrubbed the brick with a metal brush to loosen all the gunk and then he used a shop vac to make sure it was free of any debris! He even scrubbed the inside of the fire box and sprayed it with a flat black heat resistant paint.

We don't know how well that will hold up but he has no plans to build a real wood fire. The fireplace is a masonry fireplace but it is 30 years old and the inspector said it had a few cracks in the masonry flue...so for now he will just stick with the little gas vent-free log set. Those little things don't put off a tremendous amount of heat! 

On to the painting. First he used oil based Kilz to prime all the brick....two coats. That was a booger....he used a 3/4" nap roller and a large paint brush to get into all the joint lines.

Then he painted it all with latex paint.

His original plan was to paint the rough cedar mantel but honestly, after the entire fireplace was painted, the mantel added a much-needed touch of warmth.

The dated 8x8 tile will eventually be replaced with travertine tile but for now this simple little project made a HUGE impact in this room! 

When he first moved in I had collected a bunch of "stuff" to decorate his walls and mantel...Sarah and I even put together a little gallery wall of "stuff" in his breakfast nook. He immediately nixed it...no "random stuff!" At first I was a bit hurt that he didn't seem to appreciate our efforts to create a homey look with all the "stuff" we had spent weeks hunting and gathering. 

Then I understood...he is just like me...he doesn't want "stuff" for the sake of having it...he wants to decorate with things that have meaning...things that have purpose.

Like me, he would rather live with bare walls and an empty mantel until he finds something that has a real value...things that make him happy.

I totally get it!

Great job Matt!!!