Easter garland....

I have mentioned many times my obsession with decorating for EVERY holiday.

Christmas was a given for years….

And of course fall….

Up until a few years ago, that was pretty much the extent of it…maybe a few knick knacks here and there for a few holidays like Valentine’s Day or Easter, but nothing major.

Then I “retired”…and decorating EVERYTHING for EVERY holiday has become my thing. A wreath on the porch, entry and kitchen, a tablescape, special candles, special dishes…every event. I even bought “Easter” champagne glasses this year and we don’t even drink! But they matched the Easter dinnerware so ……!

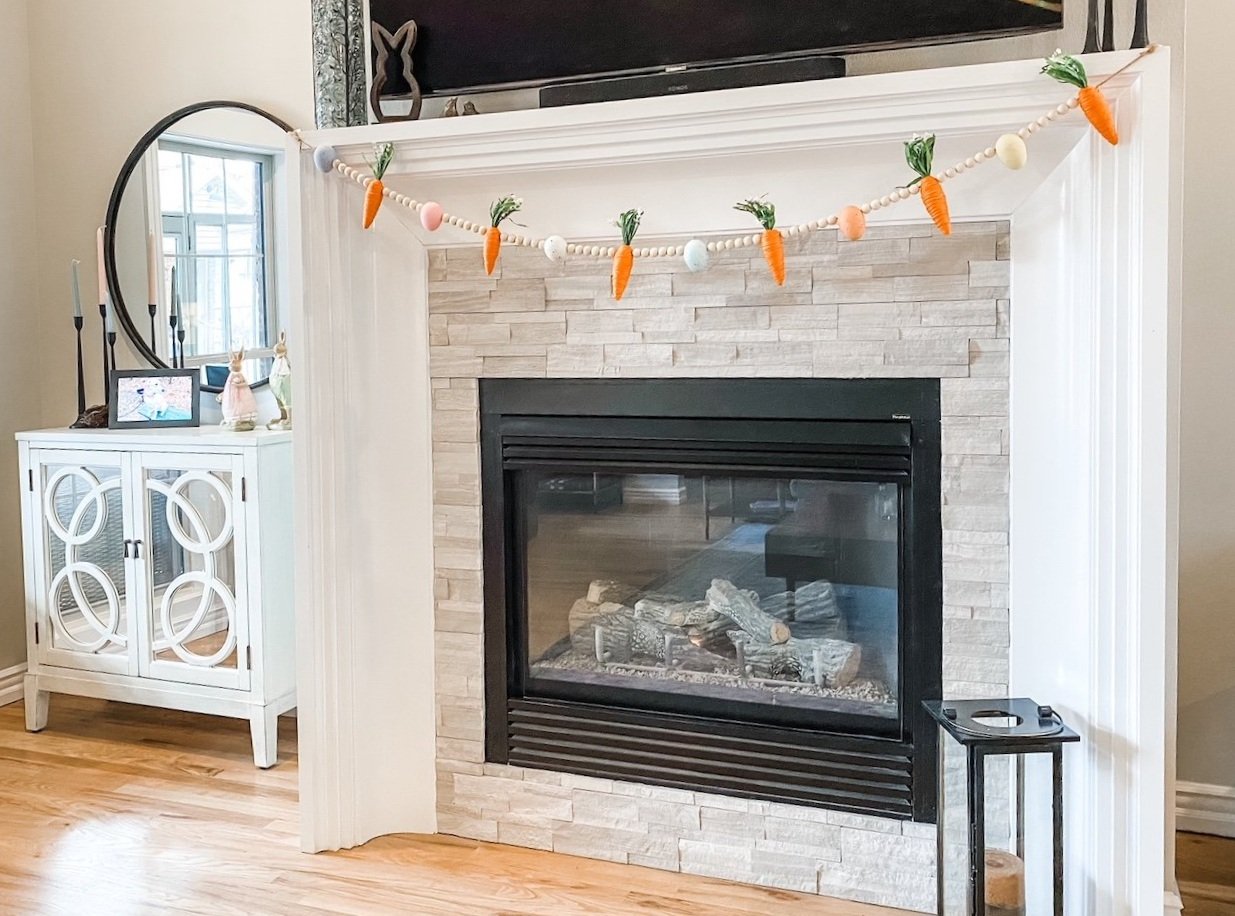
Anywho…I think the little holiday banners and garland I see on Pinterest are just too stinking cute. This year I decided I wanted an Easter garland…you know, with carrots and eggs….for the fireplace.

So I went searching.

First I ordered THIS carrot garland from Amazon.

Cute but it wasn’t really tripping my trigger.

So I went on Pinterest and started looking for a little inspiration.

All said and done, this was the final look I came up with.

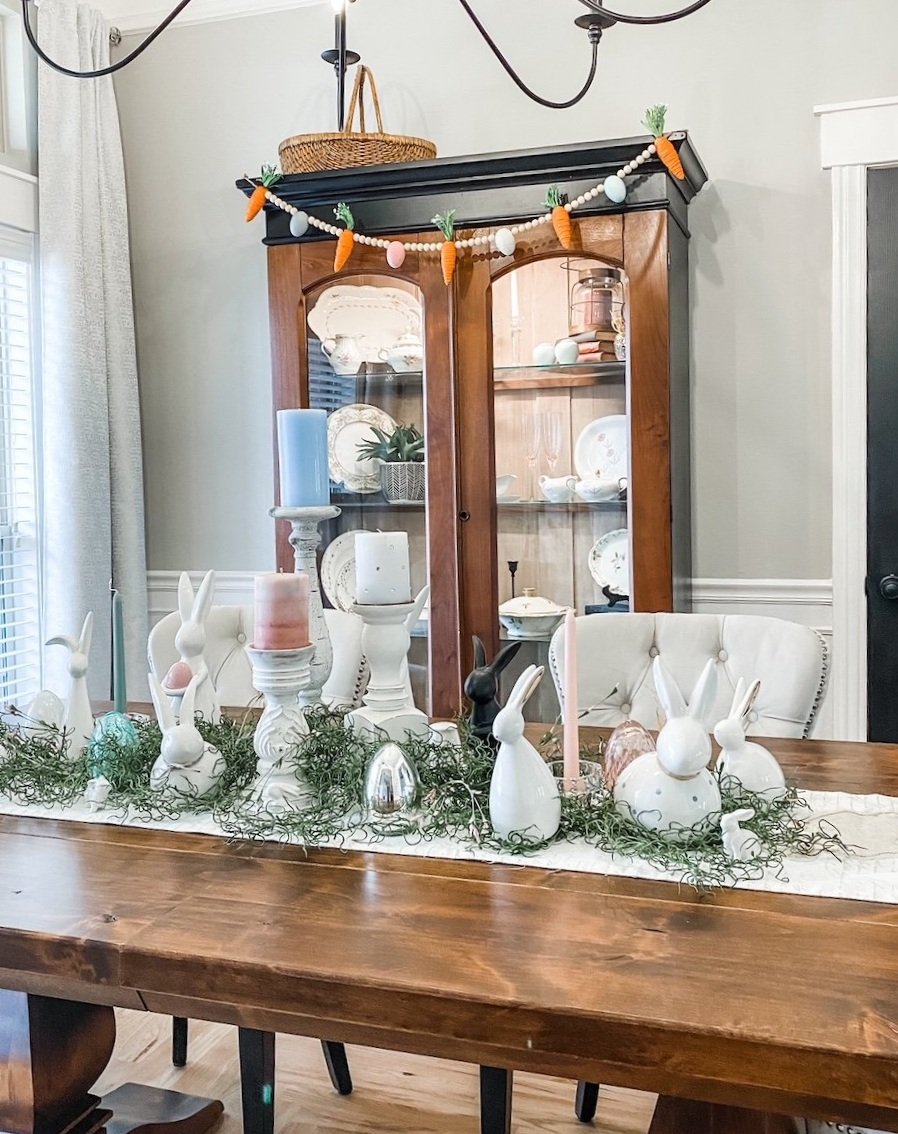
I had a little extra of every thing so I even made one for the dining room hutch.

This was super simple to make…the little carrots slid right off the jute they were on. I threaded the jute on a big upholstery needle I had on hand, then strung the beads, carrots and foam eggs onto the jute.

Garland…too cute!

As you can see, i have a thing for bunnies…just scattered around the house. Lots of pink, blue and green candles…spring wreaths…Easter pillows. Foam eggs here and there!

It may not be “the most wonderful time of the year” but fun none the less!


Comment
Share

The Olive Tree....

I recently decided to jump on a “decor bandwagon.”

Seems olive trees are all the rage right now. As I have mentioned before I have a few issues keeping indoor plants healthy so I have zero issues with breaking the “no fake plants” rule. If you are like me and have a black thumb for indoor plants, it is the only way to bring “life” into your home. (I kick butt when it comes to outdoor flower beds but this is where indoor plants come to die!)

Anywho, I have an olive wreath…but I was hesitant to spend a big chunk of money on a tree that 1) will go out of style in short order (think ficas, fiddle, etc) and 2) may or may not actually look decent.

So I did a little research and read reviews and landed on THIS tree on Etsy. I went with the 6’ tree. Pretty tree and very affordable but still seemed a tad short. I knew I was going to have to put it in a basket or pot so I decided to give it a little lift in the process.

I found a large pot at Lowe’s I like. To “pot” the tree I needed another smaller pot, some scrap cardboard, spray foam and decorative rocks….

I placed the small (and very inexpensive) pot upside down into the larger decorative pot…I secured it with a bit of hot glue just to keep it from moving around.

I hot glued the potted tree on top of the small pot. I used cut up card board around the small pot just to “fill in” the space and give a cardboard collar something to set on.

After all that I used spray foam to fill in and secure it all….

I use this spray foam for several reasons. First it puffs up pretty solid and kind of acts like a “glue” to hold everything super secure. Second, while it dries pretty hard on the top, it still is a foam and is easy to stick stuff in it if you want to…like for floral arrangements and such (I used it HERE for fall urns!) It is also relatively light weight so it fills these pots without adding a lot of weight like rocks would! It is also lightweight so it makes it easier to move the pot around!

Lastly…it is much cheaper than floral foam!

A few hints for using this stuff…it is super sticky…let it dry before you mess with it! If you get it somewhere you don’t want it, just let it dry well then scrape it off! (If you fail to take my advice and mess with it while it is wet, use mineral spirits to clean it up.)

It expands quite a bit so work in “layers”…let it cure well before you add more if needed. On this project I did two “layers” before I got it to the right height.

If you find that it is “too high” in spots, you can cut it with a serrated knife to trim it down after it has dried.

Since I was using black decorative rock, I sprayed the foam with black paint so it would blend in….

Then I just placed the rocks on top of the painted foam….

I like the overall height and look now. You have to “pot” these anyway, might as well add a little height to them.

I decided to put it in the corner of my breakfast room. If I want to move it to another spot, it is relatively light weight…not so much that it is a tipping hazard but not so heavy that it would be a pain to move.

You may notice I am already decked out for Easter…this little tree gave me the perfect spot for one of my newest Easter additions….

Next week I will share a bit more.

Until then….

Comment
Share