Another Christmas....

Ever year I feature my Christmas decor…every year I think not much has changed.

But it does change…a tad here and there.

Last year I shared a few little changes…same this year…a few things here and there.

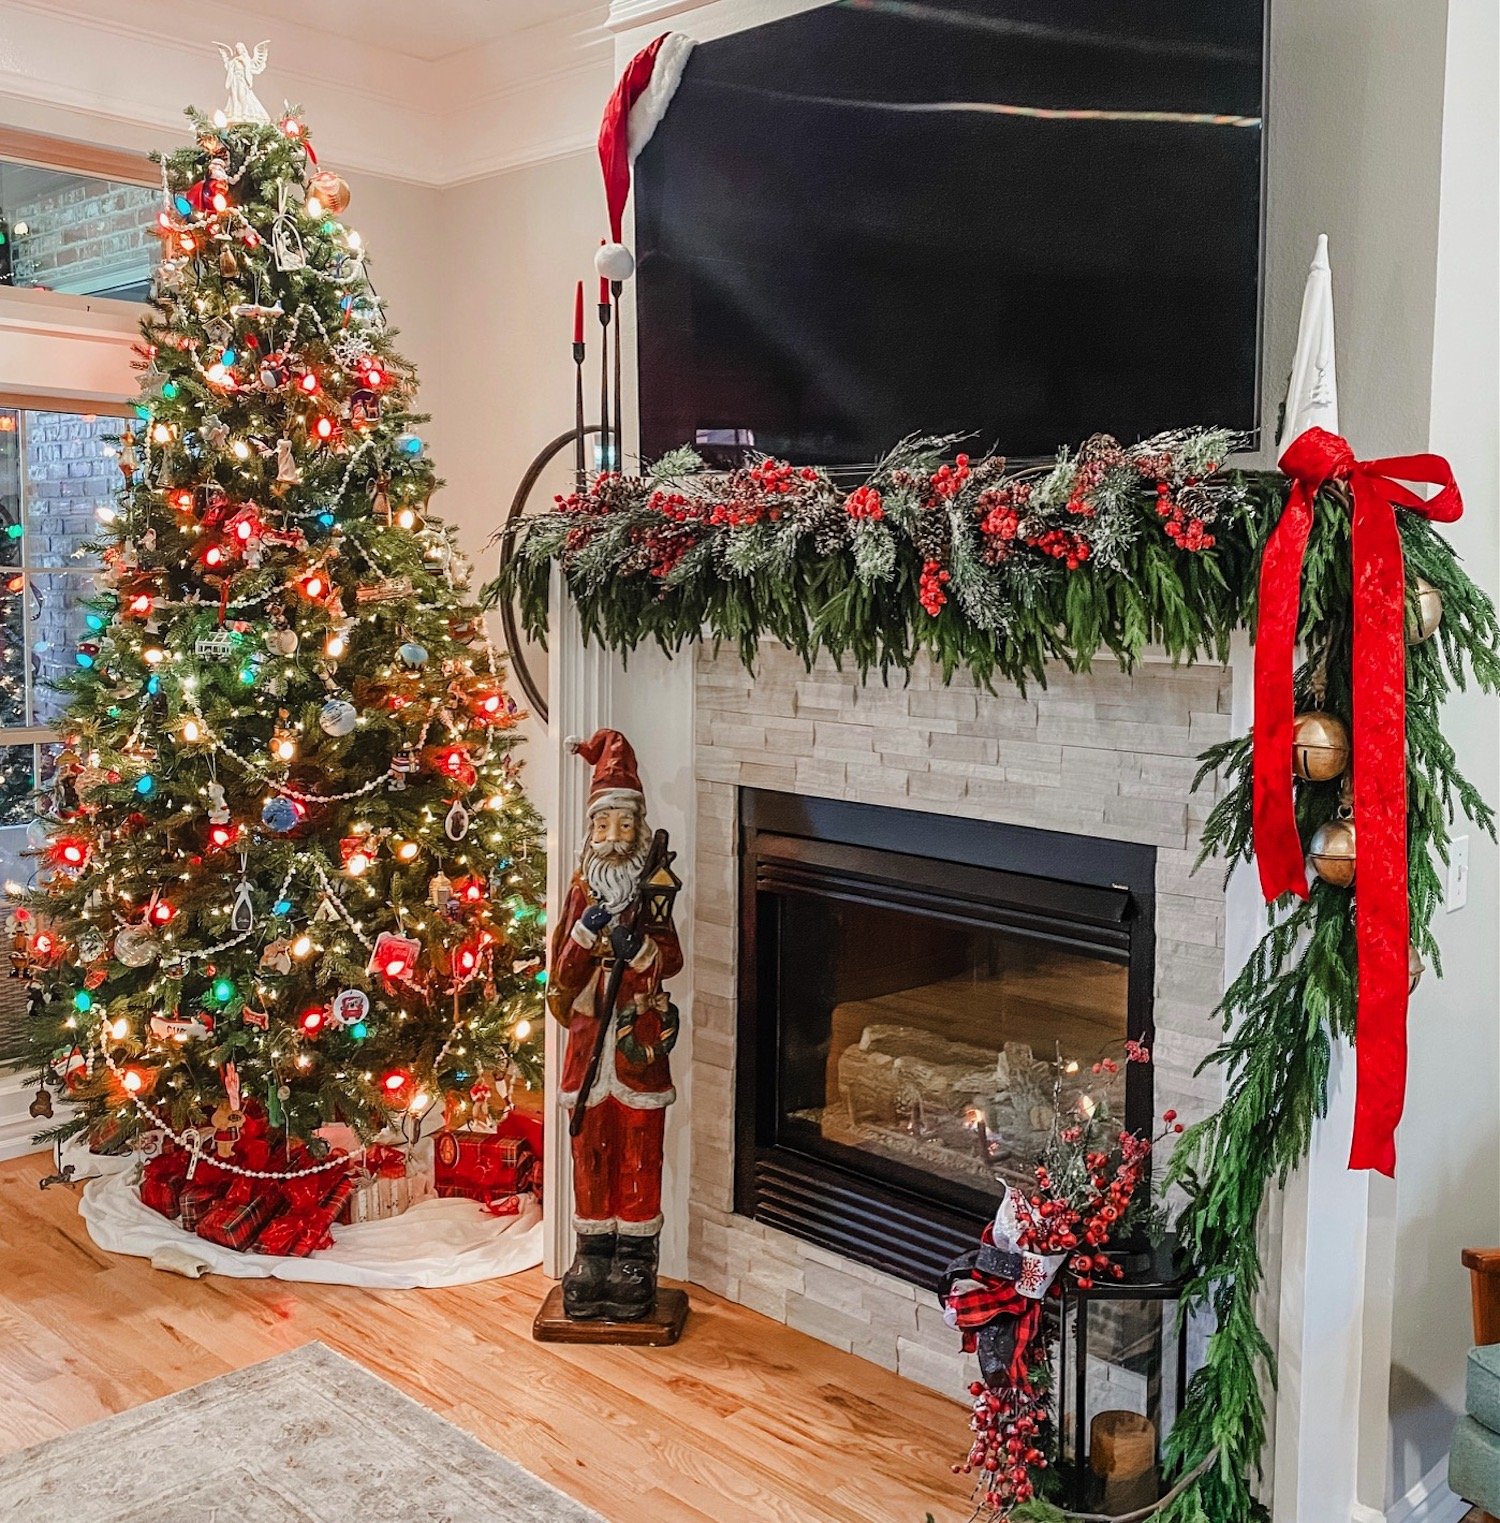
So what did I change this year? Probably the biggest change is the mantel decor….

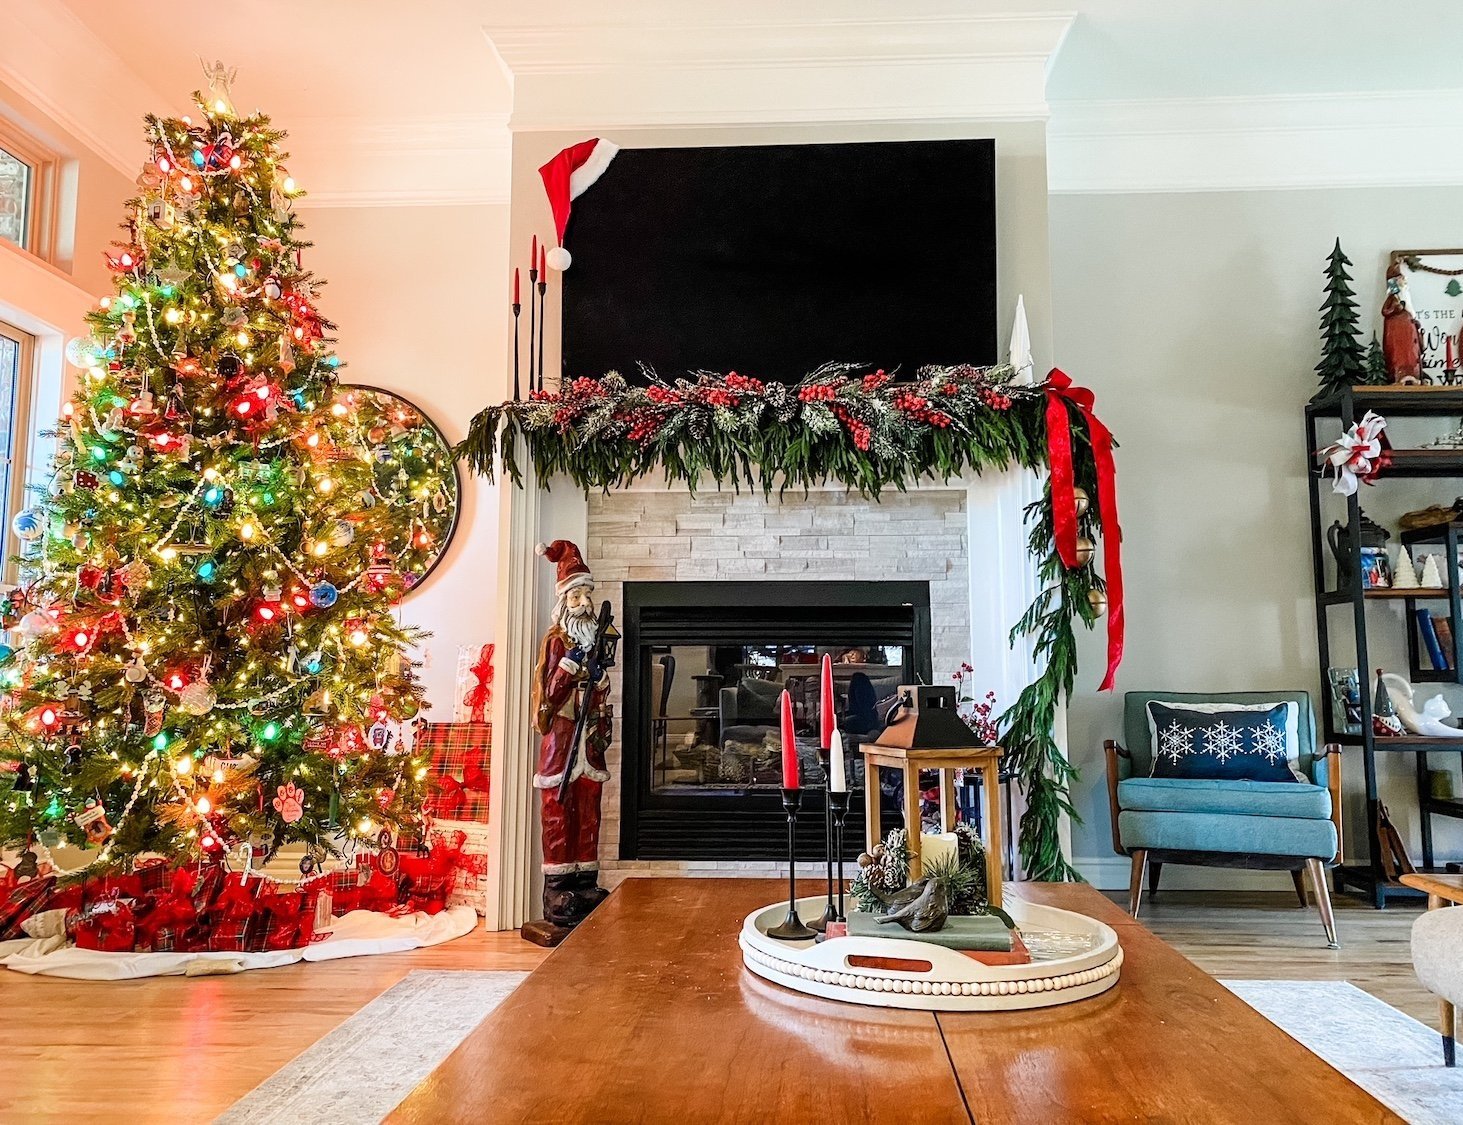
Last year THIS soft touch garland was ALL the rage…everyone wanted it. Which is why it was sold out and on Ebay for mega bucks. So I waited until after Christmas and bought it when it was back in stock. Problem was, I forgot I bought it, several times, and by the time I brought down all my Christmas decor I had 10 strands of it along with three soft touch wreaths I have NO idea what to do with!

No biggy…while it is a beautiful garland, you really have to layer it to get a good thickness. On my living room mantel I have 4 5’ strands and 1 15’ strand.

In the den I layered 5 5’ strands….

I used Command hooks about every 1-1 1'/2’ and floral wire to secure it.

I added a red velvet ribbon and these awesome bells….

I would love to link to the bells but as usual I have NO idea where I got them. I know I ordered them but from where? Not a clue!

Last year I layered the berry picks on the mantel…this year I layered them on top of the garland…just plain ole’ picks you can get at Hobby Lobby…four on each mantel.

Another new addition is this wood Santa….

I know WHO influenced me to buy it but have no idea WHERE he came from. I follow a couple of great ladies on Instagram…Deb and Danelle…and as influencers go they get me every time. Their style isn’t necessarily my style but they feature elements I love. Truthfully I think that is where the bell inspiration came from!

What drew me to this Santa was his “girth.” He’a skinny.

Okay, so here is the deal…ALL my Santas are skinny. I have NO idea what that is all about but it seems like every time I am drawn to a Santa he is on the anorexic side.

I kid you not.

Another element I added to my decor this year are the cabinets wreaths….

For several years I have wanted to add “mini” wreaths to my upper cabinets. I finally found am inspiration for what I wanted, but honestly, when I put it all together they came out a hair too big. Hardly “mini.”

So be it…maybe next year I’ll try again…for this year it is what it is….

The precious train!

This train was a gift from Brian’s grandfather to his dad in the 40’s…it was used then. Last year we displayed it above the dining room. This year we got it up and running and put it around the tree in the office.

We didn’t put it around the main tree in the living room because 1) too many gifts under that tree and 2) the SLIGHTEST bump derails it and the living room is a high traffic area.

Not sure Callum is really old enough to appreciate it but I sure love it!!!!

And now the pièce de résistance…the final tree in my life long dream of having a tree in every room!!!

For years I swore if I had the time AND the money, I would put a tree in every room of my house. Last year the goal was complete.

The master bedroom tree!

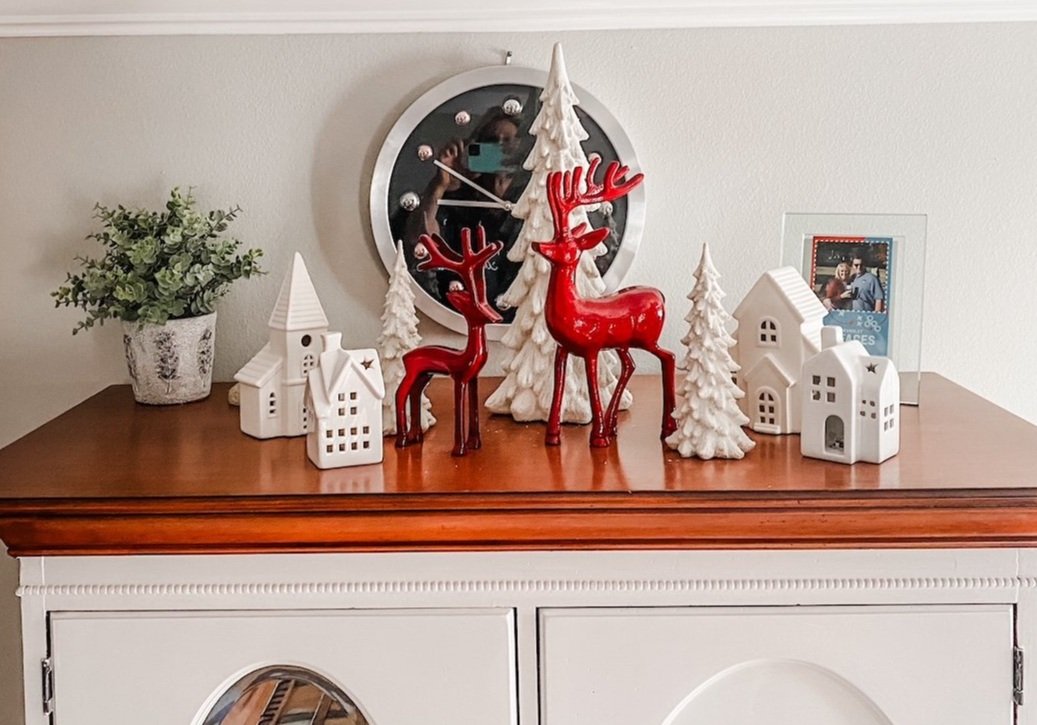
I added a few little knick knacks on the highboy. Just a few little things from Home Goods…nothing fancy.

The office….

The wreath is new…a tad over powering. Again, I tend to “go big” and then I’m not so thrilled with the result. Meh…next year I’ll change it!

The dining room….

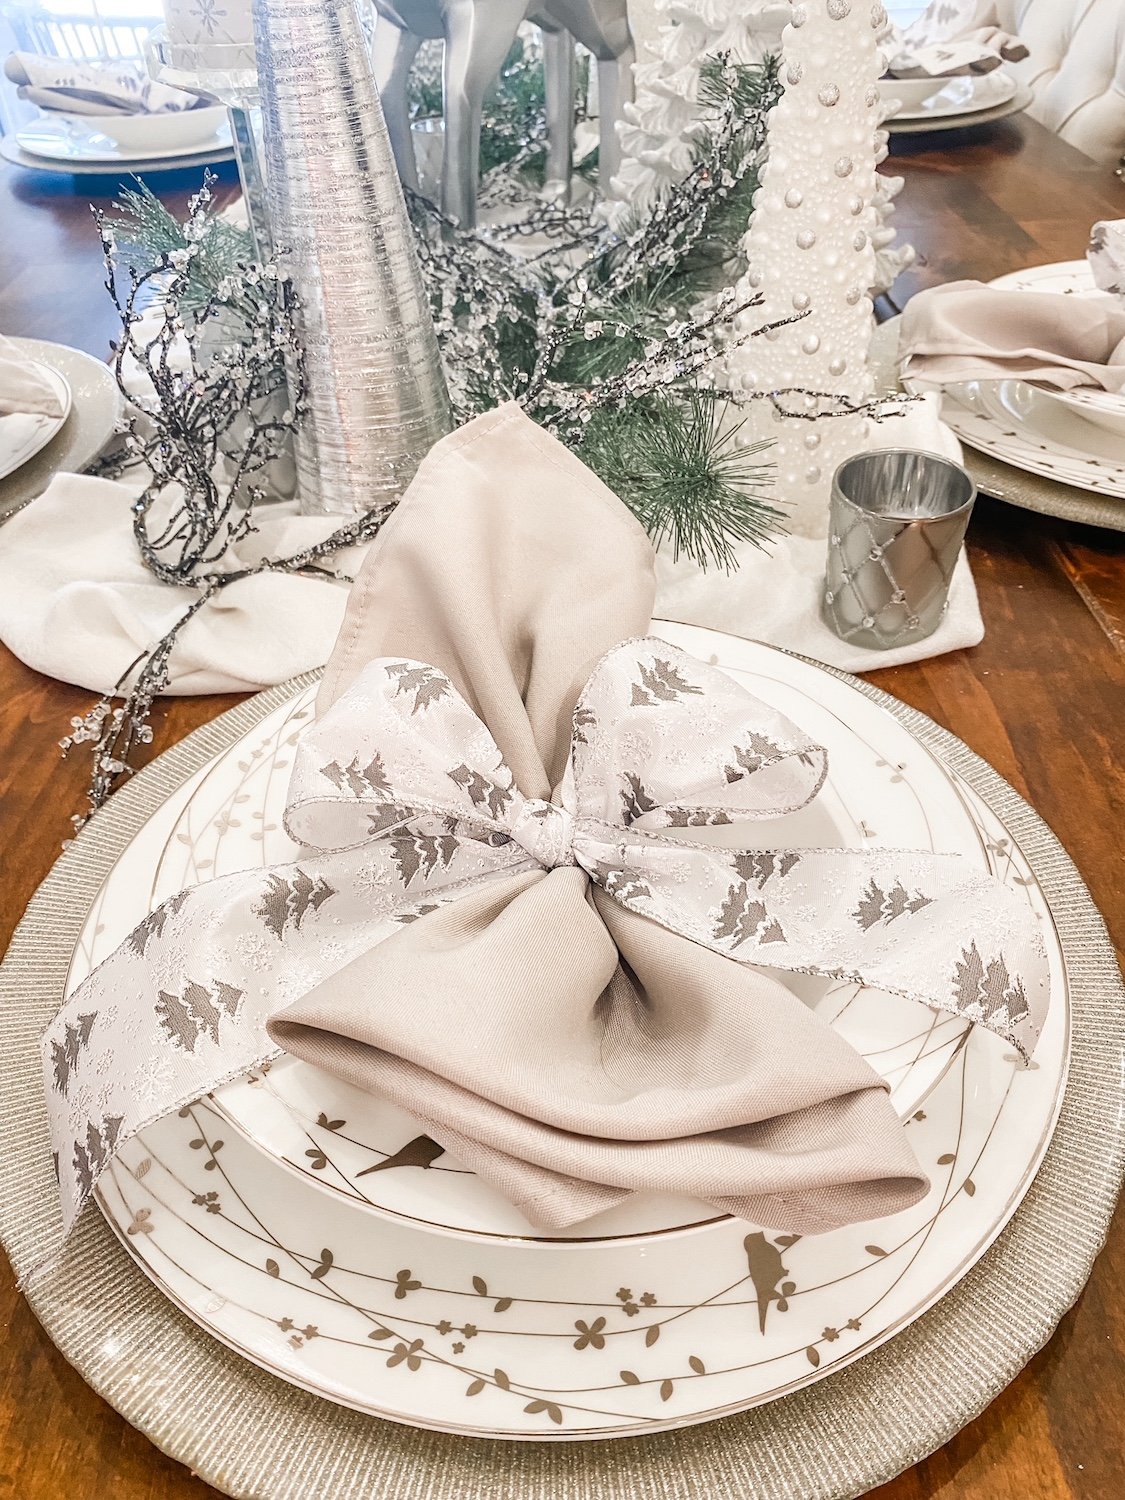
This is always one of my favorite rooms to decorate.. I love the neutrals even though I am drawn to all the vibrant holiday colors in the other rooms.

I like to keep the place settings out even though we don’t usually use these dishes because they have to be hand washed. Simple but elegant.

The sunroom….

I have shared this room before. It is my “Stewart plaid” room in honor of my “Stewart family.” Love it and I am always looking for more Stewart plaid elements to put in here. This year my sweet friend Carrie brought me this precious decoration from Italy!

The den…

The breakfast room….

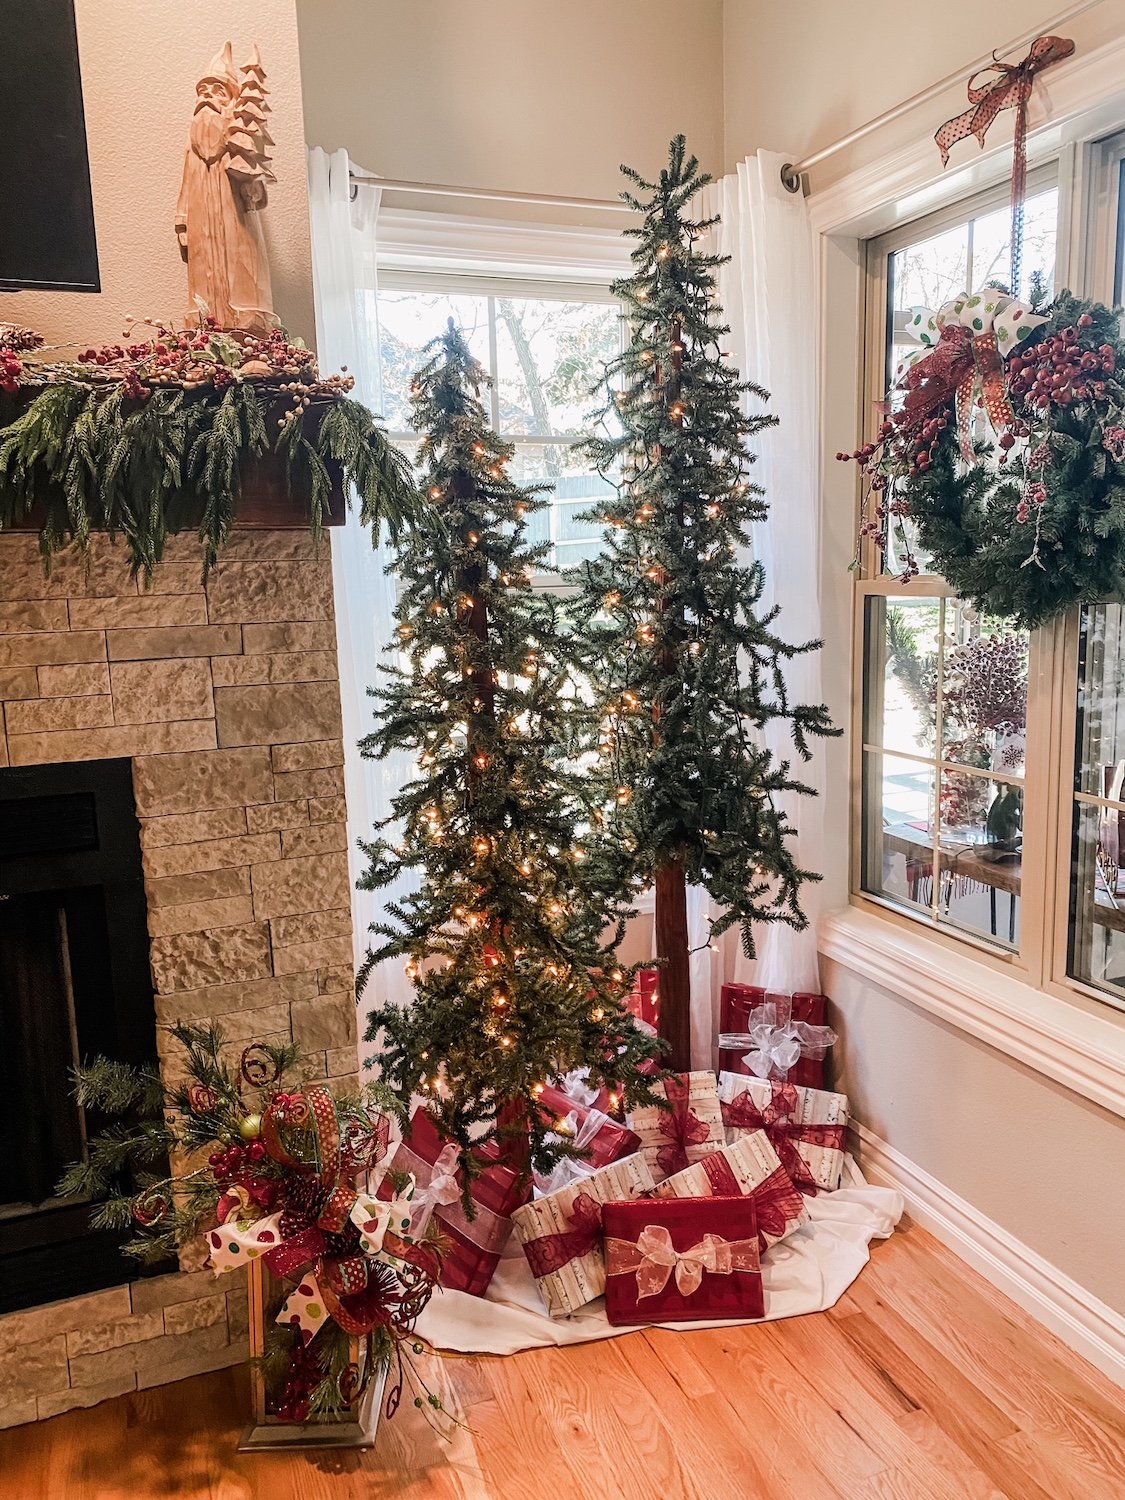
Not all the trees have decorations…some just have lights. That’s okay. They are still pretty and the four that are decorated take enough time!

The entry…

Little has changed here…added some little wooden trees and a Christmas sign on the trim…another PJ pillow. Love the view into the office!

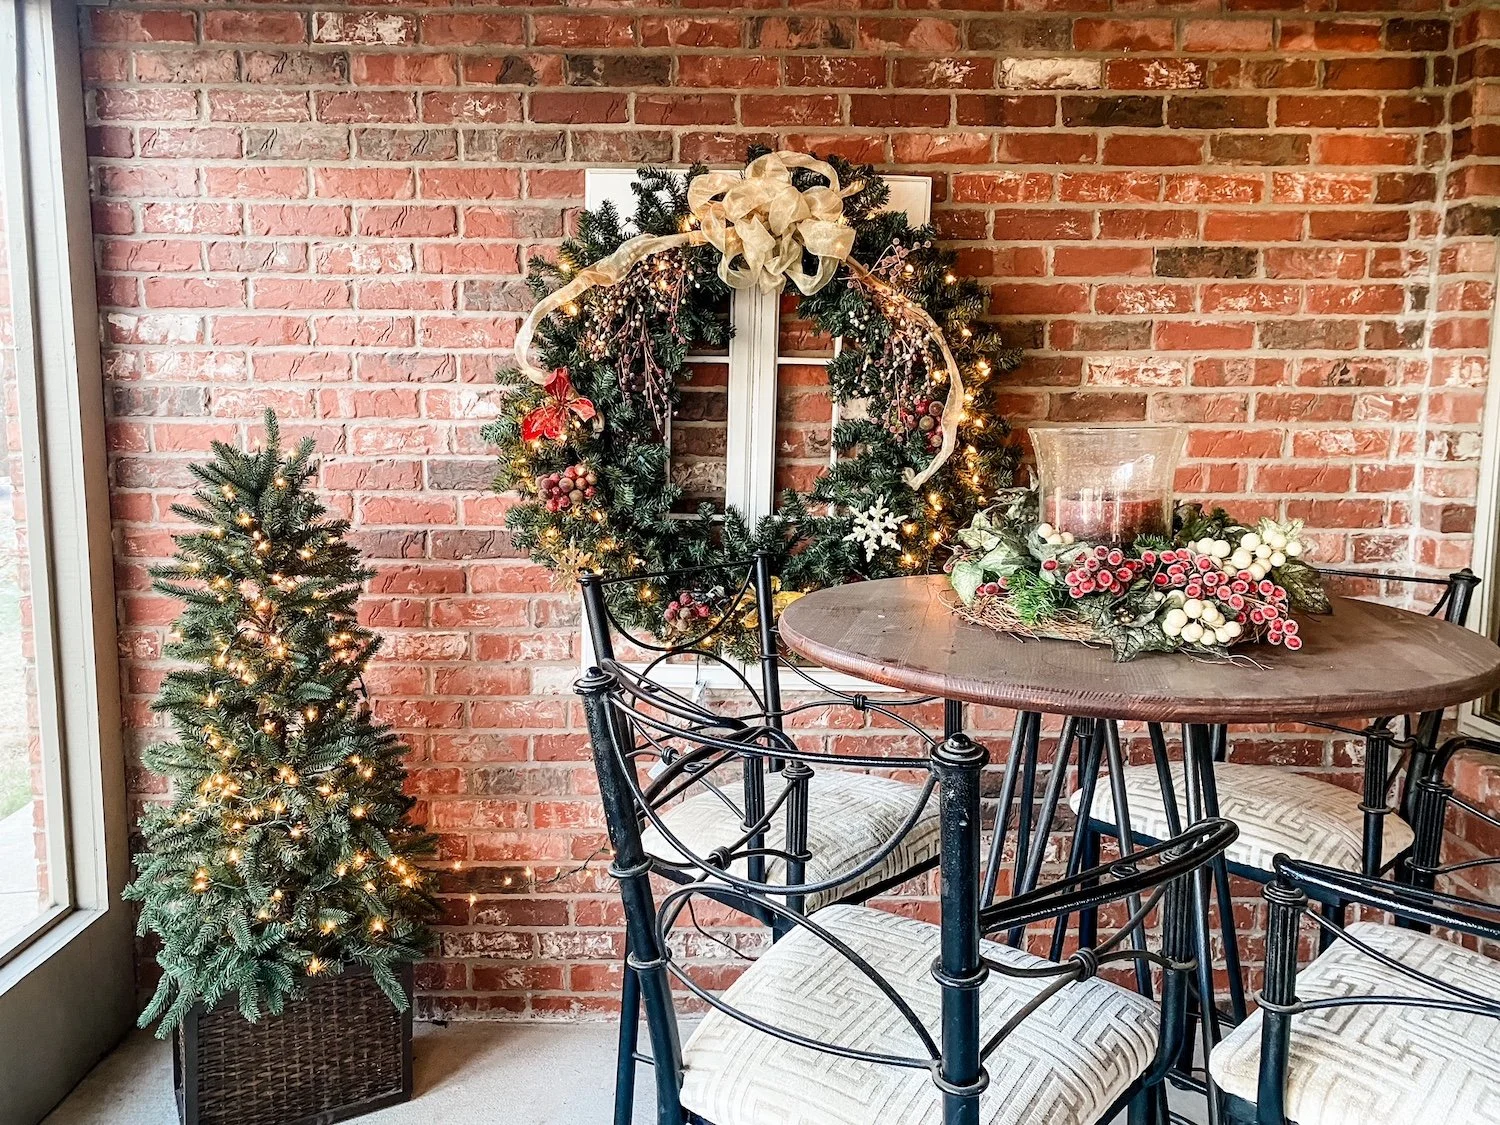
The screened porch….

And of course the main tree in the living room….

All these trees are connected to remotes (THIS is one I use and LOVE) and are turned on every day. I don’t even want to tell you what my electric bill is for the month of December. Suffice it to say it is cheaper to cool this 3500 s.f. house than to light it up…lol!!!

But I love it and as long as I am physically able to do it, I will. Then I may hire it done!

I love this holiday and it seems that year after year I do indeed add something new. I hope something I did will inspire you to add a little more to your home.

Changing dated can lights!

My wing is broken.

Poo.

It’s my elbow…it is still boogered. I am trying to “heal” it by resting it but after about a month I’m ready to give up and see what a ortho dude can do for me.

While “resting” I pretty much sit around and look for stuff to do.

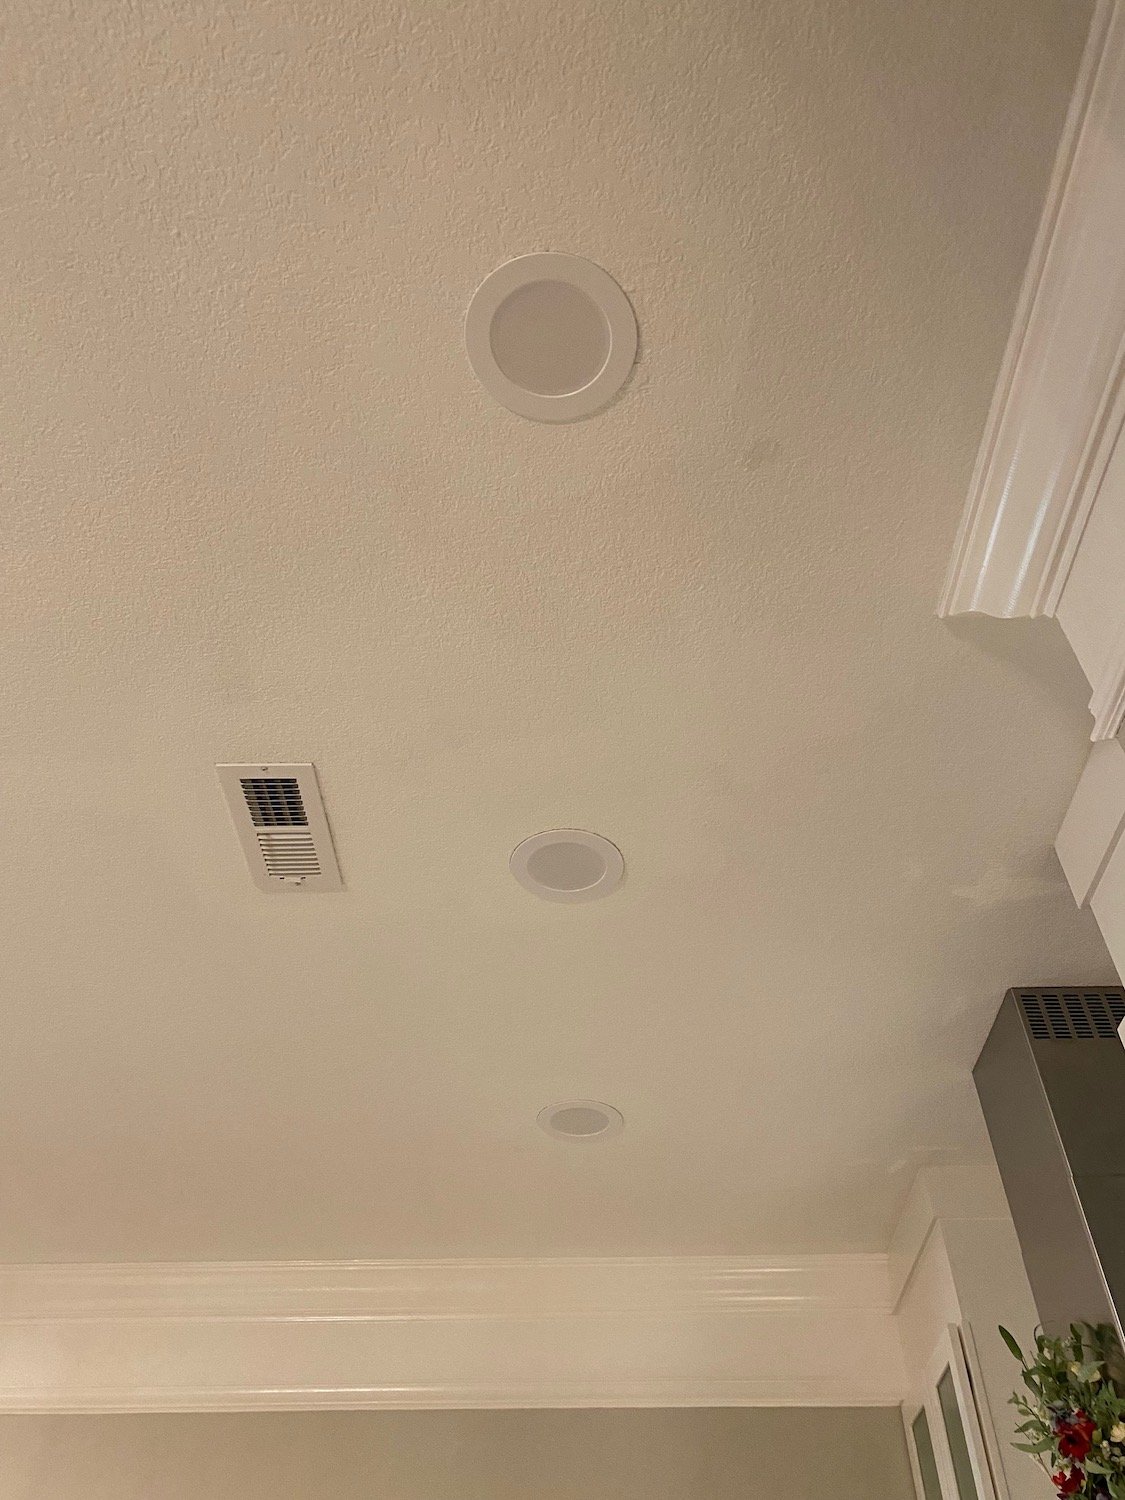
Laying on the couch, looking at the ceiling, I began to obsess about my dated can lights

SUPER simple fix and on a scale of 1-10 it is pretty much a 1.

This is what I have….

…an ugly old can light with a bulb. It had obviously been painted over when the prior owner painted the ceiling. I have five in the kitchen, two in the den, four in the living room, two in the bedroom and four in the bathroom…so yes, they annoy me. But truthfully only when I am laying on the couch or in the bed looking at the ceiling.

While they are “dated,” truth be told no one really pays attention to them except of course when a bulb goes out.

This is where I want to say that when “they” say an LED bulb lasts 10 years, “they” lie.

Beside the point…point is, it is cheap and easy to replace these “dated” fixtures.

So off to Lowes I went and THIS is what I found….

When I say it was easy to replace, I am not kidding. The hardest part was climbing up and down the ladder. Just remove the existing bulb and trim piece. The trim piece is usually held in place by little springs or pinch clips.

Then just screw the new fixture into the socket (like a light bulb) then slip the little pinch clips into the existing brackets on the side of the can. Simple!!!!

The fixture has five different light settings on the back…from bright white to soft “yellowish.” I set all my living space lights on a soft setting and the three in my kitchen on a brighter white for task lighting. Perfect.

TIP! If one of these eventually goes out you can’t just replace a bulb. My suggestion is to get an extra 1-2 in case one goes out in the future and this style or brand is no longer available…that way you won’t have to replace multiples if one goes out!

Again, one of the simplest and most impactful DIY projects you can do. Don’t know why I haven’t done this in the last three years.

Oh, yeah, I know why. Rarely do I lay on the couch and look at my ceiling lights.

"Mud room" bench....

This is a project you see a lot on Pinterest and it is a super simple and functional use of normally wasted space.

Case in point…my daughter-in-law’s sister’s (Laura) house….

This room is next to her kitchen…designed to be the “breakfast room” space but is really used as a thoroughfare from the garage into the house and has become a general “drop zone catch all. “ With two small kiddos, it could be the perfect “craft room” and drop zone but as you can see there was no form or functionality to the space.

So she sent me this “inspiration” photo.

A functional and organized space for shoes, backpacks, coats, etc.

Heck, I can build that!

She likes the board and batten look of my entry more than the “panelling” look in her inspiration photo. No biggy. Remember what I have said before…the key to any project is first, your inspiration…..second, your plan and third, the execution.

So we had the inspiration…just a few tweeks and we had a plan…

Now it was time to execute!

I have said before I am not a “how to” kinda person…I am a “YOU CAN DO IT” kinda person. So find a tutorial for installing board and batten and building a bench that makes sense to you and works for your space.

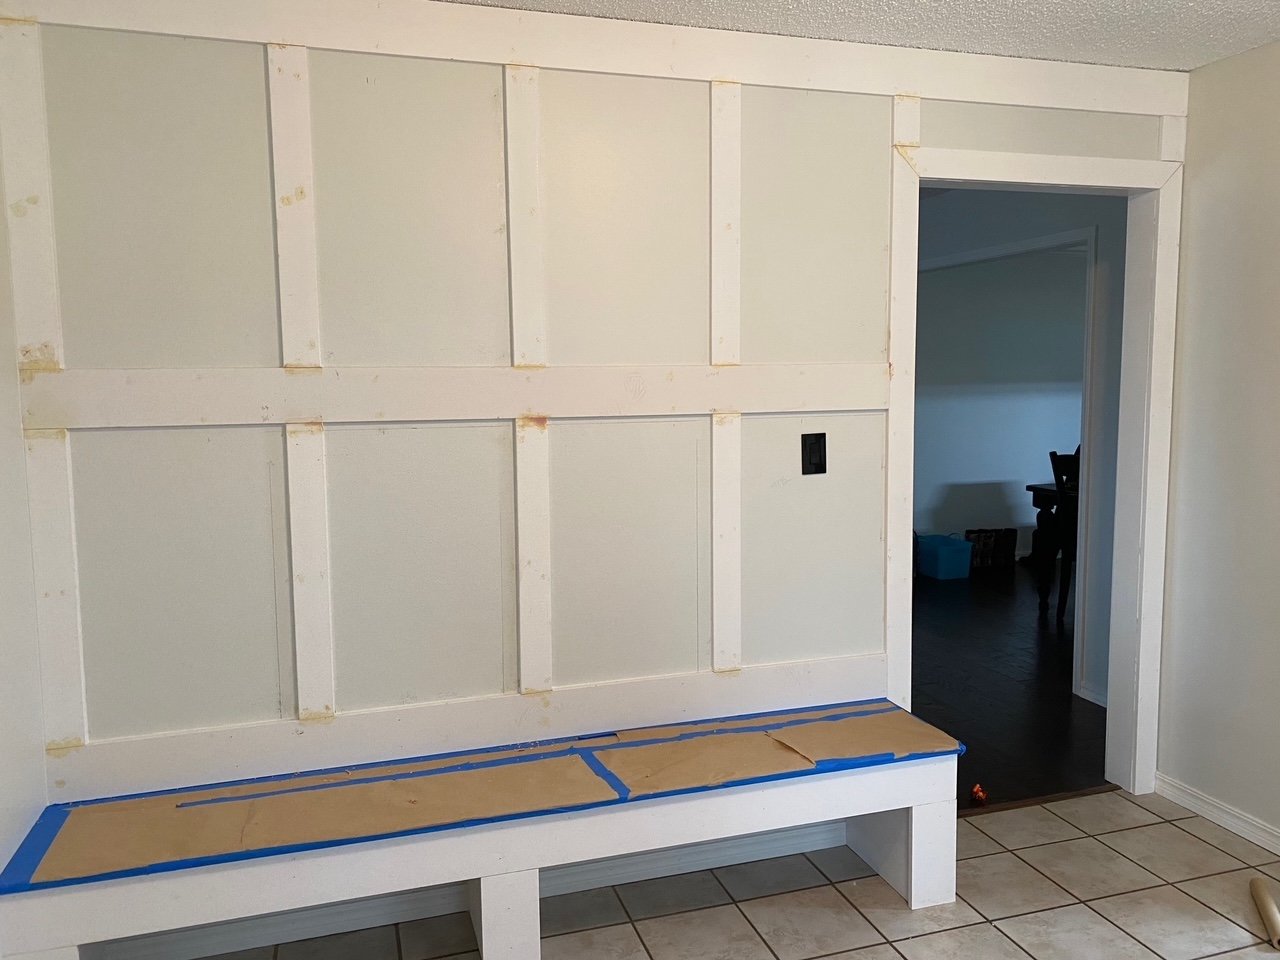
First up…the bench. I had to off center the middle support because of an outlet but it was pretty basic stuff…2x4s, construction mastic and wood screws. Again, find a tutorial that makes sense to you! (Even I look at tutorials sometimes and say WTH!)

I build the legs of the bench out of 2x4s then clad them with plywood. Simple.

I used 1x6 pre-primed pine to trim out the front of the bench. MDF will “swell” if it gets wet so you can use it on wall treatments but I highly recommend using a solid wood product on anything adjacent to the floor.

I always use pre-primed or prime and sand before I install to avoid having to prime and sand inside the house!

I used 3 1x6 lengths of oak for the bench top. You can also use pine…MUCH cheaper but Laura liked the look of the oak. I used a rooter on the edges, just a hair, so when I joined them together they look more “plankish” than solid.

I built the bench top, using a biscuit joiner, in the garage… no stain just 3 coats of polycrylic, and then installed it before I moved on to the wall treatment.

For the board and batten wall treatment I used preprimed MDF.

I usually install the horizontal pieces first…making sure they are perfectly level. Then I go back and add the vertical boards. Putty all the nail holes and seams and make sure you caulk EVERY joint and crack…sand it all super smooth.

REMEMBER if you can feel it you are going to see it after paint…so sand and feel with your hands! Sometimes it can take 2-3 coats of joint filler to get good coverage.

We covered the wood bench top and painted with a brush and roller…three coats!

GORG!!!!

We added cute little hooks Laura picked out!

I was still loading tools and the littlest (3 y.o.) was already claiming all the hooks for his back pack and Hulk costume and mask! Probably should have added more hooks…lol!

Props to Laura…I really believe the vision and inspiration are the most important keys to any successful DIY project.

She did good and I have no doubt this little area will now serve her family well!

Christmas! It really is the most wonderful time of the year!

I almost didn’t do a Christmas post this year because I thought not much has changed.

But every year I add more and more to this house.

A few weeks ago I shared the new “black and white” tree in my office (I shared the accent wall and office makeover HERE)….

I love this tree and this year I wrapped all our Christmas eve gifts (shhhh…it’s pajamas) with white paper and black and gold ribbons to match the tree….LOVE!

Next year this tree will play an important role because we added a VERY special element to our Christmas decor.

In the 40s, Brian’s grandad (his Papa) gave his dad a used cast iron train set for Christmas. Brian remembers it going around his Papa and Grammy’s Christmas tree every year.

This year Brian got it from his dad. It is magnificent!

This year we are displaying it above the dining room with some miniature Christmas knick knacks and little fairy lights.

We can’t put it around the main tree in our living room because of all the gifts but next year we will put it around the tree in the office.

Why….because next year we will have a 10 month old grandson who will absolutely love it…it goes around the tracks and even blows steam!

When I began to look around I realized how much has indeed changed because of all the little projects I have completed this past year.

The dining room…I added wainscoting and the china display cabinet and that changed everything up a tad!

No major projects in the entry this year but I added a tartan holiday rug from Ruggable!

So far I really love this rug and am considering getting one for the living room!

The breakfast room…this year I added the board and batten and a new china hutch….

It didn’t change up things too terribly much…just added a few touches to the hutch, moved the tree that use to be in the corner onto the screened porch and replaced it with the tree that was in the office last year!

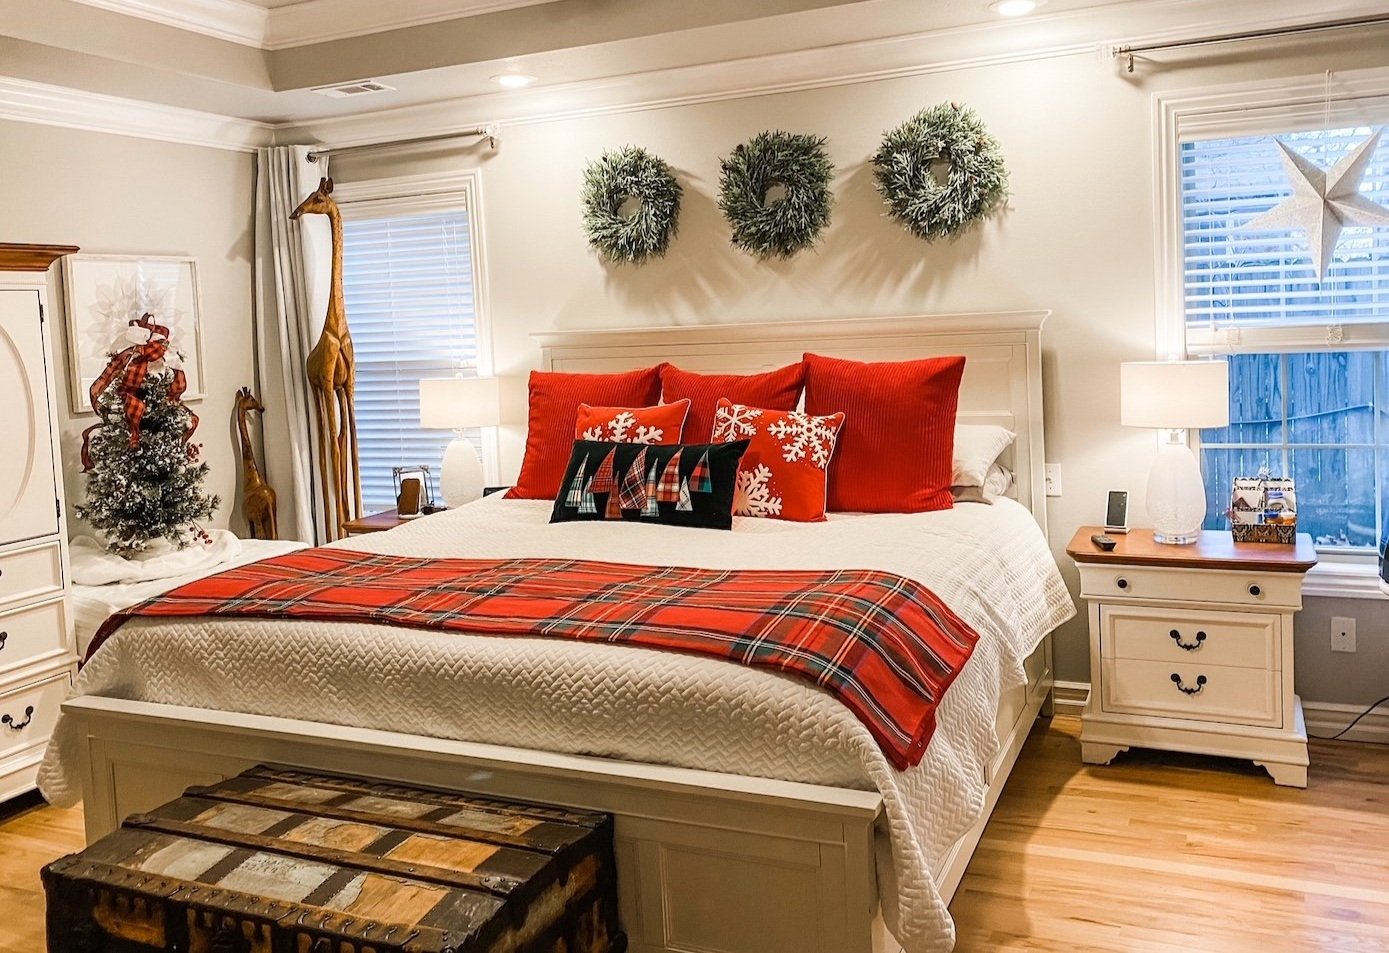
My master bedroom….

I’ve never decorated the master bedroom for the holidays but this year was kind of a fluke. I ordered a ton of stuff for the guest room earlier this year. My oldest son is currently staying with us while he gets his pilot license so there is really no reason to deck it for the holiday. So I decided to use all the holiday froo-froo for my bedroom.

I LOVE IT!!!

The green pillow with the Christmas trees is one I made with the scraps from THIS never ending quilt project. (To date I have made 8 quilts, two pillow covers and one throw pillow)

My friend brought me this amazing star from Germany…I can’t wait to add a light to it!

The little tree is the one I had in the guest room last year. Next year when the big dog kennel is finally gone I am going to put up a bigger tree. Similar to the one in the office…only red and white! (I am slowly working my way to my dream of having a Christmas tree in every room!!!)

Decorating this room was a no brainer since, like the guest bath and office, you see it from the entry….

Not sure why it took me three years to do it!

The living room…earlier this year I changed out the fireplace surround. It didn’t make a huge difference, but this year I decided to add garland to the fireplace mantels. I desperately wanted the soft touch Norfolk pine that is all the rage but by the time I knew I wanted it, it was all sold out.

I have to be careful about the height and placement of any mantel decor because of the televisions (one of the few “design concessions” I gave Brian) .So I settled for some pretty frosted berry picks…four laid out in a row. I added them to the living room and den fireplace mantels.

I left the mirror in the living room and I love how it reflects the tree!

Truthfully, I think I like the color and texture of the picks on the mantels better than I would plain green garland.

Great example of doing what you love rather than what Pinterest tells you to do!

So simple and so pretty.

Last year I shared how to make these little door signs…still think they are cute as a bugs ear! (the one on the left really is my wrapping room)

I did change all the other door wreaths. It really isn’t hard. Candle wreaths with a little ribbon…simple and inexpensive but very pretty throughout the house!

The kitchen…the only change in there this year was the pantry. Humungus difference for me for holiday baking but didn’t change the holiday decor!

I didn’t change much in the “Stewart plaid” all season room. I found this darling Stewart plaid top hat topper in a Christmas shop in Breckenridge and had to have it!

Little has changed outside…I did finish a TON of projects this year but nothing that really affects decorating for the holidays! (Check out the outdoor swing pergola I featured HERE)

I scattered a few things in my laundry room…nothing earth shattering.

So, while there doesn’t seem to be a lot of changes, additions and tweeks, there are.

I hope you and your family have a WONDERFUL holiday!!!!

Fall tablescape...

I have some hard fast rules for decorating for the holidays. Fall decor goes up the week before we leave for vacation…usually the last week in September. Christmas goes up the weekend after Thanksgiving.

It’s the rules.

This past week I broke the rules.

It wasn’t really my fault. I got an At Home magazine in the mail. It had a really pretty picture of a fall tablescape and I was compelled to immediately go buy MORE fall stuff for my formal dining room. I blame it all on their devious advertising.

I went upstairs and dug around in my stash of heirloom china. I also pulled out the fall box marked “formal dining” …then I decorated my dining room.

I used my china and added little glass pumpkins, some amber stemless wine glasses and green place mats from At Home and straw placemats from Amazon

I picked up a few fall table runners but they didn’t make the cut.

i stuck a few little fall doo-dads in the china cabinet…

I made the center piece last year…fall candles, pumpkins, fall picks and some cotton stems in a round tray.

LOVE!

(You can check our the china cabinet makeover HERE!)

My son insists we use this room during our Sunday dinners. Since this china has to be hand washed, I have no doubt it won’t actually get used…we will just have to sit in the other dining room or move this fancy stuff out of the way…but it sure looks pretty.

For those who advocate using the fine china for every day use and not just for “formal”….you obviously have never had to hand wash dishes after feeding your entire family.

Right now we are having to hand wash everything anyway…our TWO YEAR OLD dishwasher isn’t working. I have no idea why…I’ve googled…could be one of four things. But after having to buy a new washing machine because we couldn’t get a simple part, we decided we would just buy a new dishwasher rather than pay $150 to have a repair main come out and tell us we can’t get a part we need. A brand new one was installed Tuesday.

So back to fall decorating. I love it and every year as soon as the temp drops below 80 degrees, I get the itch to start digging out the pumpkins and fall wreaths. But like every year, the temps climbed back into the 90s this week so now I haven the dining room decked out but the rest will have to wait a few more weeks.

That is okay! I will just enjoy the glorious summer flowers! And they are glorious this year!!

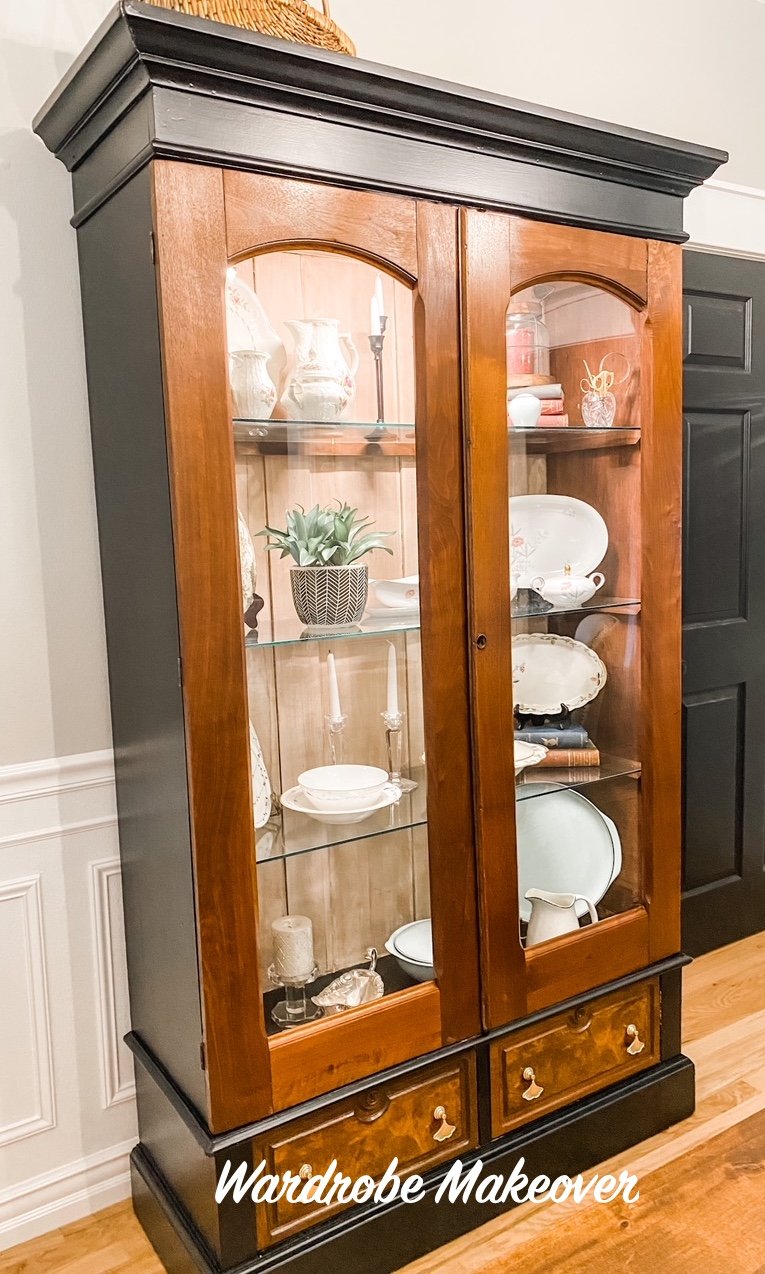
The wardrobe reveal....

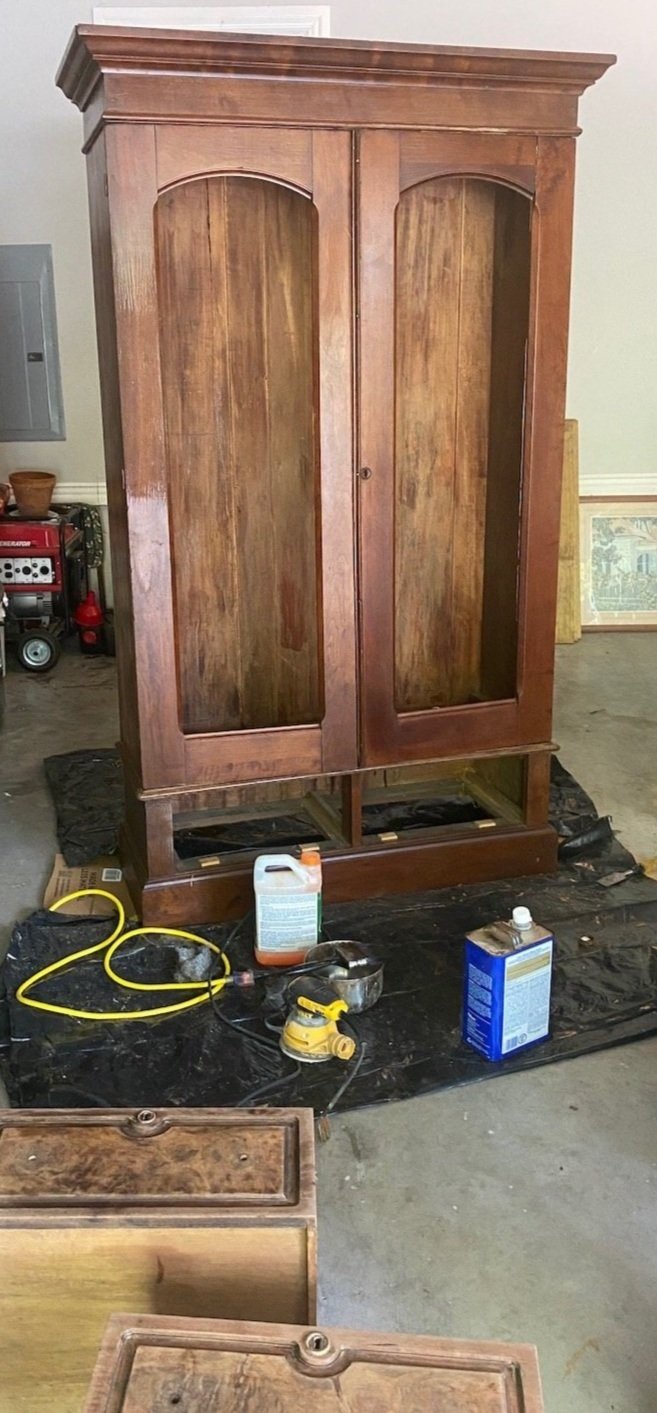
Last week I shared the wardrobe cabinet I planned to refinish and convert to a display cabinet….HERE.

Definitely lacking in soooo may respects. But I had a pretty good idea of what I wanted to do with it.

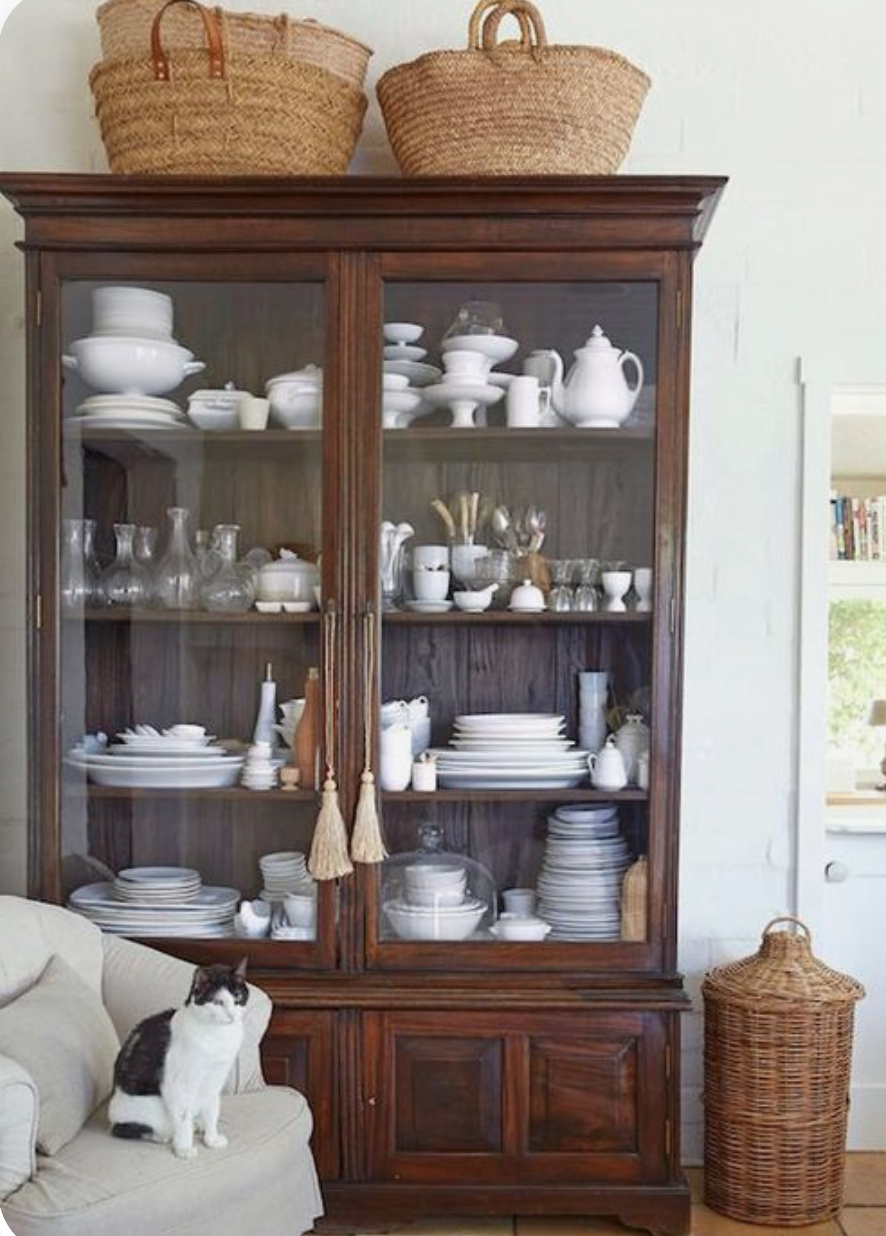
These “inspiration” pictures have been on my computer for over a year, just waiting on the perfect piece to transform!

The last one is probably my favorite…a Pinterest find. It was the one that influenced me the most, as you will see.

So the plan…remove the panels in the door and add glass. Remove all the shelves and add glass shelving. Lighten the back of the inside. Strip the doors and drawers and apply tung oil. Paint the rest of the outside of the cabinet black. Replace the hardware. Add a light.

So of course the first step is to deconstruct and then begin the stripping process on the doors, drawers and inside back panel.

What a chore!!!! I think someone, at some point, had applied at least 20 coats of poly. The 1/2 acetone, 1/2 lacquer thinner process I shared HERE, wasn’t cutting it. I applied Citristrip and wrapped everything in plastic wrap…that seemed to do the trick for 80% of the finish…then I was able to sand off the rest since this was mostly solid, then clean it up with the 1/2 and 1/2 mixture. Remember, you don’t want to vigorously sand veneer because it can be super thin and you can end up sanding right through it. I started with an 80 grit then finished with a 220 grit. Then I hand sanded it with 220 to get it butter smooth.

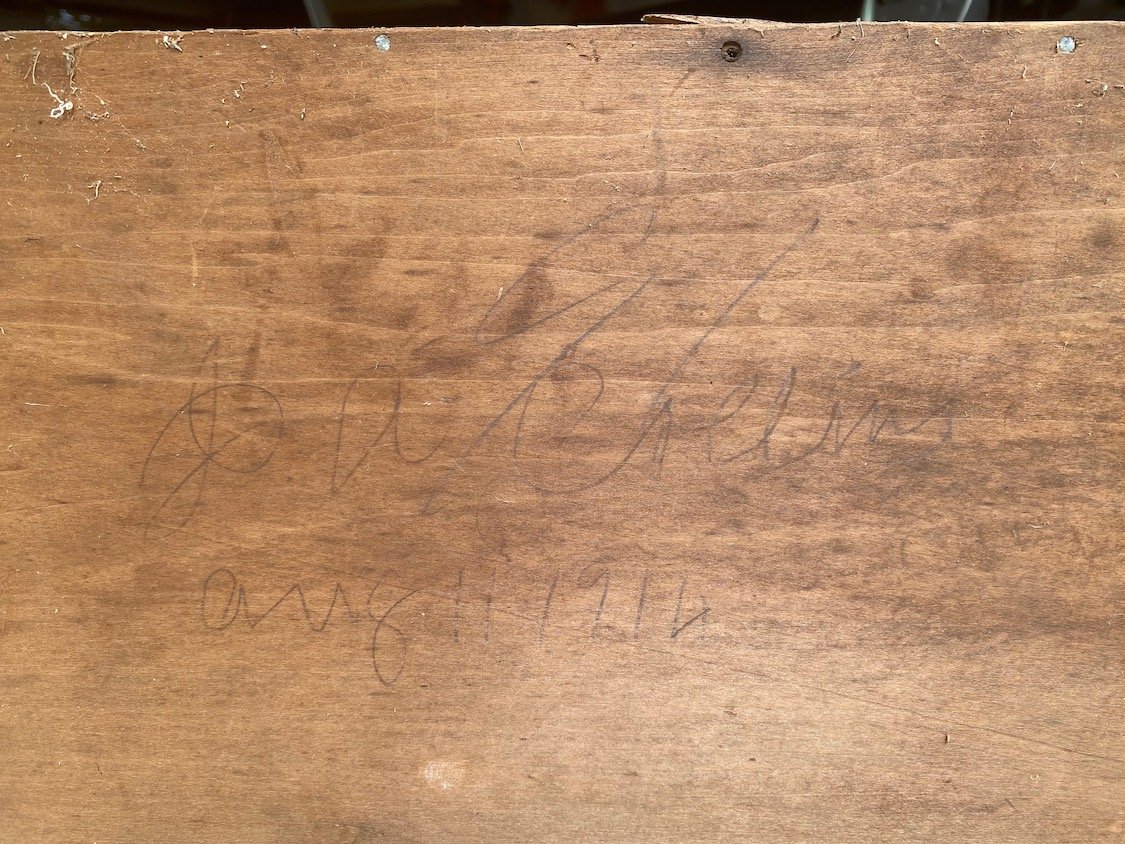
I knew this piece was old (which is why I know the poly was NOT the original finish) and that was confirmed when I checked out the underside of one of the drawers.

It was signed and dated…most likely by the person who constructed it…August 11, 1914…wow!

The other thing I discovered was the mortise and tenon peg joint. So super cool. Normally drawers are constructed using dovetail joints. This was unusual to find, but probably not unusual for the times.

I removed the doors to make it easier to work on the inside as well as make it easier to strip them. Remember to ALWAYS reenforce screw holes when you remove the screws. Not hard at all. Just take a match stick, dip it in wood glue, then insert the stick in the hole and break it off.

This will ensure that when you go to reinsert the screw, it won’t be loose or “wonky.”

I stripped the inside back panel then sanded it down. I tried lightening it with oxalic acid but it still seemed a tad to dark and a bit yellow. So I ended up applying a whitewash. Just a little white paint mixed with water, brush it on, wipe it off…like a stain. I can still see the character and grain of the wood but it lightens the interior considerably.

There was a tiny bit of veneer on the base of the cabinet and one side was in pretty rough shape. My original plan was to remove all the old veneer and apply a new piece. I planned to paint the outside of the cabinet so it didn’t matter that it would be different than the other side.

Problem was, when I went to remove the loose veneer, some of it was SUPER stuck…as in it was NOT coming off.

Soooo, punt.

I scraped off all that I could then I used wood filler to get a smooth surface.

This picture is after the 1st coat.

The whole process took a lot of time and patience. Fill, let it dry, sand…apply some more, let it dry, sand. It probably took 3-4 applications to get the side perfectly smooth and ready for paint.

REMEMBER, paint will NOT cover poorly patched or repaired areas…if anything it will highlight it. So take your time and do it right!

After patching, puttying and caulking, I primed the entire outside of the cabinet with primer, sanded it smooth with 220 grit paper and then wiped it down with a tack cloth.

I then spay painted it with a flat black paint. Remember, light coats…2-3.

The paint I used SAID it was primer and paint in one. As you may know, I do not trust that and will ALWAYS apply a good primer before paint…always.

I stripped the drawers and doors (using this process) and I used my new favorite tung oil finish to seal them.

I added new shelving support using some leftover walnut I had from my office feature wall project. I wanted good solid support since it would be holding glass shelves and china…glue and nails!

(This is solid natural walnut…no stain…just an oil finish!)

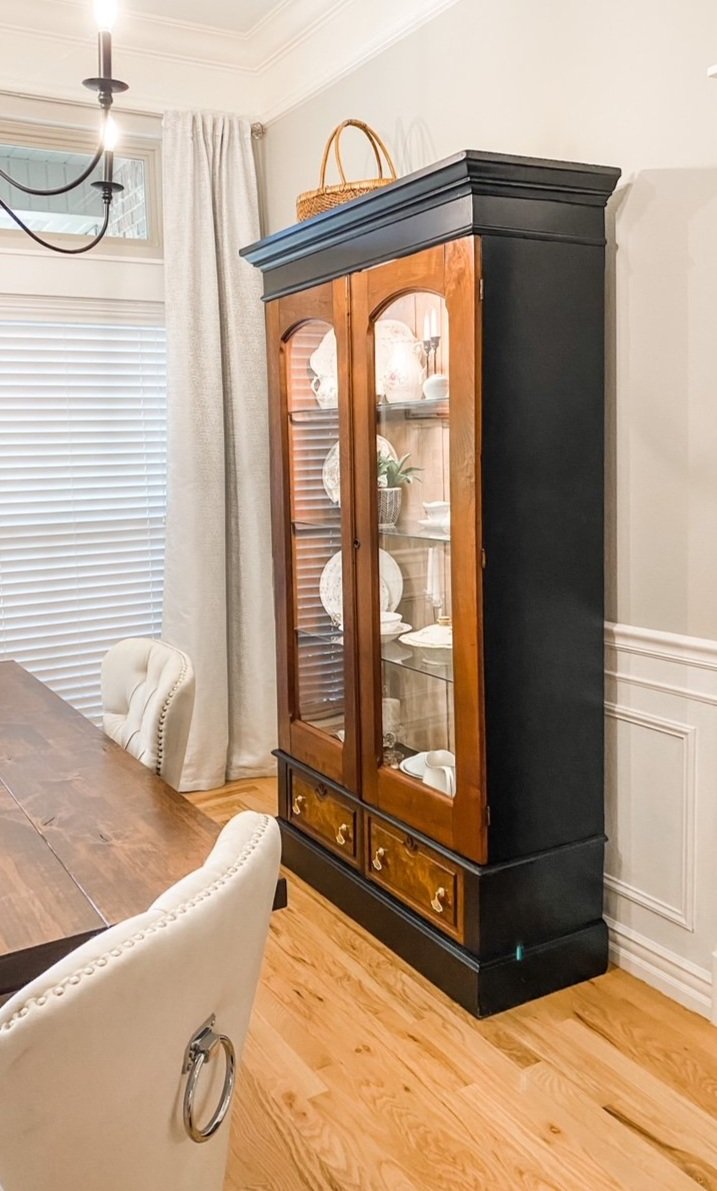
I moved it in the house before I added the glass or hung the doors…just made it lighter and easier to move…okay, RELATIVELY easy…this sucker is big!

So, my original plan was to put it in my office. But it covered too much of the feature wall I worked so hard on. I moved the Drexel server into the office and put this cabinet in the dining room.

The final touch was the hardware. My original plan was to find some simple tear drop hardware. While looking, I found these precious little ginko leaf designs on Etsy.

Back story…years ago when my kids were little we lived in a house that had a HUGE old ginko in the court yard. I have the loved these trees ever since. Kind of quirky but with a story.

I added a LED light inside the cabinet…simple!

Now I have a place to display more of our family china.

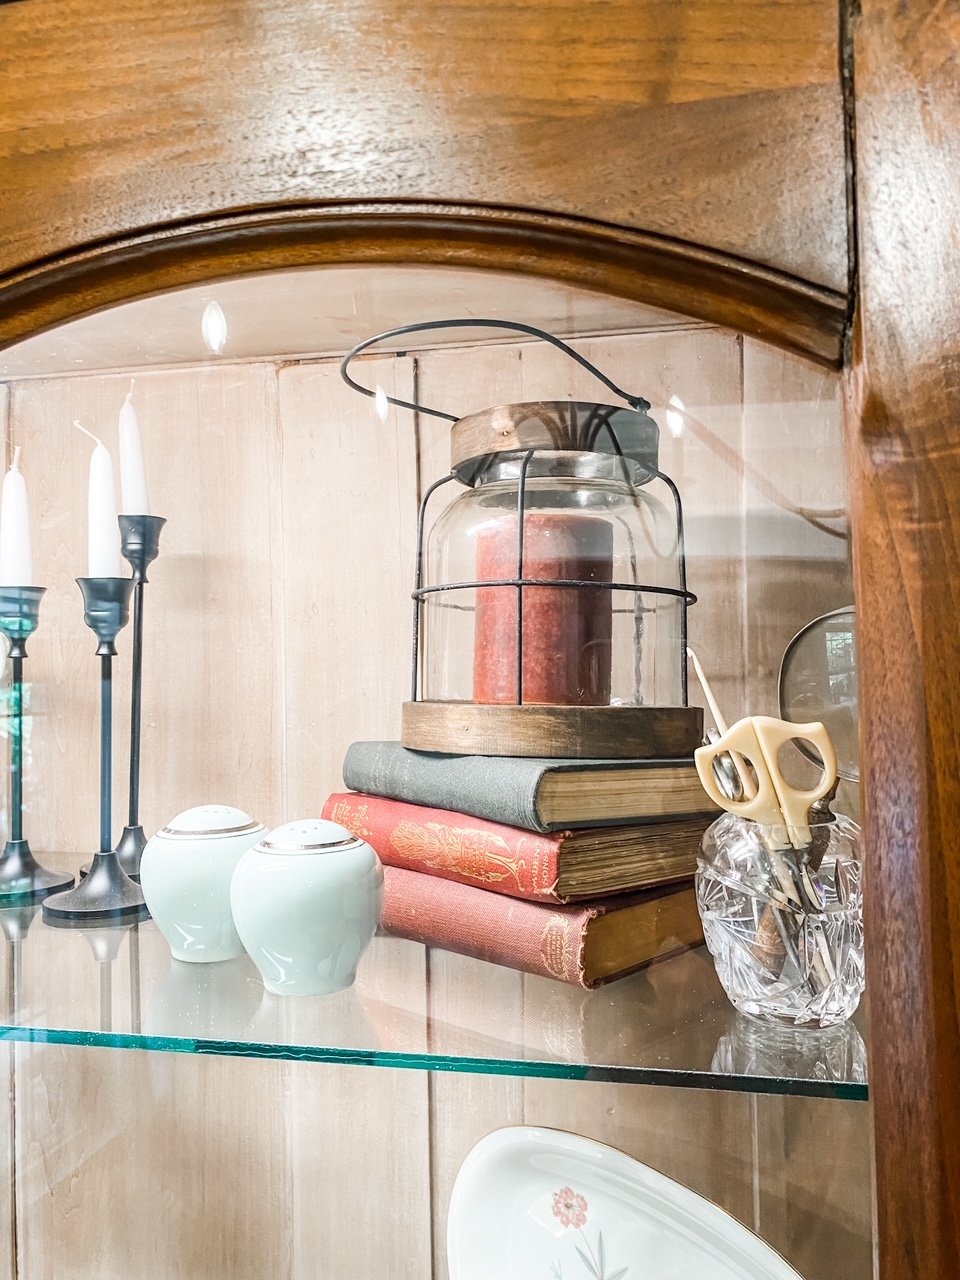
Rather than fill it with all the china I have stored away I selected a few serving pieces of each set. I like to use antique books as risers so I picked a few up at a local flea market.

The only things I purchased were the candle lantern and a fake plant. I know, fake plants are suppose to be “faux pas” these days…I don’t care…I can’t keep a real one alive and it looks lovely.

I love to decorate this room for every holiday so I can’t wait to doll this piece up for fall in a month or so…then Christmas.

I think it will be just stunning!

The dining room wainscoting reveal...

As I mention HERE when I was looking for inspiration for my dining room, I like to keep a list of projects I want to complete so I can check them off as I go.

CHECK!

The dining room wainscoting is done.

Not sure it is really even noticeable, but to me the room looks much more “finished.”

BEFORE

AFTER

Super simple project with simple but lovely results….

The entire space is a far cry from where we started two years ago….

So another simple project checked off the list.

If you will remember, I followed Timisha’s tutorial for this molding…she really does a great job of breaking down the process! She is one of the reasons I don’t do a lot of detailed tutorials…why reinvent the wheel when I can just link you to one…lol!

I still have a few more projects I would like to complete but OH MY GOSH it is stinking hot…with NO relief in sight.

Sooooo…I am doing what I always do in the heat of the summer. I am hibernating. Well, at least after noon. Good thing I get up early…I can cram my entire day into the morning hours!

Dining room wainscoting...

I keep thinking I have no more “major” projects to complete around this house…but inevitably I find something I want to do.

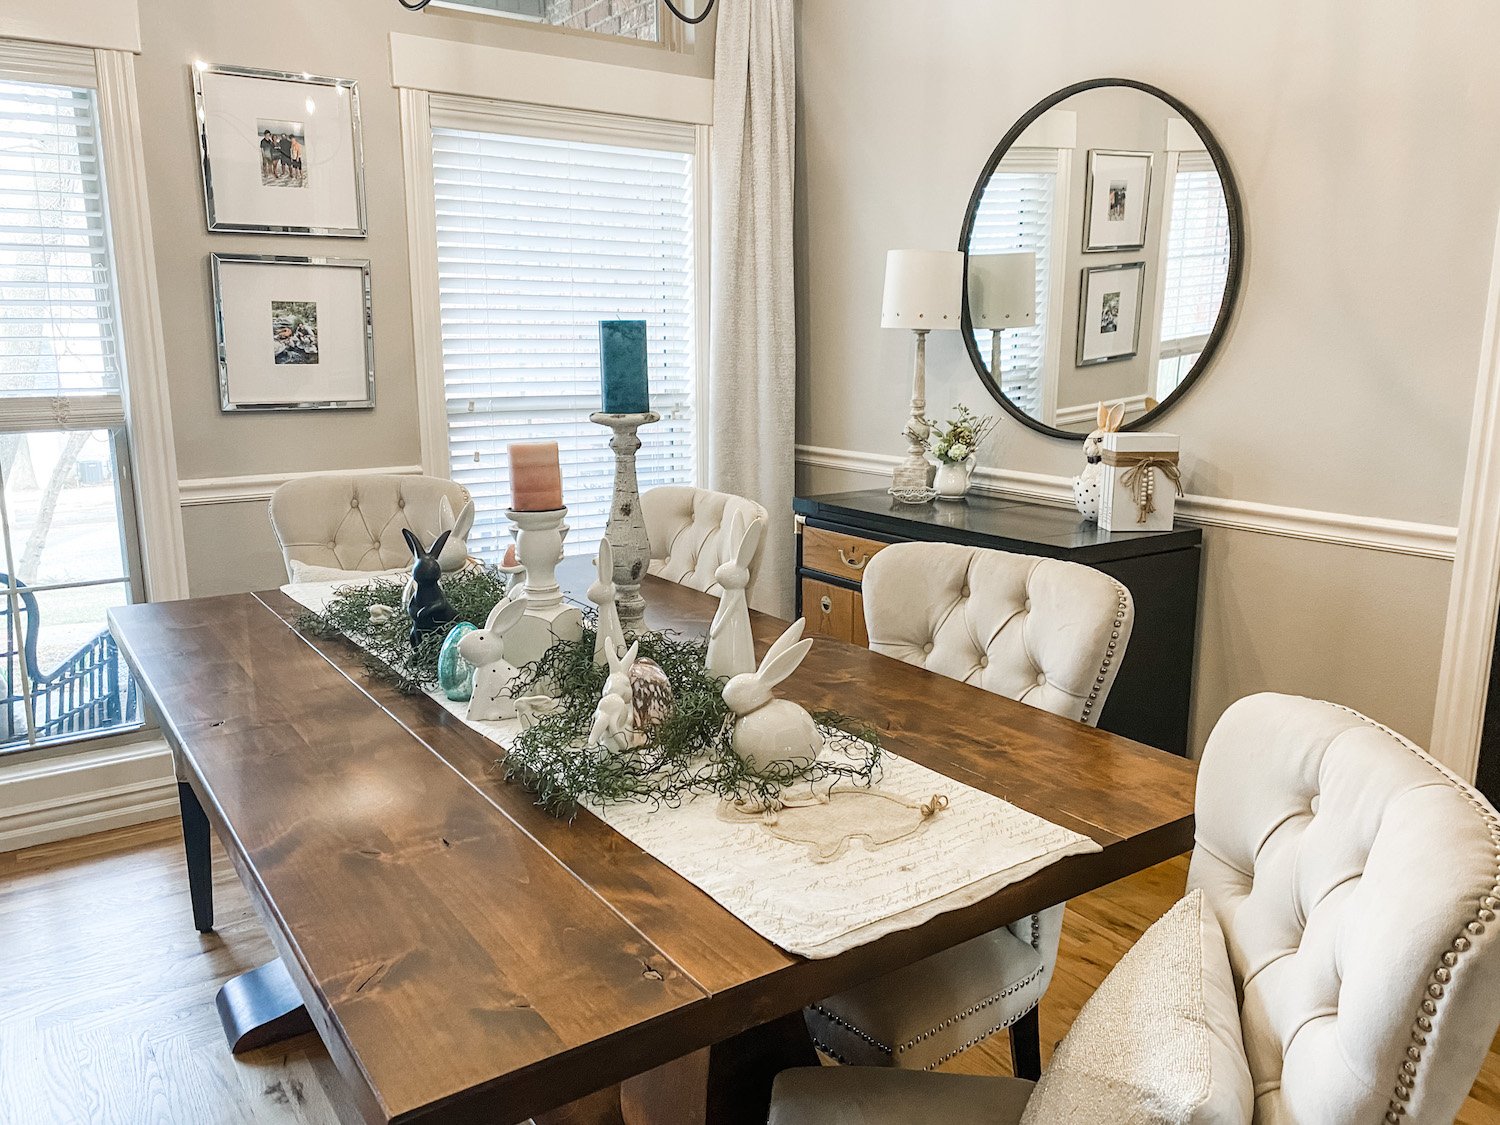
The dining room…a tad formalish but we actually use the room more than I thought we would for casual dining.

Like much of this house it has evolved over the last few years….the first Christmas featuring our new tablecurtainsthe new buffet….all relatively minor.

When we first bought the house the formal dining room was pretty blah…

Right off the entry…first thing you see when you enter the house.

This is the Christmas decor…LOVE! I love decorating this space for holidays and seasons!

As I have shared before, I replaced the arched transoms with rectangular ones, removed all the crown above the doors and windows and changed the light fixtures…all in an attempt to “detraditionalize” the space. It had chair rail and it was obvious it had wallpaper below the chair rail at one time. Before we painted, I had the painter repair some damage from where the wallpaper had been removed and add texture. Then we painted.
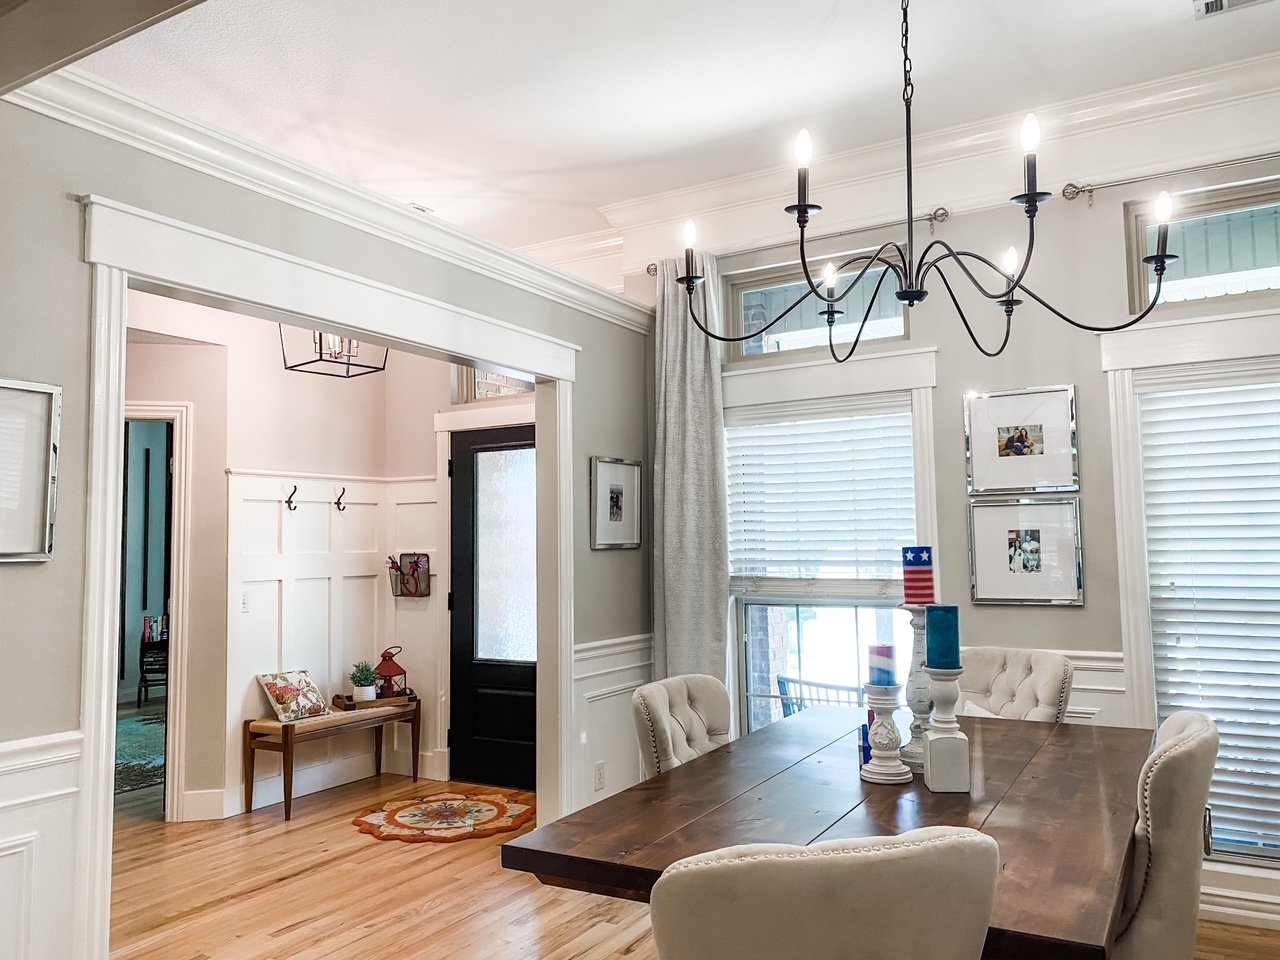
For months I have wanted to add wainscoting or SOMETHING to jazz up the space a tad. The only problem I have is that most of the wainscoting inspiration I can find is either really traditional/formal or casual “farmhousey” (like board and batten.) While I have made some changes to detraditionalize the entire space, I don’t want to go super casual. So not formal but not casual.

Don’t get me wrong…I like board and batten wainscoting.

I added it in the breakfast room

….and entry

…and I love it.

But it just seems a tad too “casual” for a formal dining space.

So…what to do, what to do.

I did what I always do when I am looking for inspiration…cruised Pinterest and the blogisphere.

There are a few issues with this room that will influence what I can do. First, the walls do not go all the way to the ceiling…so in my opinion, I need to keep the wall color above the existing chair rail.

Second, the existing chair rail. I really don’t want to remove it because then I have to do a bunch of sheetrock repair and truthfully, I think I can incorporate it into any design I pick…at least the height of it incase I find another trim i like better.

I know I don’t want to do any picture molding above the existing chair rail…kind of formalish.

I realize I have elements in this room that make it more “formal.” But I want to tone it down a bit.

So far my favorite look is this….

Timisha has a great tutorial HERE for this look.

Easy, relatively inexpensive…kinda formal but not so much that you feel like you have to set out the fine china.

Perfect.

Hopefully next week I can share the finished project!!!

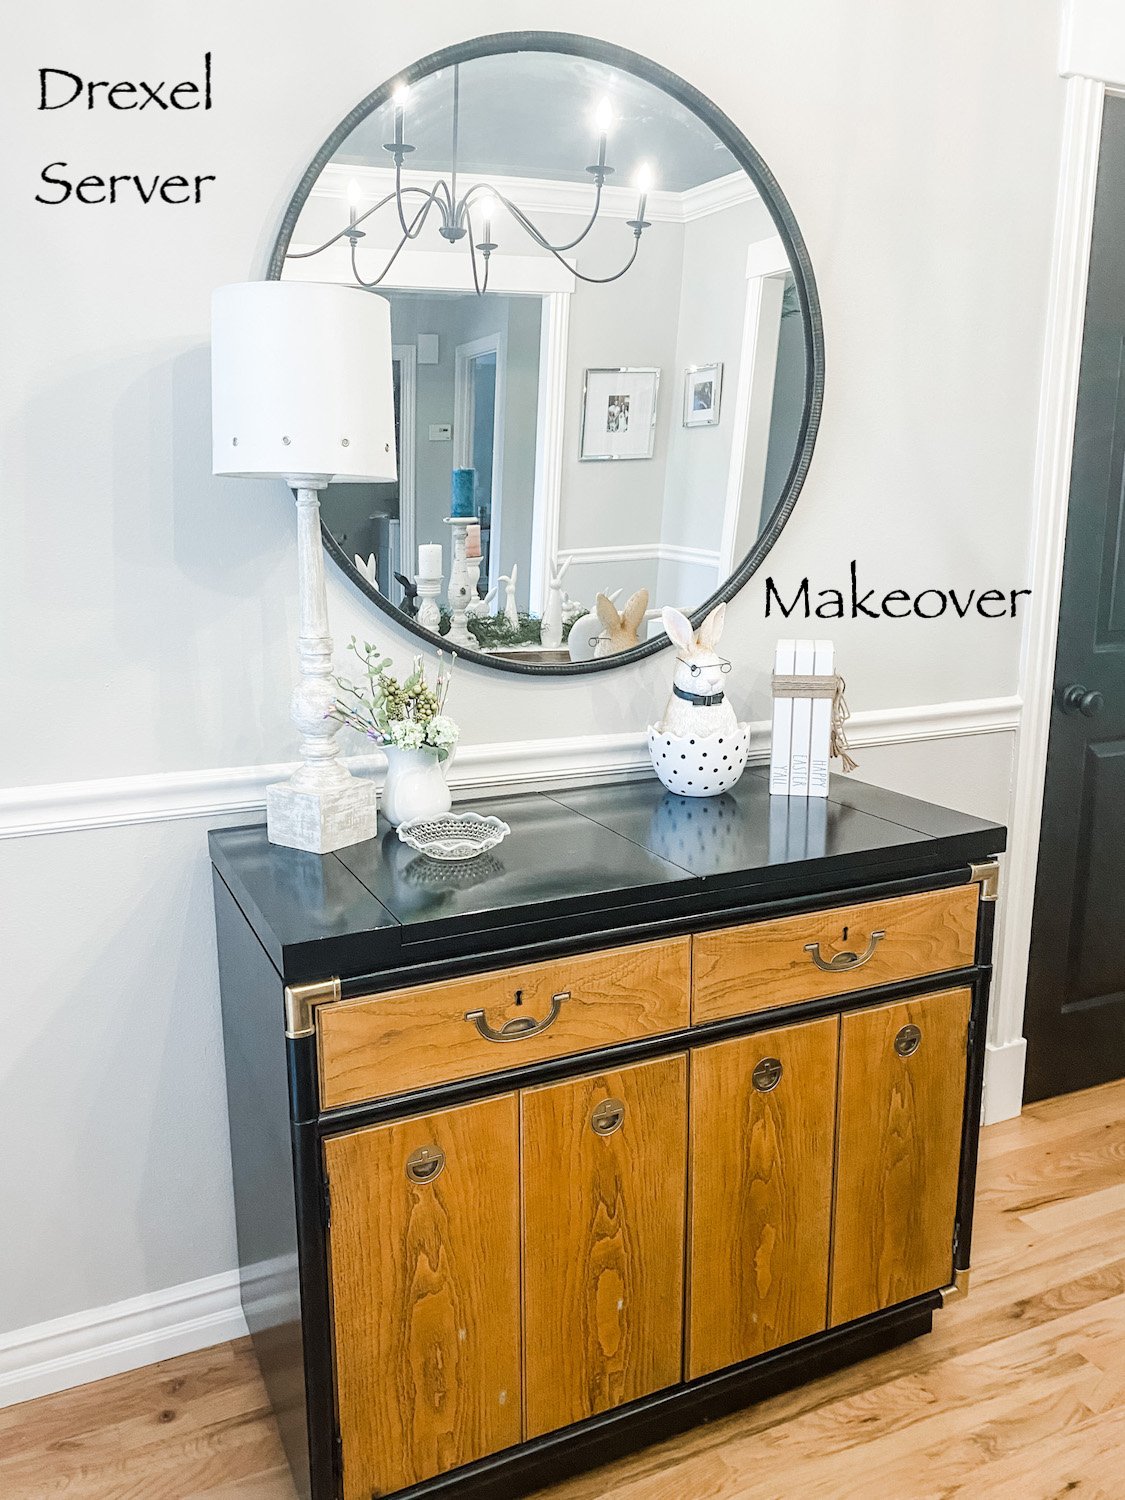
The "new" Drexel server....

I shared my plan for this wonderful vintage piece HERE….

I know purists cringe when people even talk about painting vintage pieces.

This is a prime example of “doing what you love.” If a piece will be more loved and treasured in a different state then go for it.

I painted the first one I found years ago and have had it in my dining/breakfast room…

…I recently swapped it out for the china hutch (featured HERE) and sold it.

Now this piece, a Drexel Accolade, has some value as is….if you do a little research you will find they sell for hundreds. But for me “hundreds” is not a value that will keep me from giving a piece a little makeover. If we were talking tens of thousands, yeah, no.

I also have a Drexel nightstand I refinished and shared HERE.

I planned to sell this piece after it’s makeover but I have moved it into my dining room and now I am kind of liking it…hum…guess we will see.

So…what did I do to give this thing a little more appeal?

First, I removed all the old hardware and brightened it up.

The hardware on these pieces are solid brass but after a few decades of neglect it is hard to tell. You can tell if something is solid brass with a magnet. A magnet WILL NOT stick to solid brass.

If the hardware is solid brass, the only way I have found to really brighten it up and get the decades of grime off is with Brasso and SOS pads.

Coat each piece with Brasso. I use a little chip brush to coat the pieces. After that sits for awhile, take an SOS pad and scrub away. You may need to repeat this process a time or two. I also use an old toothbrush to get in all the nooks and crannies.

After all the pieces are really clean, I scrub them with “Never Dull.” It seems to get the last layer of grunge off and gives them a little bit more “brightness.”

Not the easiest or fastest way to clean brass hardware but I just don’t think you can beat beautiful brass hardware.

Now, if the hardware is NOT brass and you want to spruce it up (without the cost of replacing) you can always give it a good scrubbing, prime it with metal primer and then paint it with spray paint. (TIP: put the screws back into the screw holes so that you don’t get paint in the threads.)

I shared another brass hardware restoration project HERE.

So, the hardware is done. If you find a Drexel piece and it is missing any of it’s original hardware, you can find replacements on Ebay…but be prepared to pay dearly for it! Each pull can range from $30 to $110 EACH!!!

I decided to strip and oil the drawer and door fronts. On the last Drexel makeovers (the bedside table and server) I painted the entire piece. This time I decided to shake things up a bit.

While I like wood grain, I am not a huge fan of oak. No biggy since, again, my original plan was to sell this piece. To highlight the pretty wood grain, I stripped the drawer fronts and doors using my trusty 1/2 and 1/2 mixture. 1/2 acetone, 1/2 lacquer thinner. HERE I posted a pretty lengthy tutorial on how to use this mixture to strip even the most stubborn finishes!

After stripping off the old finish I gave the drawers and doors a little mineral spirit wash, lightly sanded, wiped with tack cloth, then applied 3 coats of tung oil finish…my current favorite being Waterlox.

After that had dried and cured well, I taped and papered the doors and began prepping the cabinet for paint. (I removed the drawers to strip and oil them!)

I didn’t need to paint the inside of the cabinet so I taped that off, along with the black laminate under the flip top. I primed with Bullseye primer, then sanded smooth with 220 grit paper and wiped it all down with tack cloth.

I decided to paint the cabinet with high gloss black lacquer spray paint. I am obsessed with the high glass finish on these pieces. I just think it really makes a huge impact, especially with the bright brass hardware.

(You may notice I am all decked out for Easter…that is my new thing…decorating for each holiday/season. Next up will be Memorial Day/4th…patriotic stuff…then “summery”…then fall…then Christmas…then Valentine’s and back to Easter. See what happens when you “retire.”)

The trick to a flawless spray paint finish is LIGHT COATS…lightly spray, let it dry, spray again. It may take 3-4-5 coats but it dries quickly and in the end you will have a beautiful finish. If you go heavy handed you will have drips and runs and will be hugely disappointed!!!

Also pay attention to the temperatures and humidity. If it is too hot or too cold, or if the humidity is really high, you may have issues!

HERE you will find some additional tips on how to property paint furniture…very helpful!

After the paint had properly cured (gave it a good day or two) I replaced the hardware and OH. MY. GOSH!!! I seriously love this piece. Even though I am not a huge oak fan I am really loving it!!!

So the past few weeks I have been tackling a MAMMOTH project. Maybe next week I can share it. Hint, in entails A LOT of the thing I hate most….but man will it be worth it…I think…I hope….

china hutch makeover...

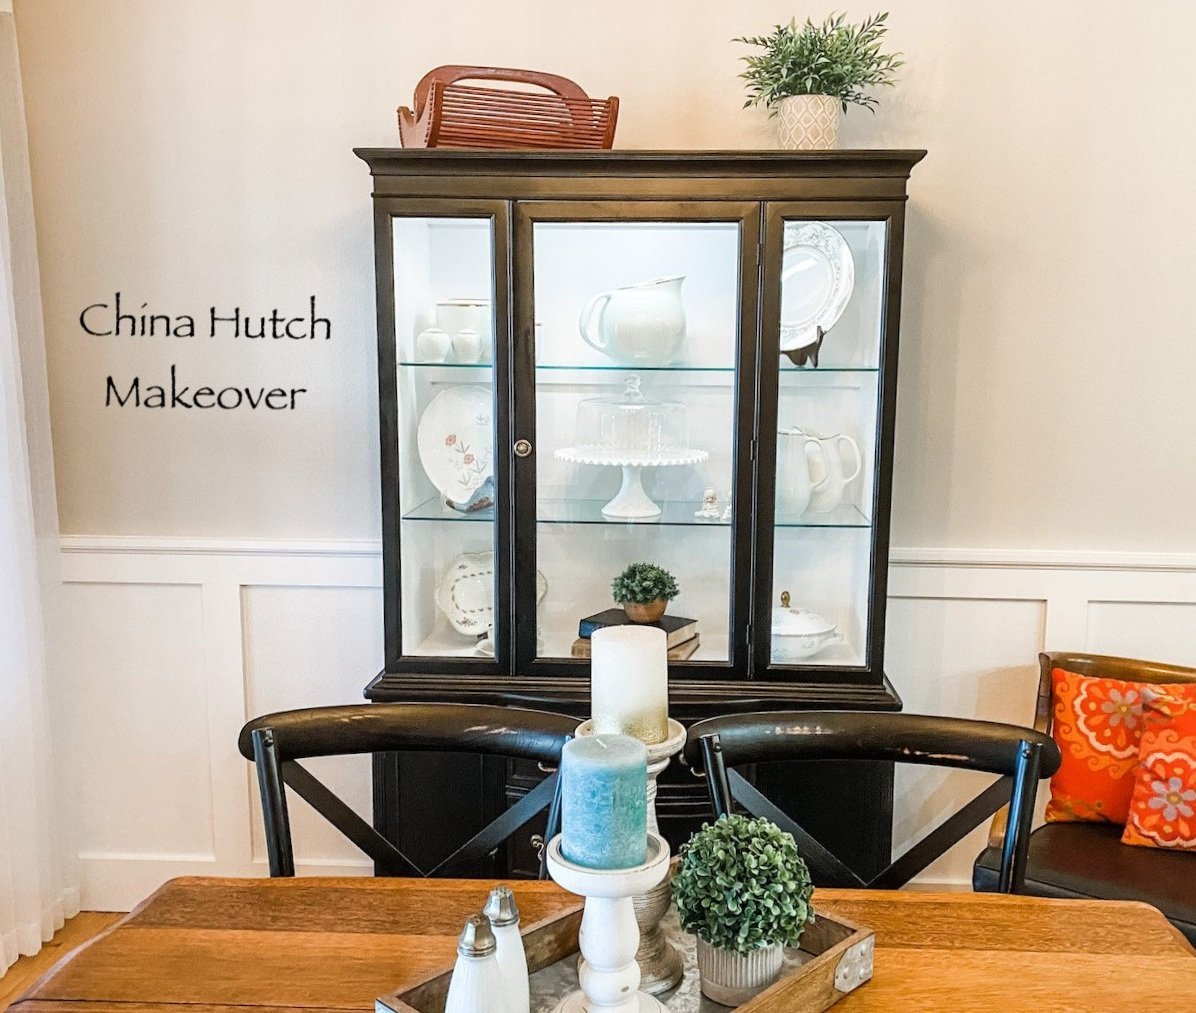
I originally bought this piece to makeover and sell…

When I gave my breakfast room a little makeover (featured HERE last week) I decided I kind of like the look and it gives me a place to display my heirloom china….

I didn’t take pictures while I was giving it a makeover because, well, I just didn’t….

But the process was pretty straight-forward.

I removed all the hardware. The drawer hardware was not the original so I ordered hardware that would have come with the piece originally. Fortunately the door hardware was still there so I just cleaned it up a bit with Brasso and SOS pads to highlight the engravings.

Before you go scrubbing on hardware with Brasso and SOS pads, make sure it is real brass. A magnet will NOT stick to real brass…if one doesn’t, scrub away.

I removed the shelving. I also removed the glass and decorative glass inserts. Not difficult because it was just held in place by some strips of tiny molding and nails…I just popped those right out and set them aside to paint and reuse.

The shelving was pretty warped and I tried my trick of laying them on the floor and placing weights on them…no go. So I ordered glass shelves to replace them. Honestly, I like the glass better.

The glass shelves where a lot heavier than the wood shelves. Originally the piece just had two little supports on each side for the wood shelving (no supports along the back for the span which might explain why the shelves bowed.) I didn’t feel comfortable with that so I added 1x3 support boards along the back, securing them with glue and staples. Now I feel confident that the shelving is properly supported and can handle the weight of dishes. (If you have ever had a glass shelf come crashing down on your china you would understand my concerns. Yeah, it happened!)

There were a few other minor repairs that had to be made…since I was painting the piece, I did them before primer and paint.

Remember, if you are staining, stain first then repair. If you are painting, repair first then paint.

I cleaned the piece well then I caulked all the “joints.” Remember if you are painting a stained piece you have to caulk all the places where wood meets wood…and you may even have to putty nail holes. If you miss anything it will show up when you prime the piece…just caulk and putty and spritz it with a little primer.

I sprayed the entire cabinet with Bullseye primer. Primer is MUST on mahogany pieces because it will bleed through the paint! If you paint a piece and see “red” or “shadows,” that is the mahogany bleeding through…or water stains, oils, etc…more layers of paint WILL NOT cover it. Prime it then repaint it. Or save yourself the grief and prime everything before you paint. Mahogany is not the only thing that will bleed through paint. Nail holes and “gaps” will show up and you will be able to fix them before you apply your paint.

Also, you will get a much prettier and durable finish.

I know some paints (like this one) profess to be paint and primer in one. Maybe so but I always prime with a primer. Usually Kilz or Bullseye.

I sanded it smooth then wiped it down well with tack cloth.

I decided to paint the inside white and the exterior black. I painted the inside with some satin white latex I had on hand, let it dry and cure then taped it all off to spray paint the exterior.

I painted the interior a satin finish but I wanted a flat black for the exterior. I went with Rust-Oleum Matte Farmhouse black.

After the black had cured (I usually give it a few days) I replaced the hardware, reinstalled the door glass (without the decorative doo-dads) using the small trim and silicone and moved it into the house. I gave it another few days to cure before adding the glass shelving.

I did not paint the inside of the drawers or the inside of the lower cabinets. I rarely do unless the piece has an odor or stains I can’t get rid of by cleaning. If you have a piece that has odors or stains sometimes your only recourse is to prime and paint!

I added a LED light to give the display a little glow! That entailed drilling a small hole in the top for the cord and mounting an LED light strip in the top of the cabinet….simple simon!

Lovely.

This is where I remind you that “cure time” is super important when working with painted wood. I always get annoyed when I watch those shows on HGTV and they paint and stage furniture the same day. DO NOT DO THAT!!!! Be patient…give paint time to cure. If you don’t you will scuff and scar your new paint job and will be seriously disappointed.

If you look back at this blog you will see I use to do this kind of thing all the time…I loved it.

I don’t do it much anymore and I forgot how much I love taking an old abused and neglected piece and turning it into something beautiful and useful again!!!