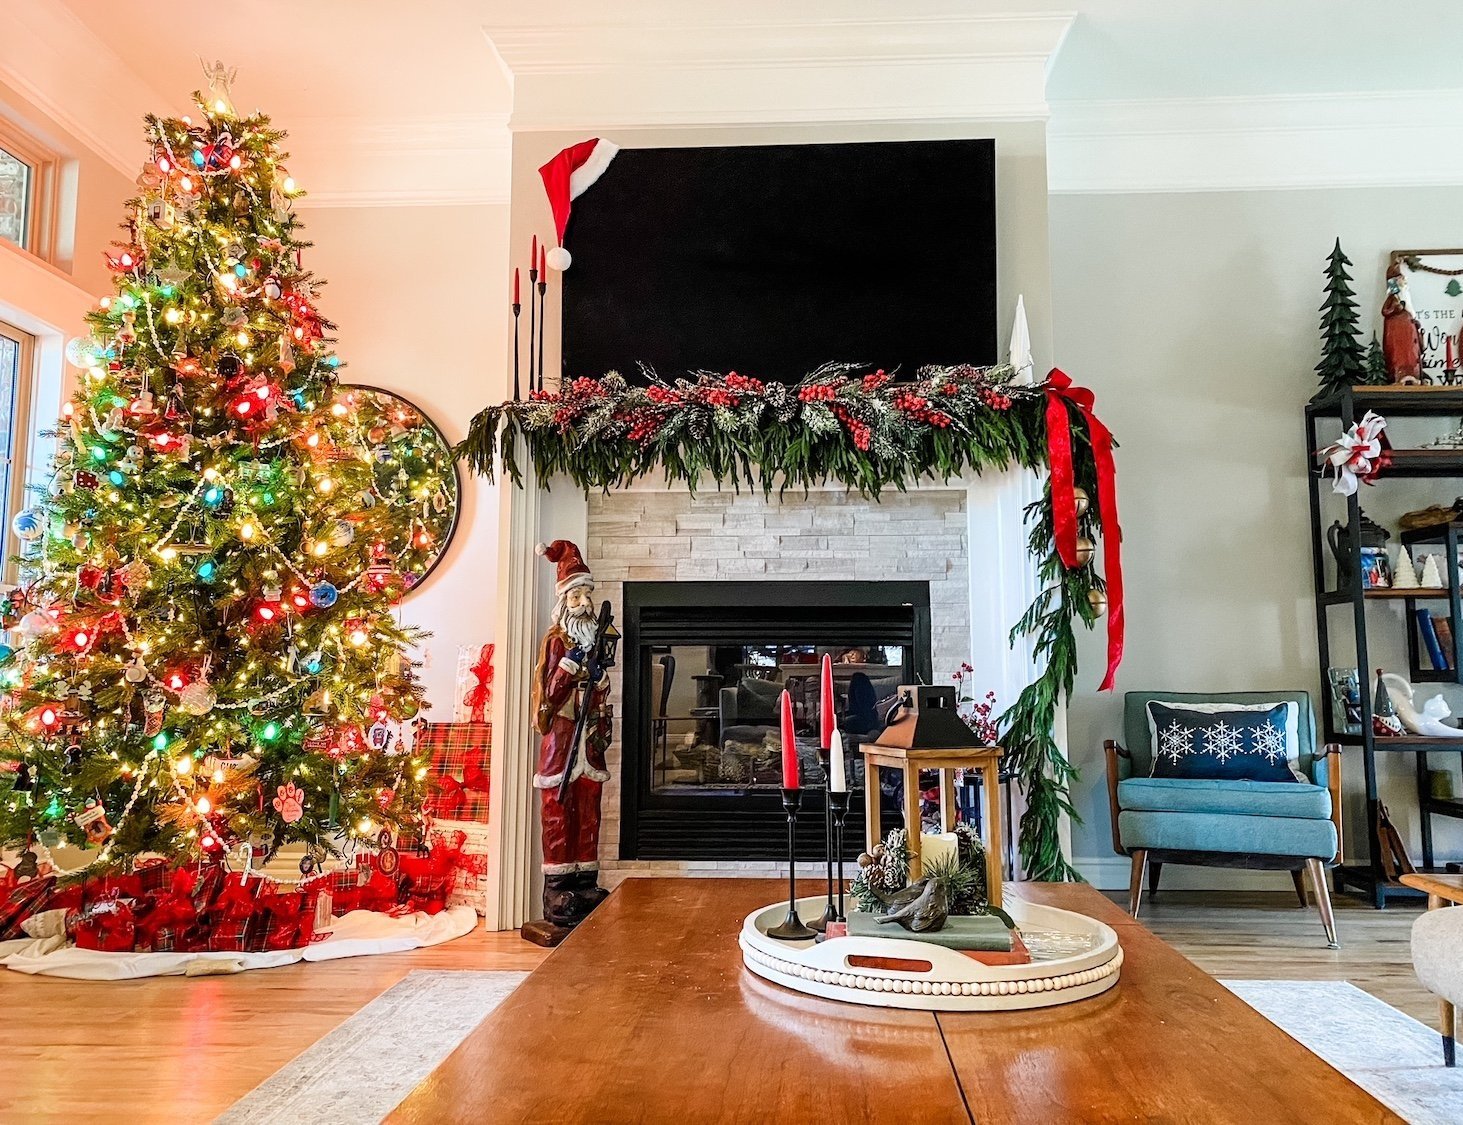
Another Christmas....

Ever year I feature my Christmas decor…every year I think not much has changed.

But it does change…a tad here and there.

Last year I shared a few little changes…same this year…a few things here and there.

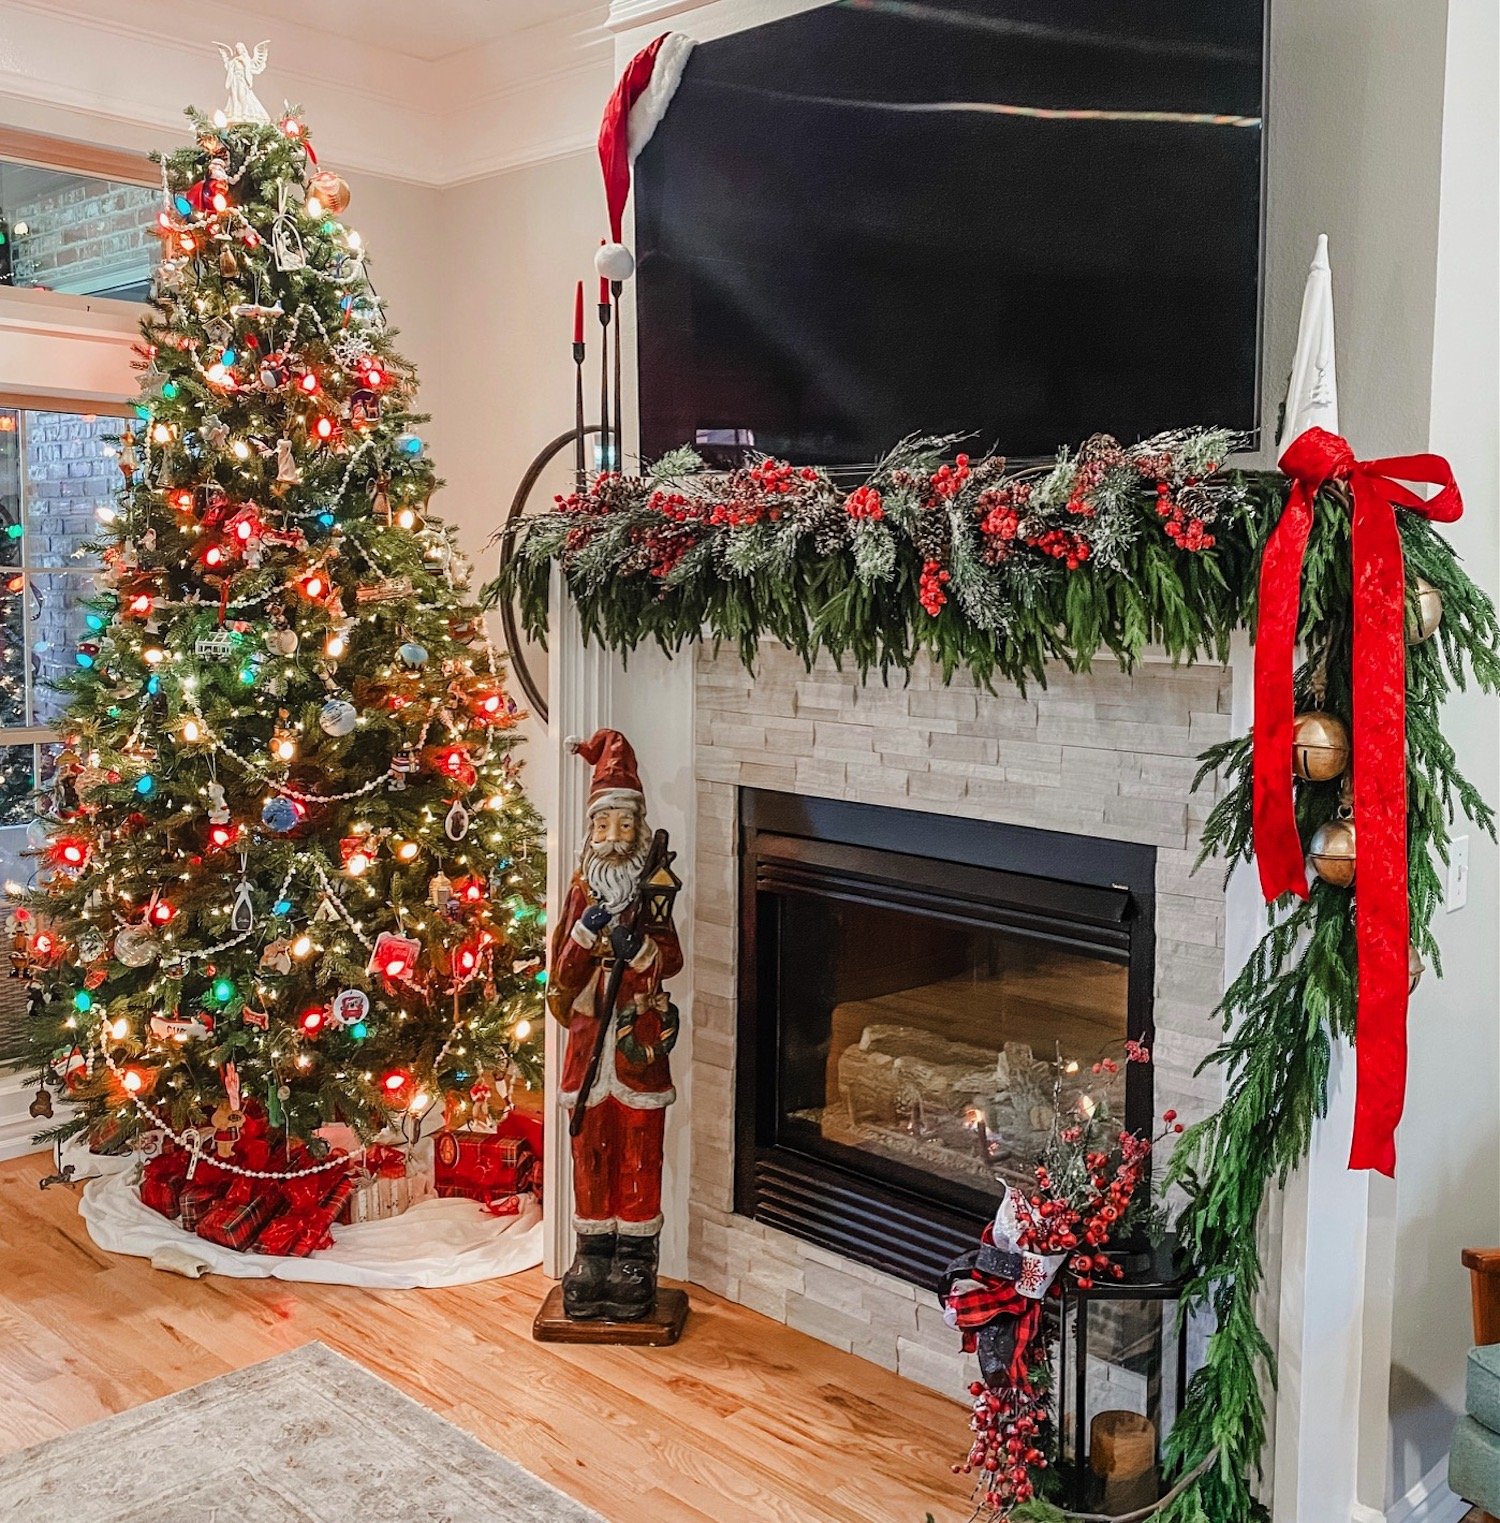
So what did I change this year? Probably the biggest change is the mantel decor….
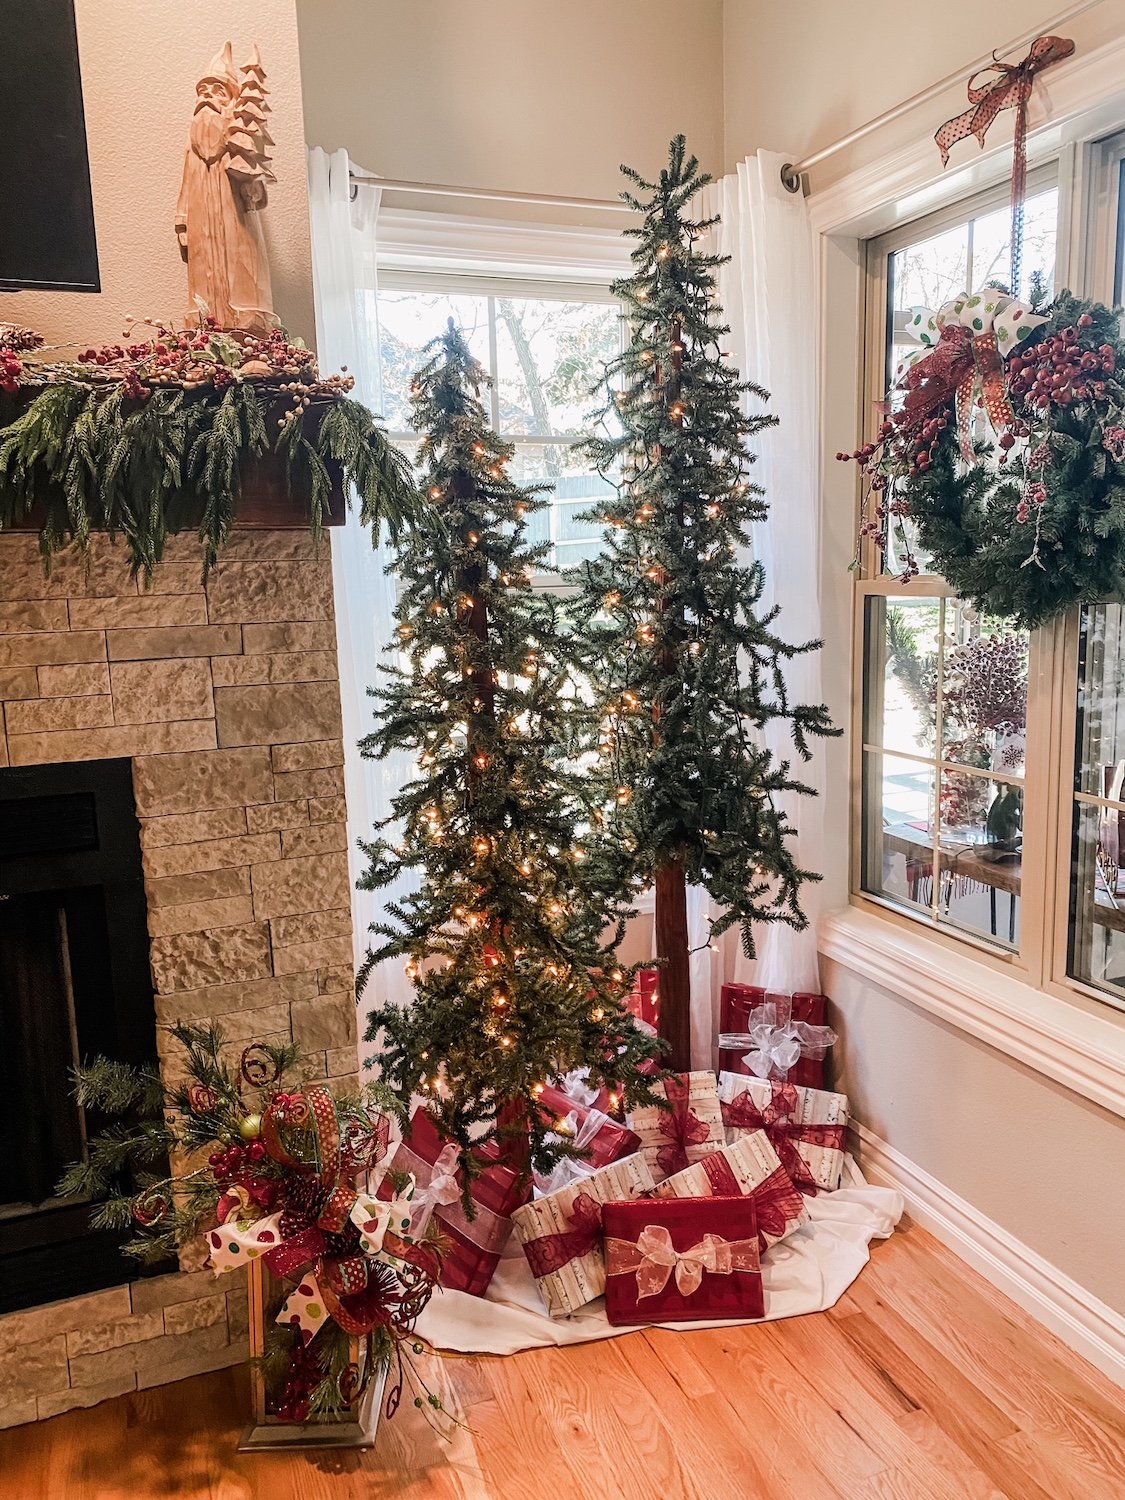
Last year THIS soft touch garland was ALL the rage…everyone wanted it. Which is why it was sold out and on Ebay for mega bucks. So I waited until after Christmas and bought it when it was back in stock. Problem was, I forgot I bought it, several times, and by the time I brought down all my Christmas decor I had 10 strands of it along with three soft touch wreaths I have NO idea what to do with!

No biggy…while it is a beautiful garland, you really have to layer it to get a good thickness. On my living room mantel I have 4 5’ strands and 1 15’ strand.

In the den I layered 5 5’ strands….

I used Command hooks about every 1-1 1'/2’ and floral wire to secure it.

I added a red velvet ribbon and these awesome bells….

I would love to link to the bells but as usual I have NO idea where I got them. I know I ordered them but from where? Not a clue!

Last year I layered the berry picks on the mantel…this year I layered them on top of the garland…just plain ole’ picks you can get at Hobby Lobby…four on each mantel.

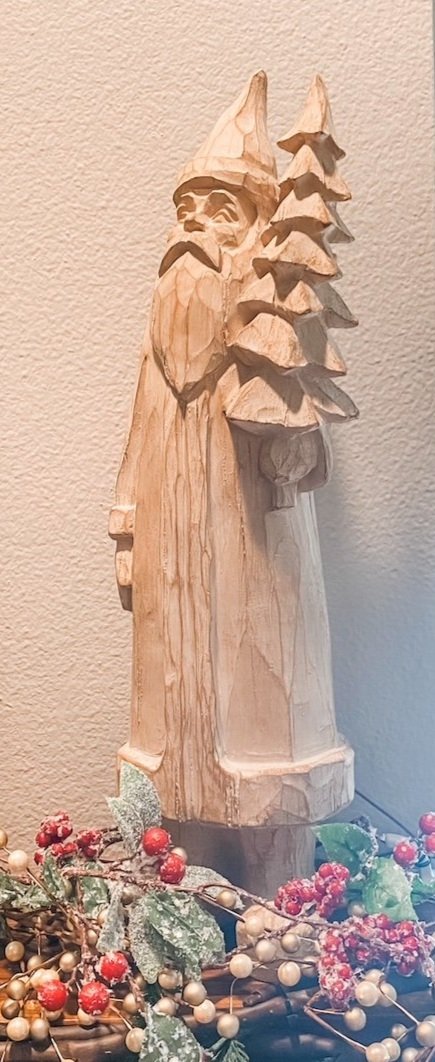
Another new addition is this wood Santa….

I know WHO influenced me to buy it but have no idea WHERE he came from. I follow a couple of great ladies on Instagram…Deb and Danelle…and as influencers go they get me every time. Their style isn’t necessarily my style but they feature elements I love. Truthfully I think that is where the bell inspiration came from!

What drew me to this Santa was his “girth.” He’a skinny.

Okay, so here is the deal…ALL my Santas are skinny. I have NO idea what that is all about but it seems like every time I am drawn to a Santa he is on the anorexic side.

I kid you not.

Another element I added to my decor this year are the cabinets wreaths….

For several years I have wanted to add “mini” wreaths to my upper cabinets. I finally found am inspiration for what I wanted, but honestly, when I put it all together they came out a hair too big. Hardly “mini.”

So be it…maybe next year I’ll try again…for this year it is what it is….

The precious train!

This train was a gift from Brian’s grandfather to his dad in the 40’s…it was used then. Last year we displayed it above the dining room. This year we got it up and running and put it around the tree in the office.

We didn’t put it around the main tree in the living room because 1) too many gifts under that tree and 2) the SLIGHTEST bump derails it and the living room is a high traffic area.

Not sure Callum is really old enough to appreciate it but I sure love it!!!!

And now the pièce de résistance…the final tree in my life long dream of having a tree in every room!!!

For years I swore if I had the time AND the money, I would put a tree in every room of my house. Last year the goal was complete.

The master bedroom tree!

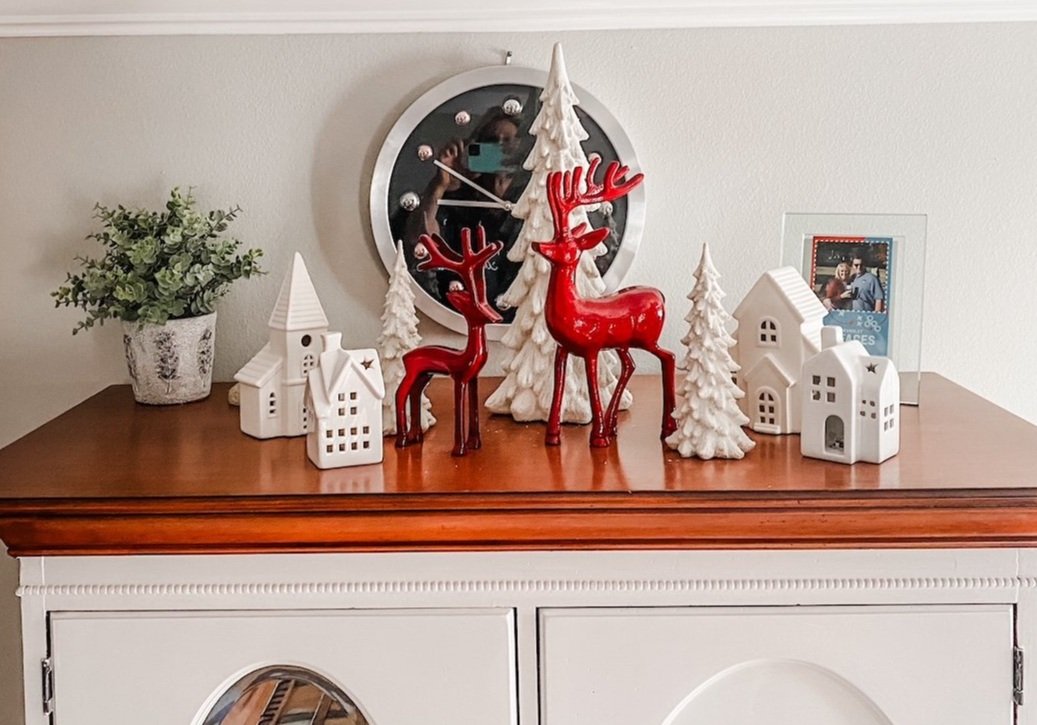
I added a few little knick knacks on the highboy. Just a few little things from Home Goods…nothing fancy.

The office….

The wreath is new…a tad over powering. Again, I tend to “go big” and then I’m not so thrilled with the result. Meh…next year I’ll change it!

The dining room….

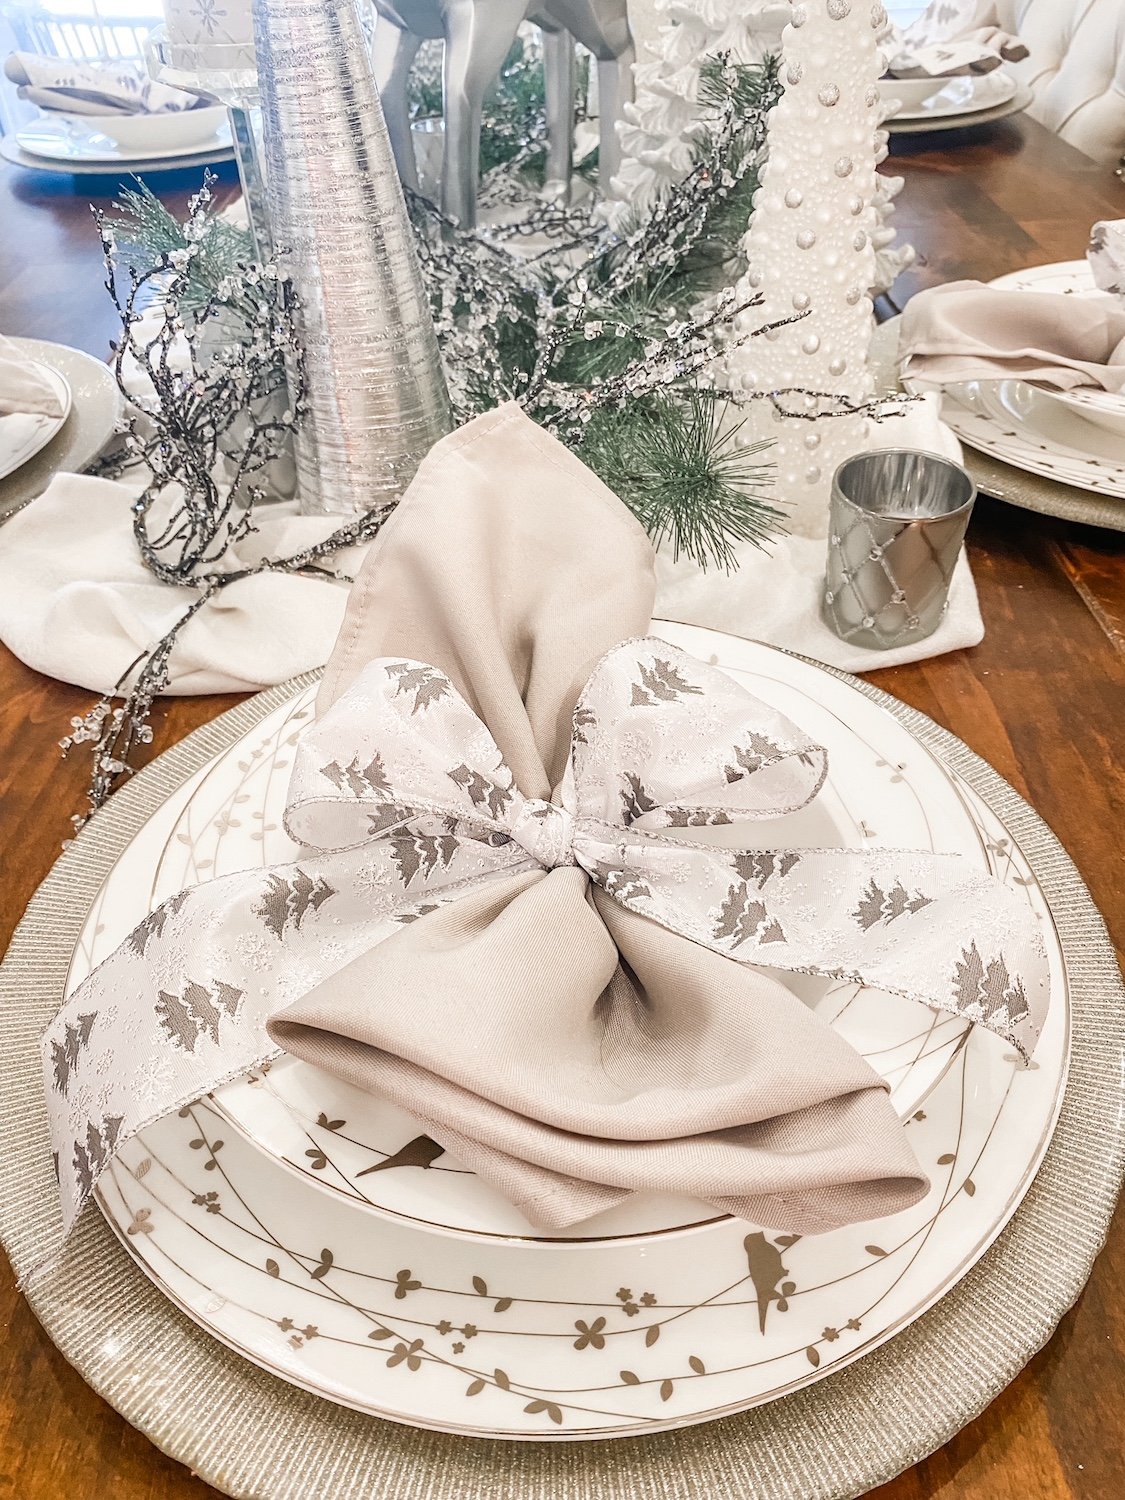
This is always one of my favorite rooms to decorate.. I love the neutrals even though I am drawn to all the vibrant holiday colors in the other rooms.

I like to keep the place settings out even though we don’t usually use these dishes because they have to be hand washed. Simple but elegant.

The sunroom….

I have shared this room before. It is my “Stewart plaid” room in honor of my “Stewart family.” Love it and I am always looking for more Stewart plaid elements to put in here. This year my sweet friend Carrie brought me this precious decoration from Italy!

The den…

The breakfast room….

Not all the trees have decorations…some just have lights. That’s okay. They are still pretty and the four that are decorated take enough time!

The entry…

Little has changed here…added some little wooden trees and a Christmas sign on the trim…another PJ pillow. Love the view into the office!

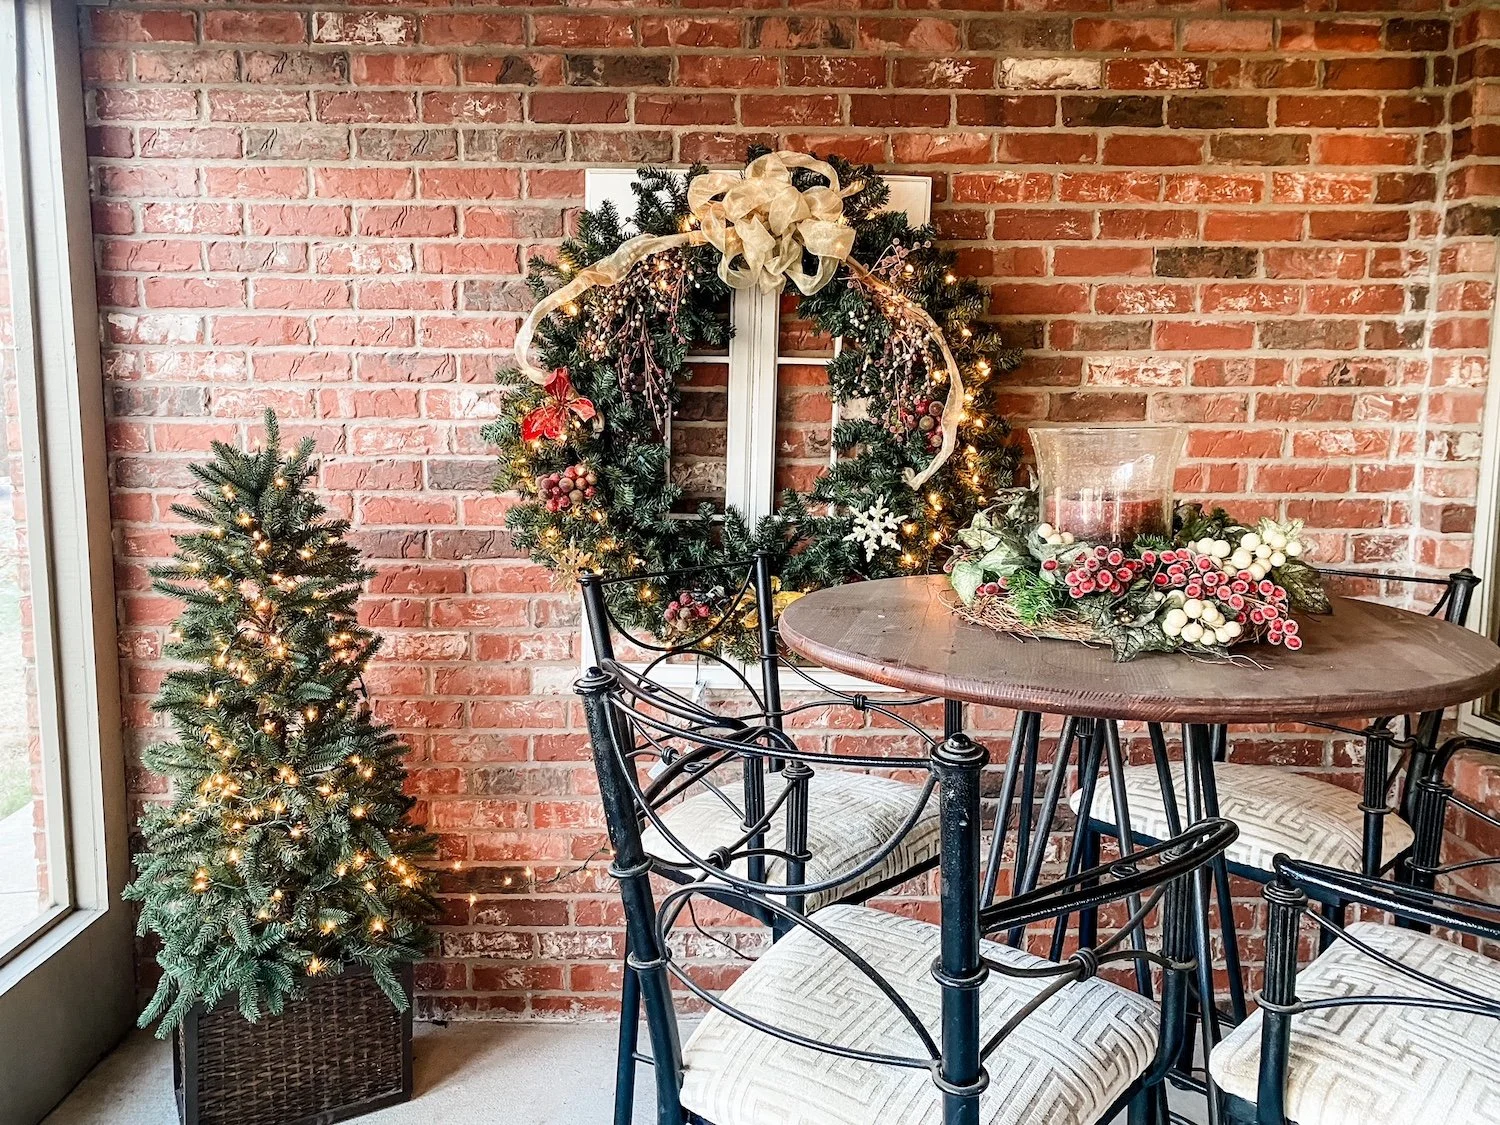
The screened porch….

And of course the main tree in the living room….

All these trees are connected to remotes (THIS is one I use and LOVE) and are turned on every day. I don’t even want to tell you what my electric bill is for the month of December. Suffice it to say it is cheaper to cool this 3500 s.f. house than to light it up…lol!!!

But I love it and as long as I am physically able to do it, I will. Then I may hire it done!

I love this holiday and it seems that year after year I do indeed add something new. I hope something I did will inspire you to add a little more to your home.

Fall tablescape...

I have some hard fast rules for decorating for the holidays. Fall decor goes up the week before we leave for vacation…usually the last week in September. Christmas goes up the weekend after Thanksgiving.

It’s the rules.

This past week I broke the rules.

It wasn’t really my fault. I got an At Home magazine in the mail. It had a really pretty picture of a fall tablescape and I was compelled to immediately go buy MORE fall stuff for my formal dining room. I blame it all on their devious advertising.

I went upstairs and dug around in my stash of heirloom china. I also pulled out the fall box marked “formal dining” …then I decorated my dining room.

I used my china and added little glass pumpkins, some amber stemless wine glasses and green place mats from At Home and straw placemats from Amazon

I picked up a few fall table runners but they didn’t make the cut.

i stuck a few little fall doo-dads in the china cabinet…

I made the center piece last year…fall candles, pumpkins, fall picks and some cotton stems in a round tray.

LOVE!

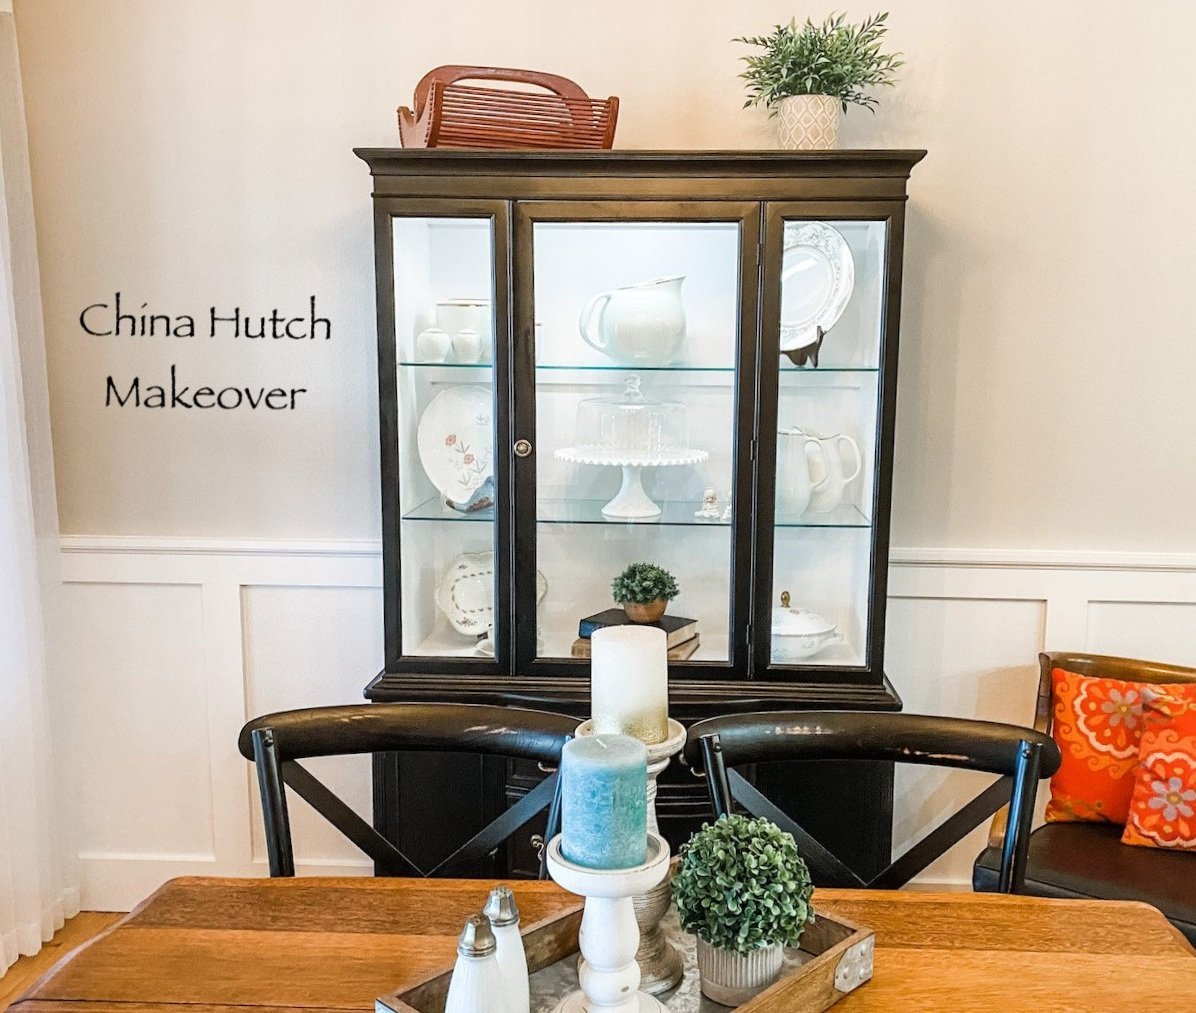
(You can check our the china cabinet makeover HERE!)

My son insists we use this room during our Sunday dinners. Since this china has to be hand washed, I have no doubt it won’t actually get used…we will just have to sit in the other dining room or move this fancy stuff out of the way…but it sure looks pretty.

For those who advocate using the fine china for every day use and not just for “formal”….you obviously have never had to hand wash dishes after feeding your entire family.

Right now we are having to hand wash everything anyway…our TWO YEAR OLD dishwasher isn’t working. I have no idea why…I’ve googled…could be one of four things. But after having to buy a new washing machine because we couldn’t get a simple part, we decided we would just buy a new dishwasher rather than pay $150 to have a repair main come out and tell us we can’t get a part we need. A brand new one was installed Tuesday.

So back to fall decorating. I love it and every year as soon as the temp drops below 80 degrees, I get the itch to start digging out the pumpkins and fall wreaths. But like every year, the temps climbed back into the 90s this week so now I haven the dining room decked out but the rest will have to wait a few more weeks.

That is okay! I will just enjoy the glorious summer flowers! And they are glorious this year!!

china hutch makeover...

I originally bought this piece to makeover and sell…

When I gave my breakfast room a little makeover (featured HERE last week) I decided I kind of like the look and it gives me a place to display my heirloom china….

I didn’t take pictures while I was giving it a makeover because, well, I just didn’t….

But the process was pretty straight-forward.

I removed all the hardware. The drawer hardware was not the original so I ordered hardware that would have come with the piece originally. Fortunately the door hardware was still there so I just cleaned it up a bit with Brasso and SOS pads to highlight the engravings.

Before you go scrubbing on hardware with Brasso and SOS pads, make sure it is real brass. A magnet will NOT stick to real brass…if one doesn’t, scrub away.

I removed the shelving. I also removed the glass and decorative glass inserts. Not difficult because it was just held in place by some strips of tiny molding and nails…I just popped those right out and set them aside to paint and reuse.

The shelving was pretty warped and I tried my trick of laying them on the floor and placing weights on them…no go. So I ordered glass shelves to replace them. Honestly, I like the glass better.

The glass shelves where a lot heavier than the wood shelves. Originally the piece just had two little supports on each side for the wood shelving (no supports along the back for the span which might explain why the shelves bowed.) I didn’t feel comfortable with that so I added 1x3 support boards along the back, securing them with glue and staples. Now I feel confident that the shelving is properly supported and can handle the weight of dishes. (If you have ever had a glass shelf come crashing down on your china you would understand my concerns. Yeah, it happened!)

There were a few other minor repairs that had to be made…since I was painting the piece, I did them before primer and paint.

Remember, if you are staining, stain first then repair. If you are painting, repair first then paint.

I cleaned the piece well then I caulked all the “joints.” Remember if you are painting a stained piece you have to caulk all the places where wood meets wood…and you may even have to putty nail holes. If you miss anything it will show up when you prime the piece…just caulk and putty and spritz it with a little primer.

I sprayed the entire cabinet with Bullseye primer. Primer is MUST on mahogany pieces because it will bleed through the paint! If you paint a piece and see “red” or “shadows,” that is the mahogany bleeding through…or water stains, oils, etc…more layers of paint WILL NOT cover it. Prime it then repaint it. Or save yourself the grief and prime everything before you paint. Mahogany is not the only thing that will bleed through paint. Nail holes and “gaps” will show up and you will be able to fix them before you apply your paint.

Also, you will get a much prettier and durable finish.

I know some paints (like this one) profess to be paint and primer in one. Maybe so but I always prime with a primer. Usually Kilz or Bullseye.

I sanded it smooth then wiped it down well with tack cloth.

I decided to paint the inside white and the exterior black. I painted the inside with some satin white latex I had on hand, let it dry and cure then taped it all off to spray paint the exterior.

I painted the interior a satin finish but I wanted a flat black for the exterior. I went with Rust-Oleum Matte Farmhouse black.

After the black had cured (I usually give it a few days) I replaced the hardware, reinstalled the door glass (without the decorative doo-dads) using the small trim and silicone and moved it into the house. I gave it another few days to cure before adding the glass shelving.

I did not paint the inside of the drawers or the inside of the lower cabinets. I rarely do unless the piece has an odor or stains I can’t get rid of by cleaning. If you have a piece that has odors or stains sometimes your only recourse is to prime and paint!

I added a LED light to give the display a little glow! That entailed drilling a small hole in the top for the cord and mounting an LED light strip in the top of the cabinet….simple simon!

Lovely.

This is where I remind you that “cure time” is super important when working with painted wood. I always get annoyed when I watch those shows on HGTV and they paint and stage furniture the same day. DO NOT DO THAT!!!! Be patient…give paint time to cure. If you don’t you will scuff and scar your new paint job and will be seriously disappointed.

If you look back at this blog you will see I use to do this kind of thing all the time…I loved it.

I don’t do it much anymore and I forgot how much I love taking an old abused and neglected piece and turning it into something beautiful and useful again!!!


Breaking the "rules"....

I don't know if it is an actual "rule" or if it is something I made up in my head.

But who made the "rule" that pots and pans have to be stored in a lower cabinet next to the stove?

For years my pots and pans were in a small lower corner cabinet next to the stove. Total nightmare to dig out a pot or pan....something I use EVERY day!

A few years ago, I installed this nifty pull out for my casserole dishes and mixing bowls and eventually moved the pots and pans to the space to the left...across from the stove. (The crock pots and extra casserole dishes went into the nightmare cabinet!)

Accessing them still required that I move this little stool...

...and crawl around on the floor to get to them all.

(This is one advantage to having a small kitchen...you can put anything anywhere and still access it in just a few steps!)

When I was shuffling things around in my pantry thinking I MIGHT put a microwave in there I found that I had a bit more room than I thought! Again, I am not cooking for a family any more, so food storage is not as big a deal as it was years ago!

Truth be told, there are food items I rarely use (like my daughter-in-law's gluten free flour and boxes of dry goods) as opposed to the pots and pans I use every single day. So that got me to thinking...WHY do I store things I use daily in an inconvenient place? Is there some kind of "kitchen rule" I would be breaking and risk being fined by the kitchen police? Can I not move the things I use EVERY day to an easier space to access and store the stuff I only use occasionally in their place?

ABSOLUTELY! So I did....

I moved the pots and pans to the pantry...eye level and easy to access. I installed another slide out shelf and use it for boxed and dry goods I only need to access to occasionally.

And you know what...I LOVE it!

I guess if the kitchen police show up to inspect I will have to move it all back. In the meantime I will enjoy being just a tad rebellious.

Keep in mind I have "purged" down to the daily essentials...that is something you need to take into consideration when you feel cramped for space! Do you really use 4 identical casserole dishes...or 3 egg pans...or 2 full size crock pots on a regular basis. If you only need them during the holidays or for family gatherings, consider moving them out of the kitchen. I store my large three crock cooker in my laundry room because I only use it during Thanksgiving...no need for it to take up valuable kitchen real estate year round. 

Think about it...are rarely used items taking up valuable space...are you storing every day items in a space that is "proper" but just doesn't work for you? MOVE IT! 

Heirlooms trump everything!

I have said it time and again....family heirlooms trump EVERYTHING!!! So when my uncle dropped off a china cabinet this week that had been my great-grandmother's, everything was rearranged to make room for it!

It's not "my style."(very traditional) It's not "my wood." (oak) It's not "my finish." (white-wash/pickled kinda look)

But it was my great-grandmother's and that is all that matters.

I even have a picture to prove it!

This is my maternal grandmother, great-grandfather and great-grandmother gathered at a holiday dinner in the early 80s....the china cabinet is in the background and the dishes on the table are my great-grandmother's china I recently acquired.

I vaguely remember this piece in my great grandparent's dining room when I was a child. They lived in a charming little post-war neighborhood in Dallas and during my childhood it was the family gathering spot for holiday's and special occasions.

While I was looking through my family photos for a picture of the cabinet, I also found this awesome holiday photo of my mother's entire family taken in 1948 at their home in Houston.

My mother is the sullen looking teenager in the red gingham shirt, my uncle to her left. The woman to the far left in the picture, in white, is my great aunt Judy. She inherited this china cabinet after my great-grandmother (woman far right) passed in 1986...and now it has come to me!

On the table are my grandmother's dishes I also acquired recently! 

These pictures are pure treasure!

Sooooo...now I have a china cabinet that is not my style, not my wood and not my finish.

I'm not sure what I will do with the finish...if anything. Right now I am just going to let it sit and mull it over. This is one of those pieces I will not touch until I have a very firm game plan in place. I know it needs a few small repairs but the beveled mirrors were replace in 1986...seriously, I found the receipt in the cabinet....$15 for two beveled mirrors. I just spent $130 to replace two mirrors that broke when my living room wall mirror fell off the wall!

I do know I would like to replace the wood shelves with glass...maybe add some interior lighting....and I couldn't wait to remove the metallic red paper inside the cabinet!

Had I picked this piece up at an auction, I would have immediately slathered it in paint. 

Not that I am opposed to making changes to family heirlooms. Sometimes you have to make changes to a piece so it will serve your family for many more decades. But when you are dealing with family heirlooms you should proceed with respect and caution! 

Traditional china vs. Ironstone....

I currently have 7 sets of china in my attic. The "important" pieces of each set are displayed throughout my home...tea sets, serving dishes, pitchers....as well as one place setting of all.

I did not set out to "collect" china. My first set was a pretty pink and green floral I purchased at an auction almost 30 years ago. The set had mint EVERYTHING...salt and pepper shakers, tea pot, sugar and cream set, serving dishes and 12 place settings.I proudly displayed it all in my china hutch until one fateful move...when I didn't get the little pegs securely in the top shelf of the china hutch...and it all came crashing down. No, it did not break the pieces I had 12 of, like plates and cups. Nope...the teapot, the sugar and cream set, the salt and pepper shakers, serving dishes. THOSE took the hit. By some weird alignment of the stars or fate, an older lady we were buying a house from was having an auction and she had the exact same set....including the serving pieces I had destroyed. Wow...what are the odds. Now most are packed away in the attic.

I bought another set of china years later, again at an auction.I loved the colors...browns, oranges, blues. It has the prettiest scalloped edges on the serving pieces! We used them at Thanksgiving for several years until we (I say we...actually Brian is the dishwasher!) got tired of having to hand wash them...now they are in the attic!

And then just a few years ago another set...a simple "white" with platinum edging, decorated with little platinum branches with birdies (if you remember, I have a thing for birdies!) Simple. I bought them for a New Year's dinner party. Much more "contemporary" than the other two sets. Naturally I used them once and then most were packed away in the attic.  

Now the "family" heirlooms are starting to roll in. The first was from my paternal grandmother. She wasn't a "china kind of person" but she had the prettiest serving pieces of the Universal Ballerina in mist from the 1950s....a beautiful greenish-bluish color with a simple platinum edge. So pretty in fact that I began purchasing the dinner plates and bowls and cups. And then I promptly packed them away in the attic with the other sets. 

Then my maternal grandmother's. Then both my maternal great grandmother's. All from Japan or Germany, where my mother's family lived during my grandfather's military career. I get tickled when people make a huge deal out of "Occupied Japan" pieces at auctions...I have an attic full because my grandparents actually lived in occupied Japan in the late 40s! 

Again, I have the serving pieces, a place setting of each and the tea sets displayed but the rest are all packed and labeled in the attic.

So where does the ironstone come in?

Well, since the discovery of blog sites like Miss Mustard Seed and The Ironstone Nest I have taken a fancy to simplistic style of the white ironstone. So much so that when I discovered ONE ironstone bowl in an apartment, I went on an obsessive hunt for more pieces. For years I have loved white dishes because it was easy to add other white dishes when needed without there being a "glaring" difference!  I ended up spending way more than I want to admit to put together 20 dinner plates, bowls and dessert plates for every day use, buying a few pieces at a time on Etsy and Ebay! 

Ironstone is not as prevalent in our area as it is in other parts of the country. I have run across a few pieces here and there but nothing like the northeast where it seems to be in every antique and thrift store...and has soared in value. I have purchased a few pitchers and tureens and dish sets over the years (usually for VERY little), but nothing like what other bloggers report. It just hasn't made a "splash" here like it has elsewhere. The pieces I have sold have often sat for some time and sell for very little.

So I have begun to "hoard" what few pieces I stumble across.

Just last week I bought two pitchers (each thrown in a flat of odds and ends) at an auction.

I also picked up this pretty sugar and creamer set that came with an entire set of ironstone dinnerware. My daughter will get the dishes for her apartment this summer (that should tell you how little I paid for the entire set)...the sugar and creamer set are mine! 

I found this little chipped creamer in a box of odds and ends several years ago and kept it because it was chipped and it is the perfect size for little knock-out roses.

I think I picked up this little set at another auction some time back. Pretty....

And this little pitcher...I like it with the little Gerber daisies in my laundry room!


Martha Stewart is credited for bringing ironstone to the fore-front of today's collectors. Her website gives the simplest, most comprehensive, history of ironstone. Well worth the read!

I really love the simplistic styling of the white ironstone. As much as I love and cherish all the pretty china I have purchased and inherited over the years, sometimes I feel like all the "traditional china" kind of gives my home that "old lady vibe." But most are heirloom pieces and are just a few of the Things I Love!

A few new storage solutions!

In my quest to make my kitchen a tad more "user friendly" I stumbled upon a nifty little storage gadget at Lowes that will help me manage my casserole dishes and mixing bowls a bit better. 

As I have mentioned, in my "dream kitchen" I have nothing but big deep drawers in my lower cabinets. Unfortunately that is a "dream" so I have to work with what I have and digging around in a lower cabinet for heavy casserole dishes and keeping all my mixing bowls organized has become an issue.  

Again, and I can not stress this enough, the number one key to getting organized is PURGING!

Pull it ALL out and ask yourself...DO I REALLY NEED THIS?! In my kitchen cabinet, I had several casserole dishes that were duplicates of what I have but they didn't have lids. Do not need! I had 5 large 9x13 casserole pans...do not need them all! I had 3 stainless bowls the same size, which made stacking them a impossible...do not need! I have FIVE crock pots...two smaller ones just for dips and such. I DO need those but only once or twice a year so there is no need for them to take up valuable kitchen real estate. So off to the hall pantry they went! 

I contemplated building and installing either 4 drawers or 2 large drawers in this cabinet base. Lots of work! So when I found these nifty little metal storage drawers at Lowe's I knew I had found a relatively easy solution.

The problem with these metal drawers is they are not custom sized so I was going to end up with a lot of "dead space." I decided to only install one for my bowls and casserole dishes since those are things I use almost every time I cook. I left the other side shelf space for crock pots and dishes I only use occasionally.

The drawer component lets me easily get to my bowls and casseroles dishes without wallering around on the floor and pulling everything out to get to the stuff in the back.

A perfect, and simple, solution for organizing a tough space.

When Brian and I went scrounging around the flea market out in Tontitown last weekend, I found this neat little wall decor. A framed chalkboard with two "distressed" wire baskets. I knew it would be perfect for organizing magazines that tend to get piled up in the coffee table, which in turn means they get ignored!

I'm pretty sure it is probably something one could pick up at Hobby Lobby, or something I could easily make with an old frame and paper storage racks from an office supply store. But it was there, and it was done...the only thing I did not like was the original  finish on the frame...kind of a "white-wash" natural wood looking thing. I immediately painted it with some chalk paint and distressed and sealed it. Great for magazines or mail. Remodelaholics featured a bathroom with a similar one.

I like it in the bathroom but I am of the opinion that if you are in the bathroom long enough to read an article, you probably ought to seek treatment. Just saying....

Last fall I bought this awesome antique sewing machine at an auction. The "lid" flips back to reveal the machine

I immediately fell in love with the little wood box that covered the machine. After a little research I discovered they are called coffins....most often in mahogany or walnut. BEAUTIFUL! I immediately jumped on Ebay and found a few of these amazing little boxes.

Naturally they needed to be refinished, but a little magic mixture and a few coats of tung oil and they are amazing!

My original plan was to use them in the "kitchen reset," but there really was no good place for them so I have them scattered around the house for storage. In the den, I use them to store some of my photo albums. They would be darling with little castors for "rolling" storage. l absolutely love them! 

When I reset my kitchen, I dug around in my flea booths looking for "functional decor." In other words, pretty with a purpose! A few things caught my eye.

The first was a little glass pumpkin...perfect for this time of the year! I usually keep my coffee in a crystal decanter, but this little pumpkin is perfect for the fall season.

Now I am going to be on the look out for one I can use for the Christmas season!

I also found this little sterling silver piece. I THINK it might have originally been for sugar since it has a little notch in the lid where a spoon may have rested but most sugar jars are smaller. Regardless, it is the perfect size for my coffee filters. 

And of course the need to store 1/2 of my dishes when I built my floating shelves...seriously, who needs 20 plates! I purchased this little basket from Kaufmann Merchantile with a gift certificate from my son but I also found some on Amazon and have ordered 3 for my holiday wrapping station! (I'll share that little project when I get it set up!)

I have mentioned time and again that I really don't decorate much with  "pretty" without "function" or purpose...unless something has sentimental meaning. 

I am learning that these little touches are what really give a home "character." No need to use boring old plastic containers or cardboard boxes if you can "think outside the box" and find interesting pieces that are "pretty" but can also serve a useful function! 

Anything that can make my life more organized is great...the fact that it is pretty or interesting is a huge plus!


The kitchen makeover reveal!

It is time for the big KITCHEN REVEAL!!!

First, I had to wait on the maple trim...then I decided to wait on the new doors and glass!

I had not intended to start decorating for fall before "the big reveal." My plan for this week was to do the glass doors Tuesday, take pictures of the kitchen and get ready for Matt's birthday celebration Wednesday (he turns 26 Saturday!), post the reveal Thursday morning and then get most of the fall decor up and get my hair and nails done ...AND LEAVE FOR COLORADO FRIDAY!!! Yippeee!

One hitch...I got a call Tuesday morning that the glass wasn't on the delivery truck so it wasn't going to be in until Thursday...well that just threw a wrench in my whole week. So Tuesday I started working on my fall decor. Tuesday afternoon, the glass place called and said they "found" my glass and it was ready. Sooooo....short story long, the "reveal" pictures are going to have smatterings of fall! 

I think I have mentioned before that I have a bad case of "Pinterest envy" when it comes to kitchens. 

Tipsaholic recently featured some beautiful kitchen pantry/storage ideas. I love the painted kitchens and all the open shelving but the one thing I noticed about EVERY picture, whether featuring beautiful glass containers or pull out drawers, was the ORGANIZATION of every item and space.

For me, the key to a great kitchen (or any space for that matter) is making sure everything is organized and functional for MY needs! And of course aesthetically appealing, but unless it is organized and functional, I am wasting my time making it pretty!

While I love all the neat pull-outs and storage inspiration, I think the first thing you need to do BEFORE you start any kitchen remodel is get every drawer and cabinet purged and organized and see what you have, what you need and what space you can rework, organize or add to make your kitchen function for YOU! Plan, plan, plan!

Here is a post on purging and organizing your kitchen drawers! A super simple little project but it has made a big difference in my ability to find stuff I need!

My goal in "resetting" my kitchen was to make it more functional for my purposes.....and of course, change things up a bit aesthetically so I am not tempted to take a paint brush to these beautiful cabinets 

I basically had a "standard" (and small) kitchen layout.

I do love stained wood and as drawn as I am to painted cabinets, I knew the day would come in the future when I would regret painting mine. My stain color (Paprika Cherry on Maple) isn't totally offensive and fairly "timeless" if that is possible, unlike my daughter's kitchen which had "pickled oak," a stain my dad and I were putting in houses in the 1990s!! I did not discourage her in the least when they decided to paint their cabinets. 

For those who believe "white is classic and will never go out of style" obviously don't remember the "honey oak" trend of the 90s..."oak is classic and will never go out of style!" EVERYTHING goes out of style...eventually! Which is why we are all painting honey oak cabinets!

Earlier this year I made an offer on a smaller house with a smaller yard in a subdivision I would love to live in. The house was basically a "gut job" and the new kitchen I designed had NO upper cabinets...none! I wanted lots of windows, maybe a few open shelves, tons of base cabinets with drawers and a big island.

But that deal didn't work out and I don't have the "footprint" to build a kitchen even remotely close to what I would have put in that house. Right now I don't have the funds (or energy) to make major changes and I can't bring myself to change out appliances that aren't totally offensive and work perfectly fine! 

What to do, what to do!? I wanted some changes, but I didn't want to do something I might regret down the road.

This is one of those times when I had to "work with whatcha got" and make changes that would give me a few elements I crave, without spending a ton of money or eating out for 2 months while the kitchen is in complete disarray. In the end I probably spend under $800 (doing the work myself!) and I think we ate out two nights! Keep in mind that the three doors cost around $200 and special order maple trim can be costly. The changes I made would be A LOT cheaper if you use stock trim and don't add new doors!

If you aren't in a position to spend a lot of money on major changes and upgrades but you love the concept of open shelving and more storage, these few changes might just be the answer!

I did not paint my cabinets but I was making changes that required a few pieces of new maple trim the color of the existing. THAT is a Herculian task and one I would advise you do BEFORE you start moving things around...unless you have stock wood like oak or poplar, or intend to paint the cabinets! My kitchen cabinets are 16 years old and honestly even if I knew who, what, and where the odds that they would have trim pieces to match after all these years are pretty slim. I tried finding stock trim that came close, but none was close enough. There are cabinet manufacturers that will do "color matches" but unfortunately they won't do it for a few pieces of trim.

As I have mentioned before, most manufactured cabinets and furniture have a stain and finish that is sprayed on...so matching an existing finish can be pretty difficult! Thank you David, at Sherwin Williams in Springdale...most amazing color match EVER! I honestly can not tell the difference between the original and the new! I took a door and a few samples of the new trim and he matched it right up...amazing!

There were a few things I wanted to accomplish in this little "makeover." First, I knew I wanted open shelving. That is one element I am always drawn to in my quest for "inspiration." (Here I talk about finding your inspiration for ANY project!)

I wanted to "pop up" a few of my cabinets and open a few up for display. In the post featuring my laundry room, I tell you exactly how to "pop up" existing cabinets.

Moving the dish cabinet, spice cabinet and the two cabinets on either side of the refrigerator allowed me to add the open shelving beneath them. 

Here you can see a step by step tutorial for constructing three different types of floating shelves!

The frame to the left is just foam board with scanned copied of my grandmother's old recipe cards tacked to it! The boys always gripe about my "shallow" bowls so I pulled a couple Philbe Fire King bowls I had in my booth and then ordered small matching custard cups I found on Ebay for dips and such! 

My spices, along with my cooking and serving spoons, are now at my finger tips!

I love all the different glass jars! I painted my old knife block a pretty teal just to freshen it up a bit! I love refinishing and repurposing old cutting boards...this one is perfect for holding recipe cards!

This is now my "baking corner." I added the antique fan for comfort...you can see how easy it was to rewire this 80 year old fan here and bring it back to life! 

I choose not to pop the cabinets all the way to the ceiling. I know some would, but I have 9' ceilings and to do so would have looked funny and made the cabinets completely unusable. 

One thing I really love are the stainless and glass vent hoods. I really dislike the big hulking, over the range microwaves. The truth is, I don't have the real estate for a counter model, so for now I will stick with the big hulking over the range microwave!  Poo. 

I removed the doors on two of the cabinets and painted the interiors. After looking at them for a few weeks, I decided I did not like that open look even with all the "pretties," so I ordered new maple doors, stained them and added reeded glass inserts...like my laundry room door! (LOVE!)

I get the "openness"  without the cabinets looking "unfinished." There is a chance I may eventually do this with the doors on both sides of the refrigerator!

I did add some under counter lighting above the pasta shelf and the "baking" shelf. 

I wired into the existing under counter lighting and ran the wires between the cabinets and across the top of the cabinet above the refrigerator that was covered by a shelf. Now all the under counter lighting can be turned on with a flip of the switch that was added when we did the original lighting! 

I added glass jars here and there to hold tea, baking stuff, beans, and pasta. I love the Anchor Hocking Heritage jars for flour and white sugar but they don't have sealed lids which is necessary for brown sugar. (That was one great thing about reworking and organizing my pantry...I was able to designate one cabinet and shelf area specifically for baking stuff.) 

I found sealed jars similar to the Anchor Hocking Heritage jars, as well as jars tall enough for spaghetti and linguini at TJ Maxx! I ended up with a variety of jar styles I picked up at TJ Maxx, flea markets and Oneida online.... and I like the different looks! 

While I think the matchy-matchy boxes and storage bins are super cute in pantries, I prefer to actually SEE what I have...so I organized my pantry and cabinets so that like items are together and I am able to see what I have and what I need at a glance!

The upper shelves were a great addition...mostly so I can now openly display my cookbooks and a tiny bit of my china (I have 6 sets!) and also a few little decorative do-dads. 

The old coffee grinder is one I have had in my booth for MONTHS...probably because it is missing a piece of the top...but it looks pretty neat on the shelf with the big gold B I picked up at the flea market, a fall berry wreath (I also have a boxwood, but the berry wreath is a new fall find this year) and an old chopping board I turned into a little "chalkboard." 

This shelf had to be removable for one special reason! "Lord ?" He is stored away in the attic for the time being, but he has to have a special place when I decorate for Christmas and he would be too large for the space if the shelf could not be removed. So I painted the shelf bracing the same color as the wall and the shelf can easily be removed when it is time to display him!


As you can see, my kitchen is pretty "traditional." With furniture, I tend to lean more towards the clean lines of "modern/mid century" now but as with everything in my house, my kitchen is more of a mix of traditional, modern, and "farm house." Eclectic, to say the least. That seems to be the "style" I am most comfortable with...not too much of any one style, but a broad mix of everything!

A toss of this, a pinch of that, a smidge of whatever strikes my fancy!

One of the great things about being "eclectic" in your decorating style is you can pick up anything without worrying about whether it fits in with the "style" of the room. Whether it is modern, traditional, transitional or farm house...if I like it, I can usually make it work!

The biggest improvement for me is the addition of the open shelves and my ability to reorganize a few spaces to make the over-all kitchen a tad more functional and organized. 

And that my friends should be the PRIMARY goal for any "makeover." Because let's be honest...if the piece or space isn't functional and organized, all the pretty it the world isn't going to cut it!

First and foremost, make your space or piece functional and organized. THEN make it pretty!

BTW, as much as I debated painting the fireplace wall when I remodeled my den I am SO glad I didn't...it is perfect for the holiday seasons...fall AND Christmas.... and I can't imagine it any other color!

Friday we head out for our annual train/zipline/fishing/Aspens adventure! I am soooo ready. Matt will be here holding down the fort and when I get home, fall will be in full swing...regardless of the temperatures! 

THREE different Floating shelf tutorials...

I am going to wait to do a full reveal on my kitchen "reset." I call it a "reset" because I didn't paint the exterior of the cabinets or get new flooring or counters...just moved cabinets around, removed a few doors, painted the inside of a few cabinets, added some under-counter lighting and added shelving. So while it is a major change, and looks and functions MUCH better, it isn't a full-blown makeover.

Today I am going to share a tutorial on floating shelves. Actually THREE different tutorials!

The first thing I had to do was figure out which cabinets I wanted to "pop up" and where I wanted open shelving. That was what all the planning and measuring and drawing has been all about for the last few months. After I decided on the "configuration" of the cabinetry, I moved the cabinets that needed to be moved (see a tutorial on doing that hereand decided what "stuff" I wanted on each shelf...that is an important part of the plan because you don't want to plan on storing a 10" tall Anchor Hocking jar on a shelf that, in the end, only has 9" clearance!

The problem with adding floating shelves to any room is the need to plan for the weight of the items it will hold and whether or not there are studs to anchor the support.

In my kitchen, I had four areas I wanted to add floating shelves. I didn't want brackets, so the "support" for each shelf was a huge issue. In the end, I had to construct and anchor three different types of shelving to give me the clean look of floating shelves!

The first area was the hardest only because it was the longest span and will hold all my dishes. When I weighed my dishes they came to SIXTY FOUR POUNDS!!!! Just for plates, bowls and salad plates....that didn't account for cups, glasses or condiment bowls! Course then it dawned on me that I really didn't NEED to display ALL my dishes so I pulled out 8 place settings and stored the rest above the pantry! Not a great place to store something you use every day, but perfect for things you only need a few times a year! I actually have MORE of these dishes in my hall pantry...they are Pier One Bianca ironstone and they don't make it any more...so I stock up every time I find them on Ebay or Etsy!

The two shelves were still going to hold a lot of weight and I knew I needed something sturdier than a pre-build floating shelf you buy at Lowe's. 

The wiring is from my under counter lighting that was attached to the cabinet! Notice the black piece of electrical tape on the switch so someone didn't accidentally flip that switch!!

I found a tutorial online for floating shelves using metal brackets attached to the studs by cutting out the sheetrock. God help me, I did not save the link! Since I knew what I needed to do, I didn't need to refer back to the tutorial! Hopefully my tutorial will give you the information you need!

My plan was to attach L brackets directly to the studs and then conceal them with sheetrock and the construction of the shelf! 

The first thing I did was locate the two studs with a stud-finder. I marked the location, used my L brackets to "trace" out the area I needed to cut out and then cut out the sheetrock. 

You can use a Dremel with a cutting blade but I didn't want to blow dust all over the place. I just cut it out with a utility knife and chisel.

After cutting out the opening, I set the L brackets directly on the studs, made sure it was level between the brackets by laying a 24" level across the two, predrilled the holes for the screws and then attached them to the studs using heavy duty wood screws...3/8" bolts will work as well!!! 

You may notice that the brackets are set 1/4" above the top of the tile...that is because the underside of the shelf will be 1/4" plywood and I want to be able to slip it on top of the tile. Someday I MIGHT change my backsplash and I want to be able to remove the tile without messing with the shelving!

After the brackets were attached, I used sheetrock mud to fill in the holes...right over the bracket attached to the studs. You could "patch" the area like I showed you here, or you can just fill them with mud. As the mud dries, it will crack, and you may have to sand and refill it 2-3 times...no biggy....I had a lot of stuff going on over several days so I wasn't in a hurry!

After the mud dried, I sanded it well, sprayed it with texture (again, this tutorial shows you how to do that) and then painted it (AGAIN, this is where having leftover touchup paint is SO important...unless you are repainting the entire wall!)

Here is the downside to doing tutorials...I don't always take the pictures I should take! Sooooooo......try to follow me here. The shelf was pretty much constructed the same way the shelves adjacent to the refrigerator were...so you can see pictures of the construction later in this post!

I cut, primed, sanded and put one coat of paint on all the shelving components before I put them together...that way, once it was all constructed all I had to do was caulk, putty the holes and give it one final coat of paint! (I used oil based paint on the shelves...maybe overkill but I know it will hold up!)

I used 3/8" plywood for the top of the shelf...I cut it (and the 1/4" ply for the underside) the size I wanted the shelf, LESS the 1/2" for the strips of wood used to face the front and both sides (Example, if you want your shelf to be 8" deep and 30" wide, you would cut your plywood 7 1/2" x 29"). I glued and nailed 1/2" plywood strips to the underside of the 3/8" top to create a "channel" for the electrical cord for the under counter lighting and for the bracket. I laid the 3/8" plywood across the two brackets and attached the top to the L bracket with #10-3/8" screws and then glued and nailed 1/4" plywood to the underside. So all in all, the thickness of each shelf was 1 1/8" thick (3/8" top + 1/2" inside strips + 1/4" underside = 1 1/8" thick.)

I wanted to reinstall my under counter lighting to the bottom shelf so I measured for it's placement and drilled holes for the electrical wiring in the underside (1/4" plywood) of the bottom shelf and ran the wiring between the "channels" and through the holes before I attached the bottom to the top of the shelf. KNOW WHERE YOUR ELECTRICAL WIRING IS so you don't put a nail through it when you are nailing the underside to the top!

I capped the edges off with 1/2" boards...1/2 x 2" (actually 1/2" x 1 1/2") for the top shelf with no light and 1/2 x 3" (actually 1/2" x 2 1/2") for the bottom shelf so the light fixture would not show when it was installed. Caulked, puttied and gave them one final coat of paint!

A huge advantage to constructing your own support or frame is you can make the shelves any depth you want...I actually made the bottom shelf a little deeper than the top shelf.

The spice corner was a tad easier. Since the items on those shelves were pretty light weight I used premade floating shelves. The only adjustment was the width of the shelves. The smallest premade floating shelf I could find was 18" but my space was only 15". The upside is the metal bracket the shelf slips on to was only 15" wide, so I was able to cut the actual shelf down...1 1/2" off each side, and still use the metal bracket! I painted those to match the dish shelf and installed them per the directions. (Yes, you can easily paint pre-made floating shelves...you aren't limited to white or black!)

The two 15" shelves on either side of the refrigerator were another "challenge" and constructed completely different because one side had NO studs in the 15" span and the other side only had ONE stud. Curses.

Not a biggy. Sometimes you just have to get creative!!! 

I built a "skeleton" for each shelf using 1x2 material (actually 3/4" x 1 1/2") I didn't want to make the skeleton too terribly heavy but since only one side of each shelf could be attached to the adjacent cabinet, I decided to beef up the "free floating" side with a 2x2" (actually 1 1/2" x 1 1/2") I used oak on the side that attaches to the wall since it is a "harder" wood! The rest is poplar since it is a little bit lighter! Make sure when you "design" your skeleton that you account for the 1/2" "facing" that will go on the front and sides. For example, my space was 15" wide x 14" deep...since I was "facing" the shelves with 1/2" material on the front and one side, I made my skeleton 14 1/2" x 13 1/2". Sometimes it helps to actually draw it out with the measurements!

I glued each joint, tacked them with a trim nailer and then counter sunk screws...just to make it all nice and sturdy!

If you don't have a special "counter sink" screw bit, you can always cheat like I do...first, predrill the hole using a small bit (1/16th ish bit!)...

...then use a bit that is a tad larger than your screw head and drill on top of the small bit hole, maybe 1/8" deep...then just put your screw in!

It is important to predrill holes because the wood WILL split if you do not!

After constructing the "skeleton" for the shelf, I placed it on the wall, leveled it, then predrilled 4 holes through the skeleton into the sheetrock. 

Notice I tacked a piece of 1/4" plywood to the bottom of the skeleton so I could maintain enough space to slip the 1/4" plywood underside on after the skeleton and top were installed!

After pre-drilling the holes through the skeleton and into the wall, I removed the shelf and inserted "self-screwing" sheetrock anchors into the wall... the package says they hold 80 pounds each...I'm hoping four will do the job since there is no stud in this area!!!

I used the screws that came with the self-drilling drywall anchors to secure the skeleton to the wall. I added washers on the left shelf since it didn't have a stud in the wall to attach to.... just for good measure!

Litty inspected my work every step of the way!!!!

 The right side had one stud to anchor to, so I used two self-drilling drywall anchors (no washers this time) and two sheetrock screws into the stud. For good measure I used my nail gun to nail from the inside of the skeleton into the adjoining cabinet (making sure it was level from back to front!)...again, probably overkill!

After the skeletons for the shelves were securely anchored, I used 1/2" plywood for the top and 1/4"  for the underside. Glue and a few trim nails. The thickness of the shelf is 1/2" top + 1 1/2" skeleton + 1/4" underside = 2 1/4"... so I used 1/2" x 3" boards (again, actually 2 1/2") for the front and sides (all pre-primed and 1 coat of paint). Caulk, putty, paint!

Three different construction methods...this is one of those times when one shoe WILL NOT fit all and you really have to get creative! 

This may all seem like a daunting task...and I may make it seem easy. But even for me, it is not. You really have to think, and draw, and measure and plan. And be willing to throw your hands up and start over when something doesn't work the way you thought it would! THAT is what DIY is all about.

You may have noticed that since I popped up the cabinets, you can actually see the underside now...that will not do! And that is one of the pieces of "trim" I am waiting on to finish things up...1/8" maple ply that will cover the underside of the cabinets. I had David at Sherwin Williams do a stain match and he did an AWESOME job...so as soon as the trim and skins come in and I get them stained and installed, I will do a full reveal! 

In the end...I have exactly what I want...open shelving in my kitchen and when I reveal the entire kitchen you will see how this all ties together. At least for now you know that you are not limited to the measly little 10 pound limit of a pre-built floating shelf! You CAN build a floating shelf that will hold more weight, anywhere you want! 

Antique china hutch before and after....

I have had this china hutch in my booth at Midtown for several months.

Sadly, I probably paid WAY to much for it...first auction of the season and everything was going for WAY more than what they normally do. I bought it because I think it is beautiful, but truth be told, it really isn't the "style" people look for these days, as is.

I have debated for some time whether I should bring it home and paint it. I just wasn't sure that would be the answer.

Just this weekend I decided to go ahead and bite the bullet but I was still uncertain. Until I saw this....

Marian at MissMustardSeed featured this beautiful piece she painted. You can see the "before and after" on her site!

Sometimes when we see what others do, it is all we need to find our own inspiration and relieve any fears we might have of doing what needs to be done to enhance a piece!

I love the grey against the mahogany, but right now everyone around here seems drawn to the "whites" so that is what I went with!

I used my favorite off-white, Swiss Coffee, for the "plaster paint." I did not sand or prime before painting it with the plaster paint...no need unless the piece you are working on is really rough! I distressed it just a bit (220 grit sand paper) to bring out the detailing and sprayed the exterior with poly to seal it!

I had originally planned to leave the inside stained...but it still seemed a bit dark so I removed the shelves and painted the inside a soft "teal." I taped and papered off the exterior and primed the interior with Kilz, sanded, tacked and then applied two coats of spray paint! I left the shelving the original stain finish.

I absolutely adore the original hardware so I left it!

One thing Marian does is beautifully style her pieces for photos. I rarely have the energy (or back!) to haul a piece inside and "pretty it up" before I take pictures. As I have said before I am more about the process than the pretty. HOPEFULLY someone else can envision the piece in their home and can find their own inspiration for staging it! Someday I may have the energy and space to make a pretty "backdrop" in my shop (okay, so it is really my garage!) Until then, the best you are going to get is a halfway decent "before and after" shot and maybe a little bit of instruction. 

The two top shelves are a little "bowed." They are thin enough that I think I can lay them out with some weights on them to flatten them!

The debate raging right now is whether to reinstall the door (I did not paint it!) or leave it open. 

Hum....

If this gives you a little inspiration to "makeover" a piece in your own home you have fallen out of love with, I have accomplished my goal!