MERRY CHRISTMAS/LAST MINUTE GIFT IDEA!

When I first started blogging I posted a page called “Every Woman’s Tool Box.” If you look at the links at the top of this site you will see it!

I realized today that some of you may be searching for last minute gift ideas (for your wife/girlfriend/college student!)

As I mentioned in that post, I asked for a toolbox full of tools for Christmas one year! One of the BEST gifts I ever received!

For some reason it is so empowering for a woman to be able to hang a picture or tighten loose hardware or door nobs…the ability to make any minor repair around the house.

If you are a guy, this will definitely shorten your “honey-do” list…you know, that list of mundane little tasks that your significant other needs you to do on your day off!

I put together a little tool box for my daughter when she went off to college…she loves it!

So guys…or mom’s of college students…go to Lowe’s and search around for a bunch of “little” tools…find a tool box small and light enough to keep tucked away in a closet…put a bow on it and PRESTO-BINGO! Awesome last minute gift!

In the little tool box or bag I would suggest the following…hammer, Phillips and flat screw driver, needle nose pliers, regular pliers, tape measure, 6” level, utility knife and blades, a stud finder, maybe a little socket set and a small box with an assortment of picture hangers, screws and nails.

The post also lists a lot of “big stuff” any DIYer might like…saws, sanders, clamps, nail guns, etc…but just the basics is all you really need if you aren’t into the whole DIY thing.

This may seem like a silly gift idea but most women I know would love this!

I hope you all have a VERY MERRY CHRISTMAS!!!! See you next year!

Comment
Share

Painted kitchen cabinets and a new entry...

When Matt bought his house over a year ago I promised to share the projects. One year later, I am finally getting around to keeping that promise!

As I mentioned in earlier posts, Matt first had to find his inspiration and make a plan.

His first major project was the entry makeover. My entry makeover was obviously his inspiration but his entry felt SUPER tiny compared to mine.

These aren’t the best before pictures but you can see there is a header across the top of the opening between the living room and the “entry”…so the space felt really tight and cramped…wood flooring (again, a no-no in an entry IMO)…popcorn ceilings.

The “plan” was to remove the closet and header to open up the space, tile the floor and paint the door. Simple!

Before you remove a closet, make sure you have a plan in place for the things you would otherwise store in that space. In Matt’s case, he’s a single guy with two spare bedrooms and closets, a large master bedroom closet and a nice hall pantry. He had plenty of storage space for coats and such…getting rid of the entry closet was not a big deal.

UNTIIIIIL…you start hacking into walls and removing headers that are framed with aluminum studs instead of wood. Interesting to say the least and somewhat of a challenge for a “traditional” builder such as myself.

Lots of sheetrock repair, black paint on the front door that Matt is not real fond of but is living with for the time being, new trim, new tile, new paint. Eventually I think he will replace the light fixture…but it does the job for now.

Here you can see how the entry opens into the living room…before there was a “header” that dropped down 12” and really closed that space in…removing that header not only opened up the entry but it now matches the opening into the hallway that leads to the bedrooms on the other side of the living room.

Matt built the little bench! I found the beautiful metal mirror on clearance at a home interior store.

The fireplace was pretty “dated”…he painted it last year ….

…and we replaced the dated 8x8 beige tile with the same tile we used in the entry. MUUUUCH better!

The very first thing we did before he moved in was built open shelving in the kitchen. We used the “hidden bracket” method I shared here.

His kitchen cabinets were old, nasty oak and he knew he eventually wanted to paint them…but time and finances dictated he wait…the open shelving was a pretty easy and inexpensive way to give the kitchen a tiny update. Since he had his inspiration and had a plan, he knew what colors he wanted to eventually paint the kitchen cabinets…so he knew what color he wanted to paint the shelving.

We simply removed the cabinet to the right of the sink and installed 3 shelves. The cabinet we removed didn’t go to waste…he hung it in the garage above his work bench!

Painted cabinets…this summer he was finally able to complete this part of the plan.

The kitchen before…

The kitchen after…

He hired the actual “painting” part but he did all the prep work himself. He changed out the hinges from nasty ole’ brass looking things to nice new satin nickel hinges.

He also changed out four upper cabinet doors and put reeded glass in them…

The shelves inside the cabinets were old and “sagging” so we built new shelves since you could see them through the glass.

I would like to think I was the inspiration behind that change since I am a tad partial to reed glass cabinet doors!

One element of his original plan was to change out the tile countertops to a solid surface like quartz or granite. Honestly, once the cabinets were painted neither of us found the tops to be nearly as offensive so that part of the plan got bumped to the bottom of the list. It will happen someday, but it is no longer a top priority!

This kitchen is a relatively small space…kind of a “shotgun” or “galley” kitchen if you will…brightening it up with paint and installing the glass front doors and the open shelving made a HUGE difference!

The next big project on his list is his master bathroom. He wants to remove the tub/shower insert and build a walk in shower similar to mine.

Last week I went to an auction and I was able to purchase enough 12x24 floor tile and subway tile for pennies on the dollar!!! He’s been researching the best way to build a shower pan and of course we are experts at demo! So this little project could commence any day!

In the meantime he is busy being a home owner…mowing and raking the yard, mundane chores and dealing with all the grief after a tree falls on your house during a storm! Yep, it even damaged his brand new storage building he is so proud of!

Such is the life of a home owner!

Next week is Christmas and I may take a few weeks off since the whole family will be here! I hope you and yours have a VERY MERRY CHRISTMAS AND HAPPY NEW YEAR!

Comment
Share

Modifying a Dillingham MCM dresser....

So often I buy mid century pieces fully intending to clean them up and sell them. But then, well, I don’t. Inevitably I fall in love with them or one of my kids does (just search mid century on this site…you will see)

Such was the case with this mid century walnut Dillingham dresser….

It did have a few boo-boos…a broken corner piece I was able to fix with a little wood glue…

A tiny bit of chipped veneer I decided to ignore…

And of course the finish was a little worn and tired looking and needed some freshening. First I tried a little Restor-a-finish….

You can kind of see the difference…the right side has been wiped down with Restor-a-finish.

It helped a tad but in the end I scrubbed it down with mineral spirits and steel wool and applied 2 coats of tung oil finish…brightened it right up and blended all the scratches and wear…after all it is a 50+ year old piece…it’s gonna have a few nicks and dings. But again, nothing terribly glaring.

Even though the issues were relatively minor, I hesitated to sell it. I considered painting the sides to disguise the biggest issue…the broken corner.

Enter my kid! Matt absolutely LOVED it and wanted it for an entertainment cabinet!

The dark walnut matches his vintage Lane tables perfectly and like me he has a real affinity for MCM pieces.

So I went to work modifying it for his needs..specifically he needs a place for his turn table.

(Side note…I get tickled at the newest generation of vinyl lovers. People my age remember how thrilled we were to get away from bulky old record players and vinyl records that scratched and skipped. Cassette tapes and walkmans and boom boxes…life changing! Now the younger generation have circled back around to “vinyl” and think they have discovered the greatest thing since sliced bread…HA!!! See, if you live long enough, it all comes back in style!)

So…how to modify this dresser without changing it too much.

I decided to make the bottom two drawers one deep drawer. That entailed removing the face front of the middle drawer and attaching it to the black face frame and bottom drawer…creating what appeared to be two separate drawers…but is actually just one deep drawer.

Confusing I know…let me see if I can show you what I mean in pictures.

First I had to cut the face frame in half to detach it from the cabinet.

Since it is a laminate material, I knew I needed to tape it first to keep it from “splintering.” ALWAYS tape laminate before you cut it and draw your cut mark on the tape!

I could have used a skill saw with a trim blade to make the cut. But I knew a skill saw wouldn’t work to cut the little shelf inside that separated the two drawer spaces. So, darn, I had to buy a new tool…I hate that when that happens! (NOT!)

I have a small Dremel that has similar functions but this little guy is pretty heavy duty…and it worked like a charm!

Next I used my Kreg jig and glue to attach 1x2 pieces of oak to both edges of the face frame. The drawer fronts and face frame only over lapped by about 1/8”…attaching the oak allowed me to secure the face frame to the drawer fronts with glue and screws.

We used a hole saw to cut a hole in the back of the cabinet to feed electric wires through.

That was pretty much all the modification this dresser needed to turn it into the perfect entertainment cabinet!

In the photos you get a peak of a few of the changes Matt has made to his house since he bought it a year ago…the painted fireplace I shared here and the new tile I haven’t shared yet.

I have promised for A YEAR to share a few of the projects he has completed on his house…he opened up the entry, painted his kitchen cabinets and installed glass cabinet doors, built open shelving in his kitchen and laid new tile in the entry and around the fireplace. He has even built a little storage shed! I am so proud of his “projecting” so while I was there taking pictures of his new entertainment cabinet, I snapped a few of his entry and kitchen and I PROMISE to share those next week.


Comment
Share

Traditional Christmas!

My Christmas decor changes so little from year to year I hesitate to even share. (search Christmas on this site…you’ll see what I mean!)

But every year I add one tiny element.

If you follow along you know that Brian and I travel to Colorado every year in the fall. We do our annual guided fishing trip and enjoy the fall Aspens. And every year we take a few hours to walk around Georgetown. A precious little mining town just off I-70.

Every year I try to find something a little Christmasy. It is a “tradition” I started years ago.

This year I picked up this little troll.

Too cute. I guess this year Santa trolls are the “in” thing. Again I rarely go all out with the latest “fad” but I thought it wouldn’t hurt to pick up one little piece to add to my “Colorado collection.”

This year as I set out my little collection it dawned on me that I have no idea what year I bought what. So this year I started writing on the underside of each piece the year I purchased them. Not important now but maybe 50 years from now it will mean something to someone.

Here are just a few pieces I have picked up over the years….

The snow birds….

I shared here the realization that I have an obsession with little birds.

The birch Santa…

I think Birch trees are the closest thing we “low landers” can get to an Aspen…I even bought a birch candle stick when I changed out the mantel decor this year…

This little guy….the older I get the less I want to hang and fluff so I love anything I can just tuck in a corner…

I didn’t actually buy this little guy…we stayed in a condo in Frisco and this was a little gift from the owners…just precious! How did they know?!

A “tradition” has to start sometime by someone! Don’t be afraid to start your own…time flies and before you know it your great-grandchildren will be reminiscing about years past at Grammy’s and how she always had Lord ? displayed in her kitchen…

The matching pajamas she gifted every Christmas eve and how she made everyone shower and primp Christmas morning for family pictures before they could open presents…

The 9’ tree adorned with priceless ornaments given to their grandparents by their great-great grandmother!

Sticking with “traditions” is the way to go for so many reasons…

1) It cuts down on the cost of the holiday. Decorating for any holiday can be expensive…especially if you change your decor every year trying to keep up with the latest “fads.”

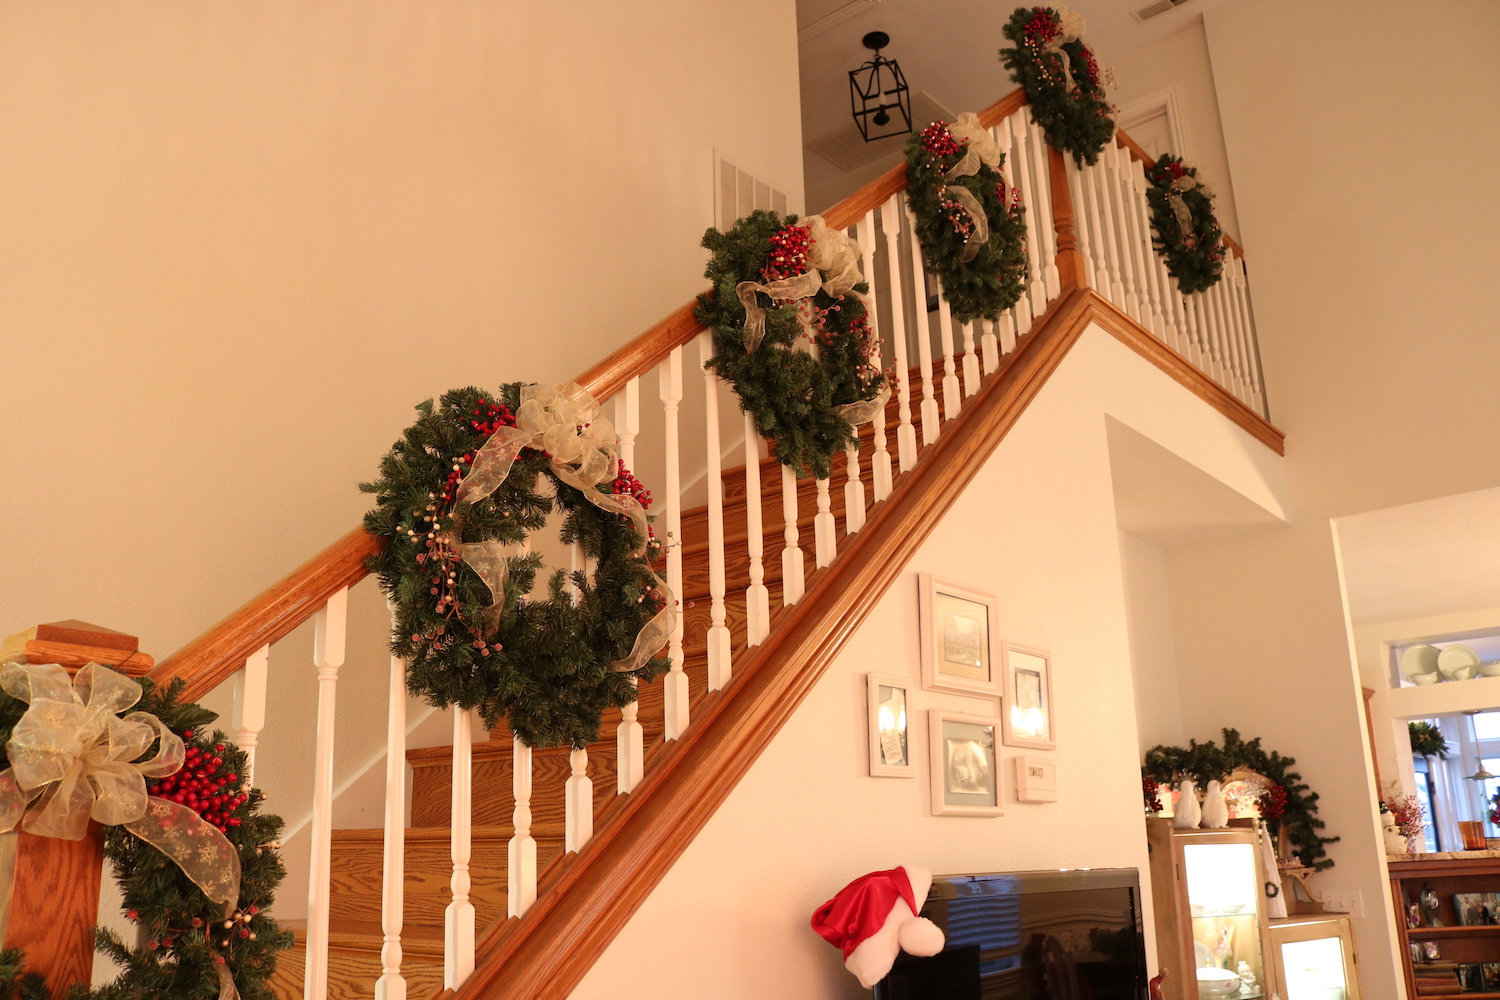
Years ago I contemplated changing out the colors in these bannister wreaths to blue and silver…

My daughter promptly reminded me that “gold and red” are traditional colors…she was right. I would have regretted spending a lot of money just to follow the “in” thing that year.
I ended up making a simple Christmas box with blue and silver and that pretty much fulfilled my desire to jump on the blue and silver decorwagon…

2) Your kids and grandkids won’t remember every gift you gave them but they will never forget the “traditions.” Whether it is the Christmas pajamas, a favorite dessert, the priceless ornaments. They don’t forget traditions…

3) While my “same-ole-same ole” holiday decor may seem a tad boring, decorating for the holiday is super simple since I pretty much know where everything goes and how everything is decorated, year to year. Little changes. It cuts down on the stress of holiday. I may pick up a few pillows or a knick-knack here and there if something strikes my fancy but most of it stays the same…i.e. easy and stress free.

This year I picked up a few “grey” holiday pillows for the couch…

But the guest bath is the “same-ole-same-ole.” I store a few trinkets under the vanity and pull it out…a festive candle, a little snowman, holiday hand towels, a holiday soap dispenser and a festive wreath I hang over the boxwood wreath. It takes me all of 2 minutes to “decorate” the guest bath.

4)Decorating for Christmas falls on the same day every year…without fail. The Friday after Thanksgiving. We fill the house with Christmas music, Brian heads to the storage building to pick up boxes while I take down all the fall decorations, and all day Friday and most of Saturday is spent decking the halls…and walls…and shelves. There is never a question of when we will find time to get ready for the holiday. Again, I may pick up a little something here and there throughout the season…but the bulk of it gets done that weekend.

Sticking with “traditional decor” (red, gold, green, silver) makes it easy to blend new with old if I see something that strikes my fancy!

5) I have no doubt that if the time comes when I can’t decorate my home myself, SOMEONE could step in and do it for me. Since little changes, all my kids know exactly how mom likes her mantle, the tree and her kitchen decorated. HOPEFULLY one of them will step up to the plate and take over the job if I am unable. Morbid? Maybe…but such is life…the day will come.

Keep the holiday decor simple and stick primarily with “traditional” vs. “the latest fad.”

These are my tips for enjoying this amazing season!