The den window reveal!
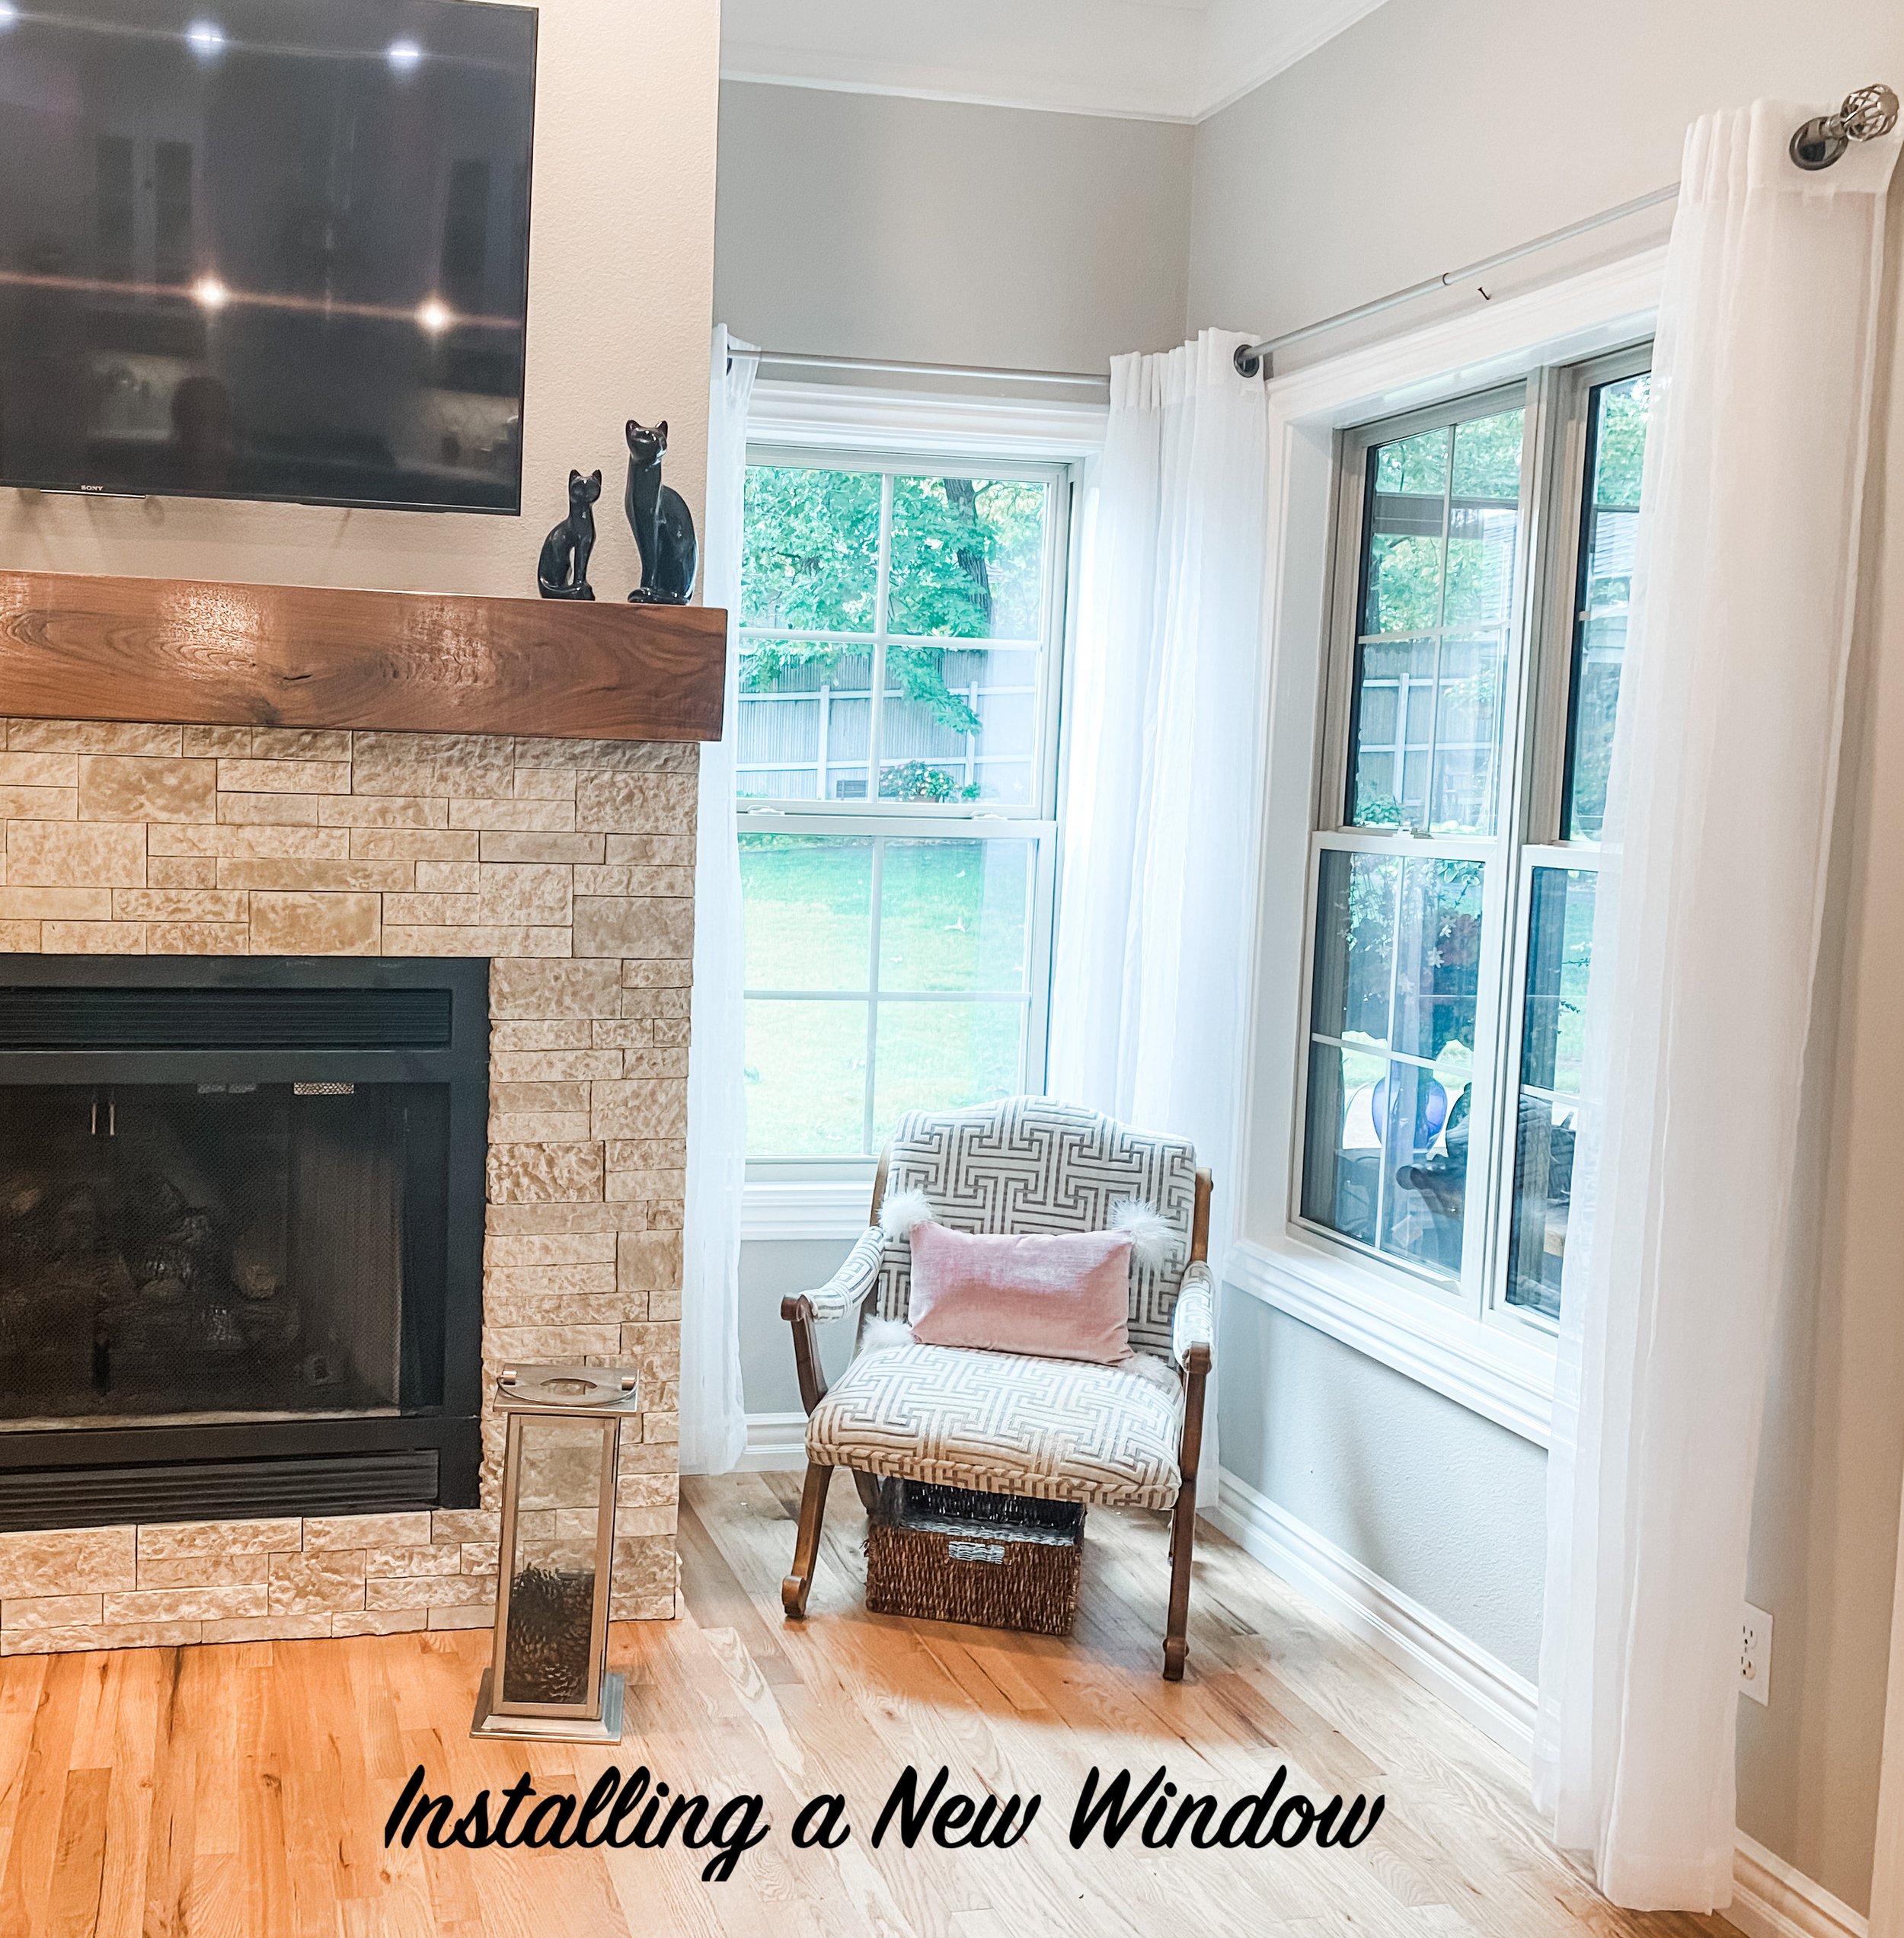
From day one…three years. That is how long I have wanted to put a window in this room!
It was a cave. There are windows and a door on one wall but they are covered by the enclosed sunroom so the natural light is seriously defused. (HERE I swore I was through with major projecting on the house…HA!)

I crave natural light. This house has TONS of windows, but the majority are adjacent to a sunporch, screened porch and covered front porch. All which I am grateful for…I just wanted a hair more light in the den.
My original thought was to put a window on both sides of the fireplace. Unfortunately, the guest room closet extends out behind the bookcase to the left of the fireplace…so that is a no-go. That’s okay…I need the built in bookcase. (HERE you can check out how I refaced the fireplace!)
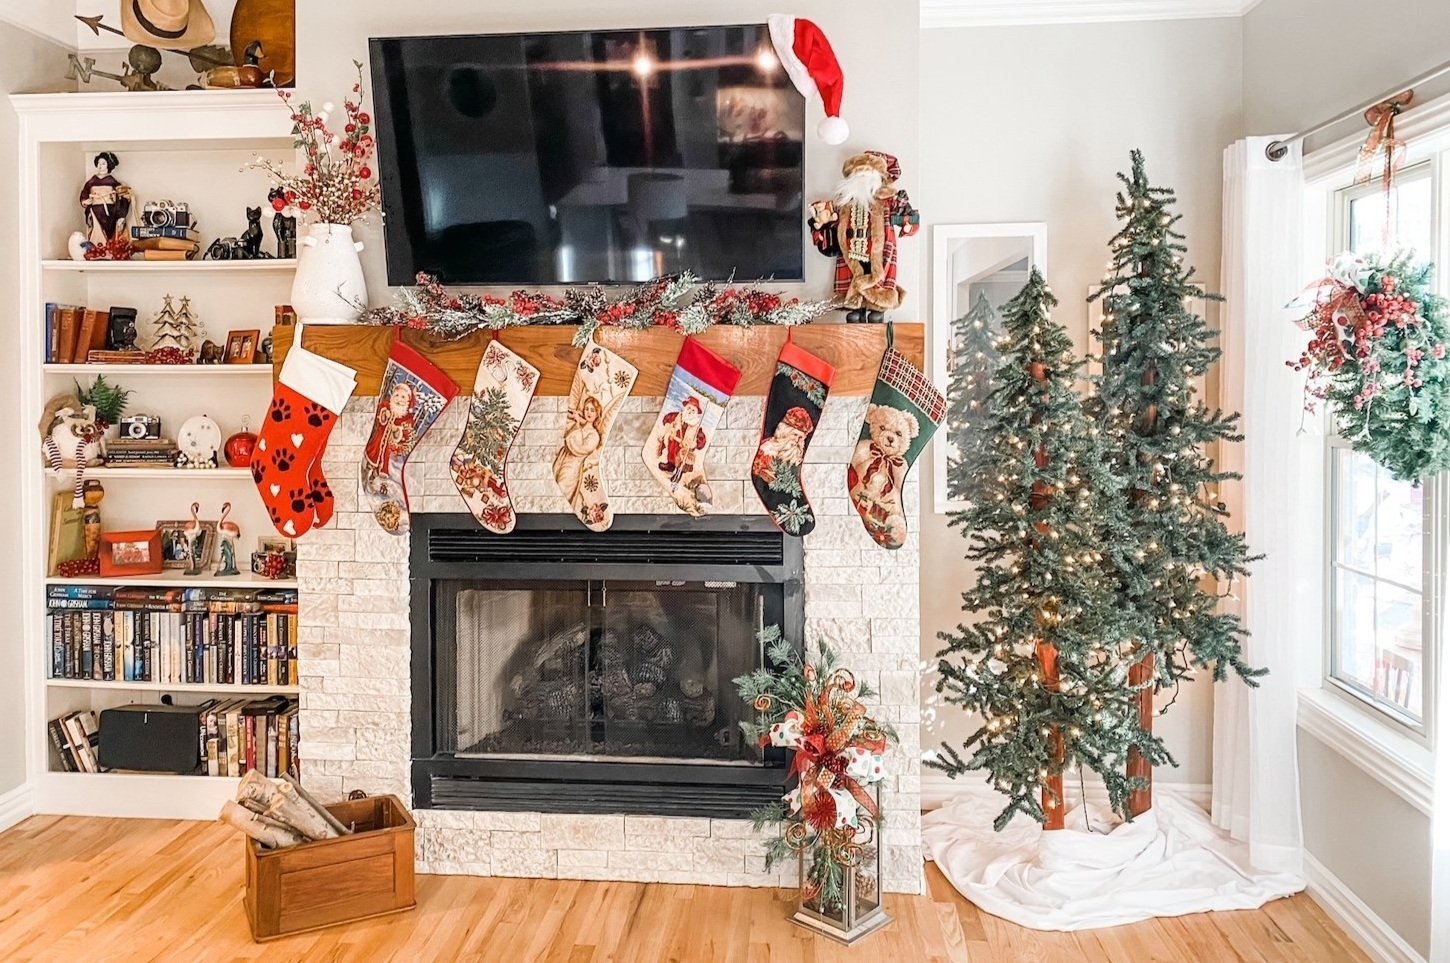
(Obviously I did not take “before pics” and the only picture I have of this space is from Christmas!)
A window on the right of the fireplace is doable….for someone like me with a bit of experience. Personally, I don’t think this is a “novice DIYer” project. If you are hell-bent, watch TONS of tutorials first and be prepared with a stand-by sheetrocker, framer, electrician, trim carpenter and brick/siding expert just in case you find yourself in over your head.
Even then, if you don’t have a basic understanding of how a home is constructed, I wouldn’t even attempt it. (HERE I posted a little bit about framing for a door or window)
Also, I highly suggest you check your local codes. You may need to pull a permit to modify framing.
As you can see from the post when I modified the laundry room opening I knew I was going to have to put in a header and maybe a few extra studs. Since I was only installing a 32” window, I figured I could just get by with a 2x4 or 2x6 (at the most) header.
Nope. When I opened the wall I found a support that was FOUR 2x4 sandwiched together…have no idea what that was all about. I went into the attic to see if maybe they loaded the roof rafters or something onto that area…not as far as I could tell. But what is there is there and I wasn’t about to assume it was just over kill.
Which meant I needed to put in a 12” header which meant I had to move the exterior light to make room for a bigger header, cut out way more sheetrock than I anticipated and add more stud supports.
CURSES!
All that being said, again it is doable. So if like me, you just HAVE to have a window (or even a door), go for it!!!
And go for it I did.
Again, I am not really a tutorial kinda person…there are tons out there, why reinvent the wheel. And honestly, every project will be different depending on what is behind the sheetrock.
Case in point.
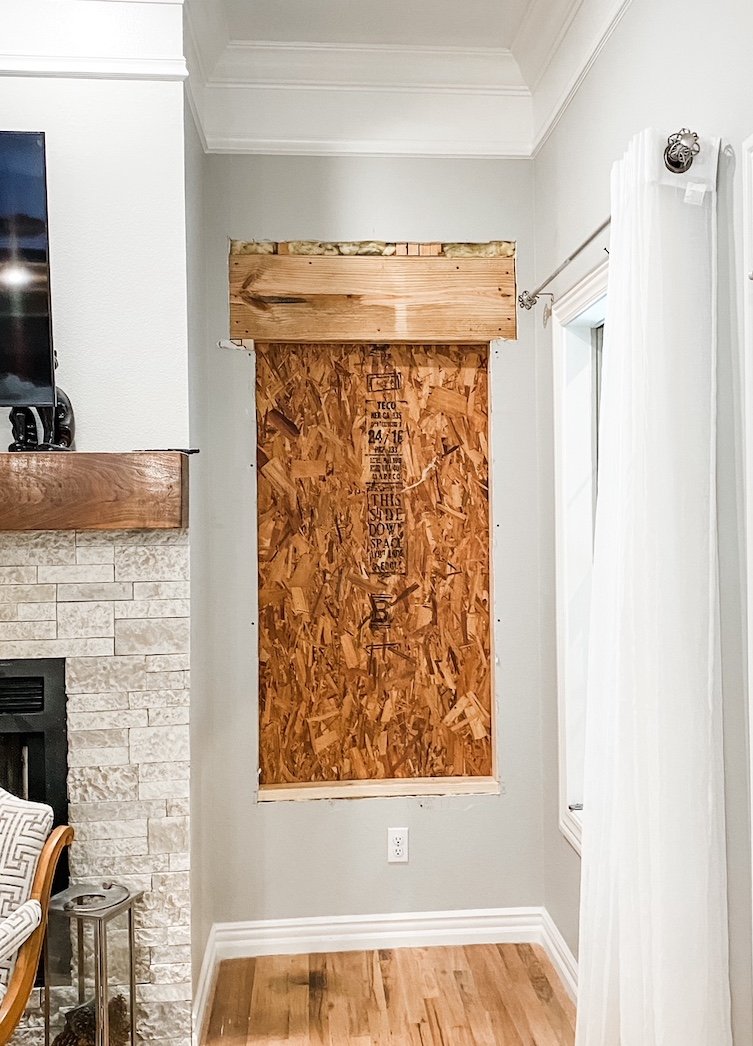
After all this “rough in” framing was done, I drilled through the corners of the opening (using a wood bit to drill through the plywood and a masonry bit to drill through the brick) and marked where the actual opening would be.
My brick guy then came and cut out the existing brick 3” from the mark where the actual window opening would be….

You can see in this picture where I had to move the existing exterior light!
While I was waiting on the brick guy I was able to get the sheetrock repair done…HERE I shared a little tip about sanding sheetrock in the house!
When the window finally came in, I cut out the plywood…MAN OH MAN!!!!

If it weren’t 100 degrees out I would have just left a big ole’ hole in the wall.
There are TONS of tutorials on how to properly install a window…read them and follow them to a T. Find one that makes sense to you!
After the window was installed, trim and paint! The brick guy came back and installed a window “casing” with new brick around the window ….

This house is 23 years old so I can’t find the exact brick to match but I found one that was pretty close! (HERE I shared how I used this “good enough” brick on my shop!) This is why he cut the brick 3” around the actual rough in opening.
What a difference this little project made!
I LOVE IT!
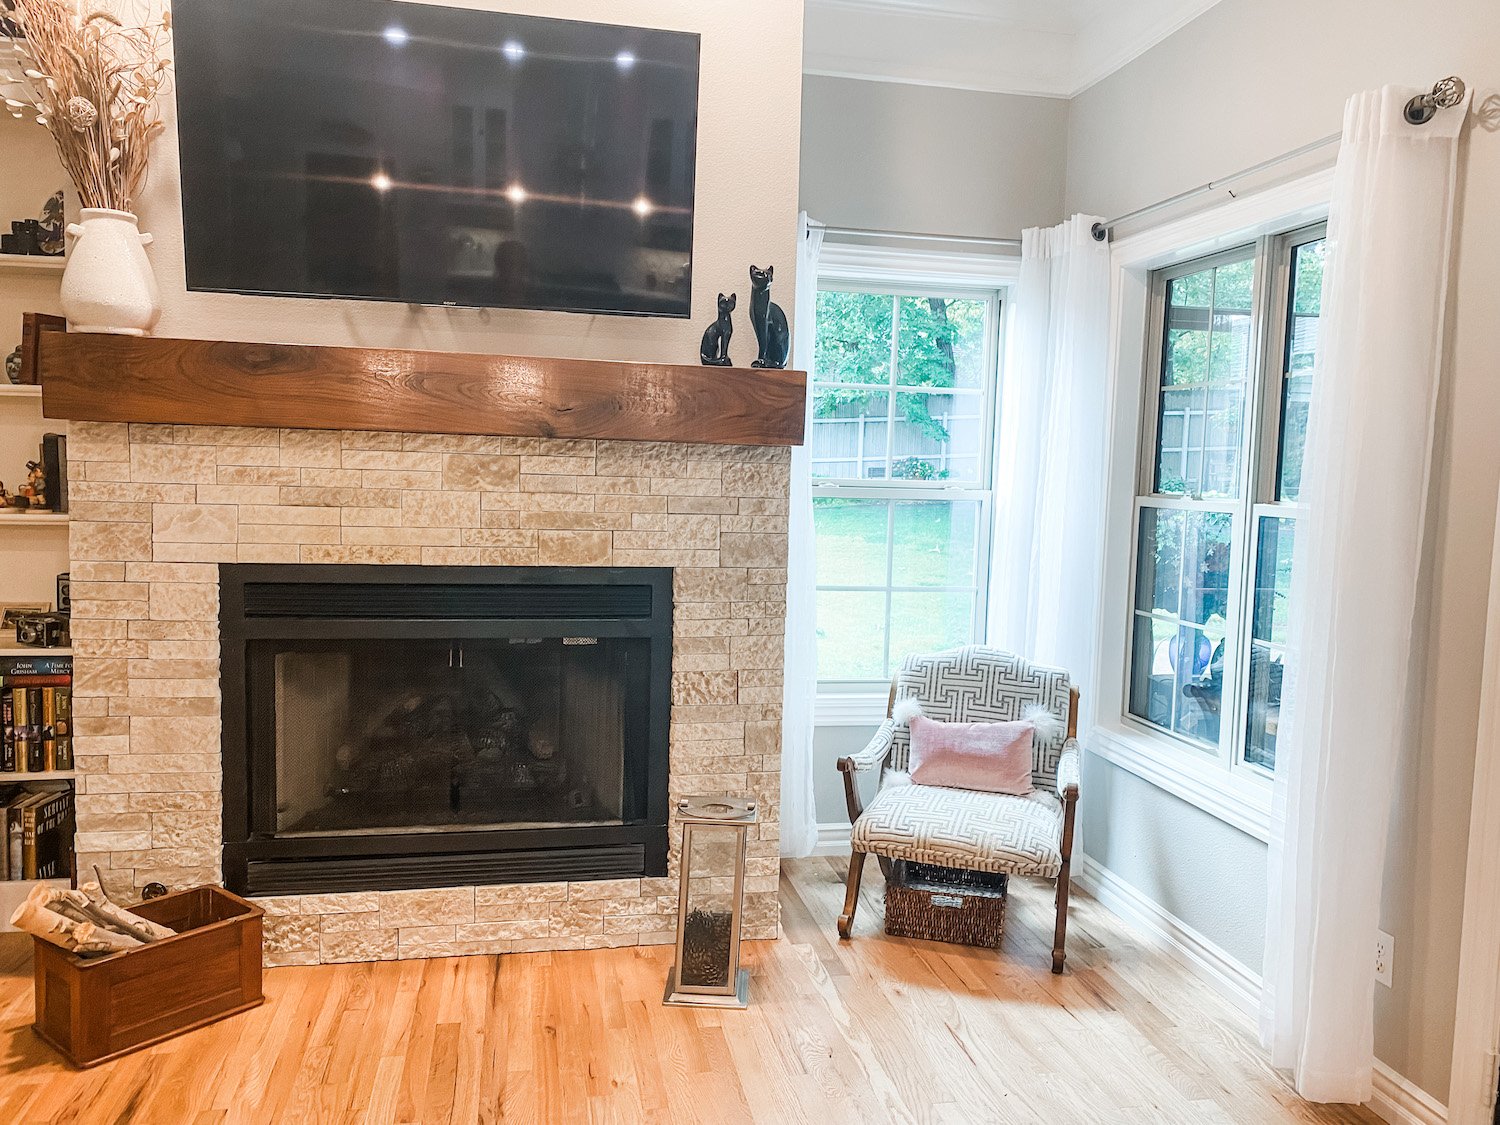

Fortunately I originally bought matching sheers for the breakfast window and the den window. I couldn’t find sheers that matched them so I took the sheers from the breakfast window and used them for the new window and bought new for the breakfast window.
I love all the the wonderful light and the view of my flowerbeds! Blooming dogwoods in the spring and fall foliage in the few months!
Lovely!

