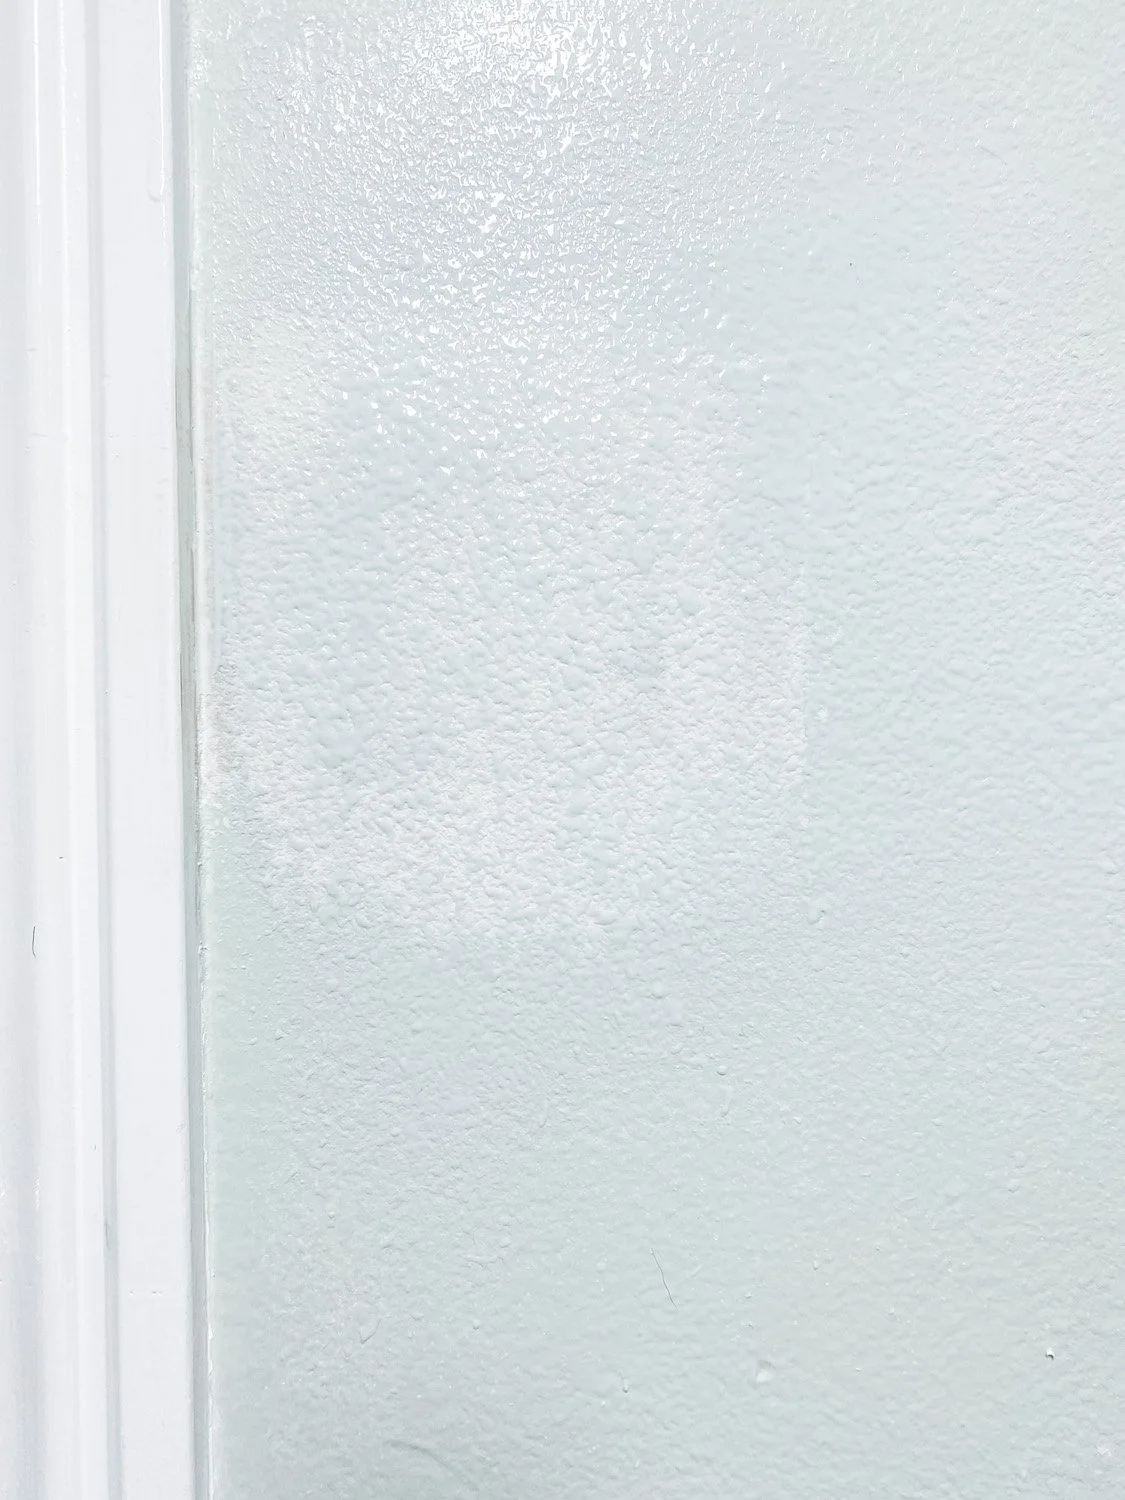
Sheetrock repair.

I posted a very helpful tutorial on repairing sheetrock HERE almost 9 years ago.

I decided to post another tutorial because I have two small sheetrock repairs…the result of removing security system control panels. (And a son who pointed out that I spent a fortune remodeling this house and left the worthless control panels)

Yes, I am removing a security system. It is the original hardwired system that was probably installed when the house was built 22 years ago and we have never even attempted to use it.

Why? Well, first we have a HUGE dog, an Anatolian Shepherd, that is quick to alert us to all boggy persons, delivery people, squirrels, unfamiliar cars, etc…day or night. And God help you if you tried to enter this house. She is the sweetest dog in the world…if she knows you or I am here to tell her all is okay. But I have no doubt she would make a meal out of you if she didn’t know you or she thought I was afraid.

No worries…we have a precious lab puppy who would be quick to clean up any mess Cleo makes…or give you puppy kisses if you are distressed. Typical lab. Not the best guard dog.

Second, everything is wireless these days. Our current security system is wireless. So an old hardwired security system is kind of useless.

I have found very little evidence of a hardcore security system. Basically there were two control panels, one in the bedroom, one in the laundry room…

…and two motion sensors in the ceiling. I removed those and covered the small holes with new smoke detectors…you can never have too many of those! (I also just noticed the doo-dads on a few doors…will have to deal with those eventually.)

When I removed the control panels in the bedroom and laundry room I found 2” x 2” holes in the sheetrock.

Curses.

So, here is another tutorial for repairing sheetrock without having to install backer boards or tape. I have used this method to repair 2” x 2” holes, door knob holes and even large sections when I removed walls (HERE)

Here are the supplies you will need to repair sheetrock….

*Scrap piece of sheetrock (you can buy this at Lowes or “repurpose” scraps from a new construction job site)

*Sheetrock mud

*Spray texture (my walls are orange peel texture…buy the texture appropriate for your wall texture)

*Broad knife

*Utility knife with a sharp blade

*Measuring tape

*Pencil

First, use a utility knife and make the hole square/rectangular. My holes were 2 x 2 inch squares so no worries.

After you have cut a decent "square" around any damage, measure the width and the height.

Then mark the scrap sheetrock, adding about 3" to that measurement! My sheetrock piece was 5” x 5”…that will leave about 1 1/2” on each side for “tape.”

Sheetrock has a paper backing on each side so it is very easy to cut...basically all you have to do is "score" the back side (usually the side that is brown) with your utility knife then just "snap" it. Then take your knife and cut through the paper on the other side.

After cutting a piece 3" larger than your opening, you will want to mark the actually opening size on the back side of the sheetrock, leaving 1 1/2" on all four sides. (This is where a little "square" tool or ruler will come in handy!) I always make my mark and cut about 1/4" smaller than my actual measurements just to give myself some wiggle room!

After scoring, "snap" one side at a time and carefully peel the "core" (the chalky inside) of the sheetrock and backing off the paper on the front side. You will do this on all four sides.

(Yes, I know I need a manicure.)

After you are all done, it should look like this.....

I also take my utility knife and make a "miter" cut at each corner...just a little slit from the corner of the board to the corner of the paper.  

Basically, what you have done here is create a patch with built in sheetrock tape...so there is no need to tape the gap around the patch and no need to try to put backing behind the board where you are patching...it is "ALL IN ONE!"  Nifty, huh? 

Before putting joint compound in and around the hole, "dry fit" your cut piece and make sure it will fit in the hole. If it seems to stick, you can shave a little off the edges with a utility knife. If you cut the piece about 1/4" smaller than the hole, it should fit right in.

After you make sure your cut piece will fit properly, mud the edges of the hole and the wall about 2" around the hole.

Set your cut piece into the hole and use your broad knife to smooth out the paper and push the excess mud out from underneath the paper edging with your broad knife so the paper lies flat. Then put more mud on your broad knife and lightly coat the entire piece.  "Feather" the edges where the new mud meets the wall. Coat the new mud a few inches onto the wall.  The less mud you leave on the patch and the wall, the less you have to sand! It is okay if you can still see the paper and board through the first coat...no biggy!

HINT:  Some mud can be pretty thick.  You can mix it with a little water and thin it down a bit...makes it easier to work with...but don't make it too runny! 

I usually let this first application dry overnight.  Remember, there is a bunch of mud along the edges that is basically "glueing" the patch in place.  You want to let that dry well before you start sanding. 

After this first coat of mud dries, sand it as smooth as possible.  Don't panic if you sand into the paper coating the sheetrock...it happens!   It really doesn’t matter what the sandpaper grit is at this point.

I always wrap my paper around a sponge sanding block...it helps you sand flat. Sand it as smooth as possible and make sure you "feather" the edges so that you don't have any heavy mud lines showing. Don't panic if you feel like you have sanded "too much"...you really can't.

FEEL the area with your bare hands...if you can feel the lumps and bumps and lines, you are going to be able to see them...so sand away!! (I can not stress this enough...SAND IT SMOOTH...CLOSE YOUR EYES AND FEEL!!!!)

After sanding it REAL smooth, put another coat of mud over the area.  Again, the smoother you coat it, the less sanding you have to do!   Be sure to feather the edges by mudding 2-3" around the repair area.  This is where a wider broad knife really comes in hand!

After this second coat dries, sand again....sand it as smooth as you can.  Again...if you can FEEL lumps, bumps and lines, you are going to be able to see them...so sand it smooth and make sure you feather the edges. This really is the "trick" to getting a good repair!

I can usually get by with two coats of mud...and that should be plenty.  If you feel you have had to sand down too much and need to add a light third coat, go for it.   Just make sure you let it dry well and sand BEFORE moving on to the next step.

After the patch and the surrounding area is really smooth, it is time to put on the spray texture.  

If needed, I usually wait to tape off the surrounding area until AFTER I sand the patch.  Joint compound will clean off easily with a wet towel but the spray texture is pretty tough stuff. So lay down a drop cloth (or newspaper) under the patch and tape off any trim BEFORE applying the spray texture.  

Most wall textures these days are what we call "orange peel."  But you might also have "knock down."  If the texture on your walls is just kind of bumpy, you probably have "orange peel."  If you have heavy blotches, you have knock down.  

You can buy cans of texture at Lowe's and they come in both orange peel and knock down. FOLLOW THE DIRECTIONS ON THE CAN CAREFULLY! And make sure you shake the can well!

(If you have never used spray texture before, I would suggest experimenting on a scrap piece of board or drywall…play with it a bit until you feel confident your application matches your wall texture. )

 If you have orange peel you will just spray it on the patch and surrounding area (using a circular motion to eliminate "lines" and spray "outside" the patch area)  If you have "knock down" texture, you will have to spray it on the patch and surrounding area, let it sit per the cans instructions and then take your broad knife and "knock down" the new texture after it has dried a bit.   Follow the directions on the can for proper application and dry times for both!   

Lighter is better....this stuff dries rather quickly, so if you think the texture is too light, go back over it AFTER the first coat has dried.  It is always easier to add a little texture than to deal with texture that is too heavy....so go light and reapply if necessary.

If you feel like you have totally botched it, just take a damp paper towel and wipe it off the wall while it is still wet. Then either practice a bit more on your scrap or try again.

If the spray texture appears a little "bumpier" than the wall texture, you can always take a piece of sand paper and LIGHTLY run it over the new texture AFTER IT HAS DRIED and before you paint.

ONCE YOU PAINT IT WILL BE REAL TOUGH TO MAKE ANY ADJUSTMENTS TO THE TEXTURE SO DO IT BEFORE YOU PAINT!!! Not impossible but more difficult.

DO NOT PAINT UNTIL THE SPRAY TEXTURE HAS DRIED COMPLETELY!!!!!

Now this is where that can of leftover paint you stored away will come in handy! Seriously, I can not stress enough how important it is to keep "spare" paint....store it somewhere in the house, clearly marked! You may have to match the paint color the best you can and then paint the entire wall. And this is not an issue at all if you are repairing walls before you repaint.

You will probably need 2-3 coats of paint to cover the patch since you are painting over "raw" sheetrock and texture.  I used a little 4" sponge roller and brush.

If you sand well and applied the texture properly, you shouldn't even be able to tell where the patch is!   

This does take a little practice.  After owning apartments and raising teens, I've had a LOT of practice.  But if you take your time, use the proper tools and really pay attention to details you should be able to do this little DIY project yourself!

I hope this gives you the confidence to finally tackle that sheetrock repair that has been bugging the heck out of you.

china hutch makeover...

I originally bought this piece to makeover and sell…

When I gave my breakfast room a little makeover (featured HERE last week) I decided I kind of like the look and it gives me a place to display my heirloom china….

I didn’t take pictures while I was giving it a makeover because, well, I just didn’t….

But the process was pretty straight-forward.

I removed all the hardware. The drawer hardware was not the original so I ordered hardware that would have come with the piece originally. Fortunately the door hardware was still there so I just cleaned it up a bit with Brasso and SOS pads to highlight the engravings.

Before you go scrubbing on hardware with Brasso and SOS pads, make sure it is real brass. A magnet will NOT stick to real brass…if one doesn’t, scrub away.

I removed the shelving. I also removed the glass and decorative glass inserts. Not difficult because it was just held in place by some strips of tiny molding and nails…I just popped those right out and set them aside to paint and reuse.

The shelving was pretty warped and I tried my trick of laying them on the floor and placing weights on them…no go. So I ordered glass shelves to replace them. Honestly, I like the glass better.

The glass shelves where a lot heavier than the wood shelves. Originally the piece just had two little supports on each side for the wood shelving (no supports along the back for the span which might explain why the shelves bowed.) I didn’t feel comfortable with that so I added 1x3 support boards along the back, securing them with glue and staples. Now I feel confident that the shelving is properly supported and can handle the weight of dishes. (If you have ever had a glass shelf come crashing down on your china you would understand my concerns. Yeah, it happened!)

There were a few other minor repairs that had to be made…since I was painting the piece, I did them before primer and paint.

Remember, if you are staining, stain first then repair. If you are painting, repair first then paint.

I cleaned the piece well then I caulked all the “joints.” Remember if you are painting a stained piece you have to caulk all the places where wood meets wood…and you may even have to putty nail holes. If you miss anything it will show up when you prime the piece…just caulk and putty and spritz it with a little primer.

I sprayed the entire cabinet with Bullseye primer. Primer is MUST on mahogany pieces because it will bleed through the paint! If you paint a piece and see “red” or “shadows,” that is the mahogany bleeding through…or water stains, oils, etc…more layers of paint WILL NOT cover it. Prime it then repaint it. Or save yourself the grief and prime everything before you paint. Mahogany is not the only thing that will bleed through paint. Nail holes and “gaps” will show up and you will be able to fix them before you apply your paint.

Also, you will get a much prettier and durable finish.

I know some paints (like this one) profess to be paint and primer in one. Maybe so but I always prime with a primer. Usually Kilz or Bullseye.

I sanded it smooth then wiped it down well with tack cloth.

I decided to paint the inside white and the exterior black. I painted the inside with some satin white latex I had on hand, let it dry and cure then taped it all off to spray paint the exterior.

I painted the interior a satin finish but I wanted a flat black for the exterior. I went with Rust-Oleum Matte Farmhouse black.

After the black had cured (I usually give it a few days) I replaced the hardware, reinstalled the door glass (without the decorative doo-dads) using the small trim and silicone and moved it into the house. I gave it another few days to cure before adding the glass shelving.

I did not paint the inside of the drawers or the inside of the lower cabinets. I rarely do unless the piece has an odor or stains I can’t get rid of by cleaning. If you have a piece that has odors or stains sometimes your only recourse is to prime and paint!

I added a LED light to give the display a little glow! That entailed drilling a small hole in the top for the cord and mounting an LED light strip in the top of the cabinet….simple simon!

Lovely.

This is where I remind you that “cure time” is super important when working with painted wood. I always get annoyed when I watch those shows on HGTV and they paint and stage furniture the same day. DO NOT DO THAT!!!! Be patient…give paint time to cure. If you don’t you will scuff and scar your new paint job and will be seriously disappointed.

If you look back at this blog you will see I use to do this kind of thing all the time…I loved it.

I don’t do it much anymore and I forgot how much I love taking an old abused and neglected piece and turning it into something beautiful and useful again!!!


Comment
Share

Board and Batten in the breakfast room...

This is a simple project I have wanted to complete from day one.

Board and batten in the breakfast room.

As I have said before, there are TONS of board and batten designs and tutorials on the webisphere. Watch videos, read blogs, search Pinterest…find a design you love and a tutorial that makes the most sense to you.

So here is a little before and after.

Before….

Not totally offensive but lacks a little “character.”

After….

Simple project for me since I have done this a time or two. (Check out the guest bath, the entry in the Lankford house and the Bogey house. )

You might notice another little change…the china hutch.

Originally I had the awesome mid century Drexel buffet but I thought I would change it up a bit. I read somewhere china hutches are making a comeback. I can see why…pretty and functional.

Eventually I would like to add some art on each side of the hutch…maybe some botanicals.

My original plan for this piece was to repair it, paint it and sell it but honestly, I kind of like the look in this room. I FINALLY have a place to display some of my heirloom china that has been boxed up and in storage for a year and a half!

Before…

After….

Next week I will share the steps I took to give this piece a little facelift! Not difficult and as you can see it made a HUGE difference!

Until then….

Accent wall tutorial...

I shared HERE how I found inspiration for the accent wall in my office.

I shared HERE the office after everything was done. (Well, everything for NOW!)

At first glance, the accent wall may seem somewhat intimidating.

This is actually a wallpaper. I like the dark wall with lighter accent stripes. I think it gives the wall “depth” and makes a room look larger.

You could easily replicate this entire look with paint…just paint the wall then paint the stripes.

I kind of did the opposite…light walls, dark stripes. I knew from day one I wanted a pink accent wall and decided to make the stripes out of walnut. My office is a big room with tall ceilings…it can take an accent wall that makes the room APPEAR smaller.

Now if you have followed this blog for any amount of time you know I have a deep love for walnut.

I made my fireplace mantel out of walnut.

My kitchen cabinets are walnut….

I made my living room shelving out of walnut…

And most of my furniture is walnut. If it is any other wood there is a good chance I will paint it if need be…but not walnut!

So, pink wall, walnut stripes.

The first thing I did in this room, after a good purge and reorganization, was paint the walls.

The accent wall was painted pink and the three other walls and trim where painted white (BM Chantilly Lace…closest I can find to a TRUE white without an undertone.)

They were ready to go….

So here is a little tutorial for doing any accent wall.

Print off a picture of your inspiration wall…as large as you can get it on a full size piece of paper. I printed off the picture above.

Measure your wall then draw the wall to scale on a piece of graph paper. For me, this is a must any time I am doing a room makeover. I need to know the scale of the space I am working with and how each element fits in that space…on paper.

Since I wanted the accent stripes to be centered between the ceiling and the top of the baseboards, I measured and graphed from the top of the baseboard to the ceiling. I did NOT measure from floor to ceiling.

Identify and mark your center point on the wall…from there you will work out from center to left and from center to right.

I had to figure out the “scale” of the stripes. I did this by making the assumption that the longest stripe in the inspiration picture (#1) was 4” from the ceiling…just a guess. When I measured that with a ruler on the printed picture, it measured 1/8”…that became my scale…1/8” = 4”. The distance between the stripes measured 1/4” on the picture, so I determined the distance between stripes would be 8” (I actually did 8” on center (OC)…which means I drew my stripes 8” apart then centered the 1” strips of wood on that mark.)

All this information gets transferred to my scaled drawing.

I counted the number of each of the different sized stripes. The inspiration wall had 4 different sized stripes…so I assigned each size a number, 1-4. There were 5 #1s (the longest)….4 #2s…5 #3s…3 #4s (the shortest) that would fit on my wall, spacing 8” OC apart.

By using my 1/8” = 4” scale, I determined that each stripe was 24” shorter than the next (12” from the top, 12” from the bottom).

So #1 is 107” (top of baseboard to ceiling is 115” - 8” (4” from ceiling and 4” from baseboard)…#2 is 83” (107” - 24”)…#3 is 59” (83” - 24”) and #4 is 35”. (59” - 24”)

If #1 is 4” from the ceiling, then #2 would be 16” (4” + 12”) from the ceiling, #3 would be 28” from the ceiling and #4 was 40” from the ceiling.

All this was drawn, to scale, on the graph paper.

Man, this sounds confusing….but it really is not. If you draw it all out on a graph paper to scale, it makes perfect sense…I promise.

Then it was all transferred, in pencil, to the wall.

It is so much easier to erase something that is wrong than it is to tear glued and nailed boards off a wall.

So, now I have the entire plan drawn out on paper, to scale, and I have the measurements of each stripe.

I decided to make my walnut stripes 1” wide. I also decided to give them a “3-D” affect by placing them on 1/2” furring strips. Walnut is a pretty expensive wood so I made the furring strips out of plain ole’ poplar and stained the sides to match the oiled walnut.

Matt and I used his table saw to cut the walnut in 1” strips. We cut the poplar into 1/2” strips.

Using the graph paper with the accent drawn to scale as my guide, I used a pencil and level to mark the wall where each stripe would go. After marking the wall, I attached the furring strips using Gorilla Construction Adhesive and my nail gun. I let that dry overnight since the nails did not hit a stud (impossible!!) so the construction adhesive is what really holds the furring strips to the wall.

While that was drying, I prepped the walnut strips.

After cutting each piece the length needed, I sanded, then applied Waterlox. I LOVE this oil. It is a clear oil. It is my “go-to” wood finish these days. I first used it on my kitchen cabinets a year and a half ago and it has held up beautifully!!!! So I used it on the mantel and shelving. No stain…just 3-4 coats of this stuff will make any wood shine!!!

I applied two coats…steel wool and tack cloth between coats…and then applied a third coat after I had installed the strips on the wall and puttied the nail holes.

I applied the walnut strips directly onto the furring strips. Again, I used the construction adhesive and nails.

MAKE SURE EVERYTHING IS LEVEL AS YOU GO!!!! I made sure each furring strip was perfectly level and then I made sure each walnut strip was level. I worked top to bottom…wood, especially narrow strips, will bend…so make sure each strip stays level all the way down.

After I puttied the nail holes with wood filler mixed with stain to match the oiled walnut, I wiped on one more coat of oil.

After all this is done, go back and do wall paint touch up. You will scuff up the walls with the wood strips and the level.

Beautiful!

Now, this may seem like a really tough project. It really is not. It is like any other DIY project…it all hinges on the “prep.” In this case, laying it all out on paper BEFORE you start buying materials and cutting wood.

Changes I would make? I wanted a “3D affect”…in other words I wanted the walnut strips to “stand out”…which is why I added the solid furring strips. I think if I did this again (which I won’t) I would want to use spacers to make the walnut strips stand out. The only downside to that would be that wood has a tendency to “move”…twist, bend, warp. By attaching the walnut strips to solid furring strips, the walnut will not bend or warp! So maybe the way I did it is best…who knows…I just think I would have liked the look of “floating stripes” better.

Other than that, I am pretty happy with the results.

I have some leftover walnut so I THINK, when it warms up a bit (we got 8'“ of snow last night and it is still snowing), I may make some floating shelves for this wall…

Again, I eventually want to make a few other changes to the room (rug, chair, credenza) but I love this accent wall.

As with all DIY projects, the key to success is the prep and planning.

This week I planned, prepped and prepared for board and batten in the breakfast room….

My plan is to install board and batten at chair rail height and paint it white.

I also finished this nasty china hutch…

I know this looks pretty ratty but I painted it and did a little tweeking on it and it turned out super cute. My plan was to sell it, but I think I will move it into this room and style it first…I may even like it well enough to keep it. We’ll see.

Hopefully next week I will have the breakfast room done and in order and I can share that as well.

Until then….