Bedroom step repair with gel stain...

About six years ago I installed laminate flooring in my master bedroom. I haven’t regretted it for a second.

One thing I did to save a little money was use gel stain on the oak thresholds and tread rather than buy new that matched the laminate. As I mentioned, laminate thresholds can be VERY expensive!

I sanded the finish a tad on each piece and then applied three coats of General Finishes gel stain and a coat or two of poly.

Usually gel stain holds up a tad better. I can only assume it has not on this step because I didn’t put enough top coat on it to protect if from constant foot traffic.

I decided the only way to fix this issue was to strip ALL the finish off the step…down to bare wood.

This entailed using my 1/2 mixture (1/2 acetone, 1/2 lacquer thinner). I didn’t want to get the stripper on the painted trim so I made sure to tape it all off with 3 layers of tape and put plastic down to catch any drips.

After stripping all the finish off, I lightly sanded it, wiped it down with a tack cloth then applied stain. I had to apply three coats to get a deep color that matched the floors. I let the stain dry well. This time I used hard-core poly specifically for flooring…three coats( lightly sanding and tacking between each coat)!

Niiiice….

A tiny boo-boo…seems some of the stripper managed to sneak through the tape and muck up the paint…oh well, another “honey do” on my list..

I used the same gel stain process on my bedside table tops when I painted them a few years ago. Brian’s has held up fairly well but mine has not…to many glasses of water and cups of coffee without a coaster!

My plan is to strip all the finish and gel stain off the tops of those as well and refinish them…someday soon!

I ordered new black door knobs for all the downstair doors. I painted the door knobs years ago, then painted the doors black…still LOVE! I used a good metal primer and paint on them and they have held up fairly well but I found relatively inexpensive knobs on Amazon so I decided to order them.

I have installed passage knobs and I am still waiting on the privacy knobs!

Just a few little projects to kill time during my home quarantine…projects I have been avoiding. Maybe I’ll clean out a few closets upstairs. Who knows…I do have a pile of good books I could work through as well!!

I’m kind of a homebody so I am use to being home…but when someone tells me I CAN’T leave, the 5 year old in me comes out!

Guest bath makeover....

I’m trying to complete a few small projects…a few weeks ago it was my laundry room.

This past week it was my guest bath.

The guest bath is right across the hall from the laundry room…since I painted the laundry room a pretty “sagey green” I decided to tone down the blue in the guest bath. While I was at it, I decided to change out the counter top and backsplash.

I installed a glass vessel sink, a super awesome faucet and new lighting when I gave the room a little makeover a few years ago (probably a decade ago!) and I still love them so I didn’t need new ones.

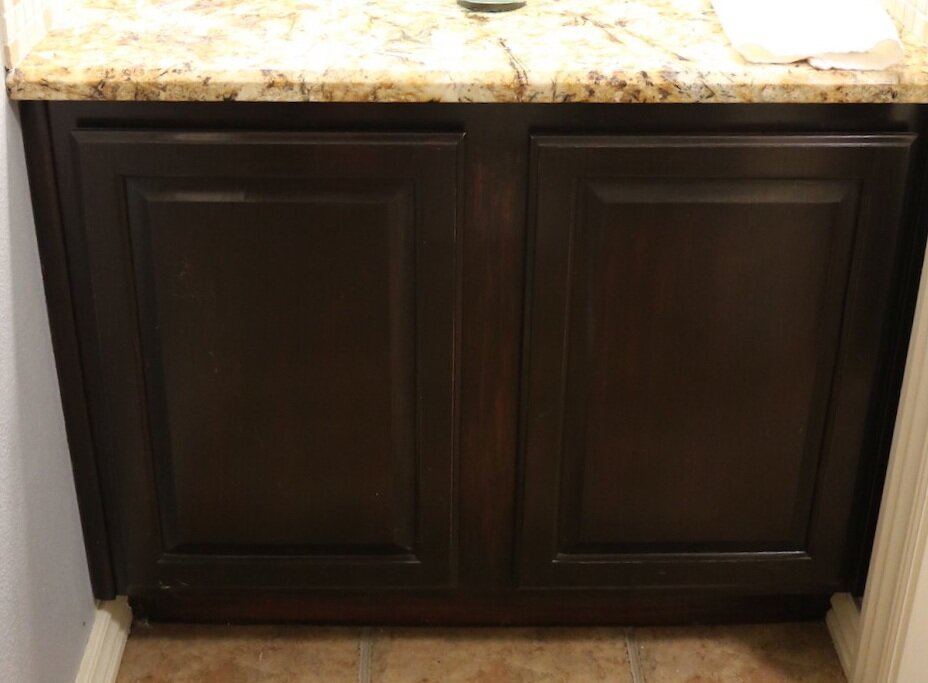
(My dismal attempt to photograph dark cabinets with no natural light!)

The wall decor over the toilet had yellowed a tad because I sealed it with poly. (Yes, poly yellows…to avoid, use polycrylic or a clear coat sealant)

My “plan” was to paint the walls and trim, change out the top and backsplash, strip the cabinet and mirror frame for a “lighter” wood stain and repaint the wall decor.

After painting the room a lighter color and installing a lighter top (white quartz) and white backsplash and lightening the wall decor with a fresh coat of white chalk paint, I decided to stick with the vanity cabinet and mirror “as is” for the time being. I had stained the vanity “java” with gel stain years ago and I think it looks fine (but impossible to photograph!)…the mirror has a “java” stain finish, so it coordinates well with the vanity.

Just these few easy changes made a huge difference…the paint really lightened and brightened it.

Still love the Devoe prints I added two years ago!

One of my favorite little projects…a TP cubby! Super simple!

Fresh white chalk paint with a tiny bit of distressing…this time I sealed it with a clear coat so hopefully it won’t yellow again!

I would like to mention my trim paint…I painted it the same color as ALL the trim in my house. White would have been great but I decided to stick with the color of the trim throughout the house…just my personal preference.

Paint.

A must when you want to change a room! Whether you paint the walls or furniture, JUST DO IT! Paint is relatively cheap (only took 1/2 a gallon for this room) and if you don’t like it, you can always change it!

I love this little makeover. I have been coveting white quartz for my kitchen tops and this tiny bit has REALLY stoked the fire.

Who knows….

The Twix Birthday Cake!

I still love doing DIY projects and rehabbing furniture but as you may know I am on a bit of a hiatus from any major projects. One, I have a lot of work to do at the apartments 2) I think I have an ulcer (at least that’s what we are treating right now!) and 3) I’m just kind of tired!

So….

For now I want to share one of my latest creations.

A Twix Cake…check it out here!

Comment
Share