A new storage project and Christmas 2019!

It has been a minute since I shared a home project…just too much going on the last few months to do anything other than what HAS to be done around here!

But I saw this little storage idea HERE and knew it was exactly what I need in my guest bathroom!

I had to build a little Christmas gift but I can’t share that just yet since it is suppose to be a surprise. But while I had the saw and nail gun out I decided to take time to build this little storage unit.

I keep plenty of spare toilet paper under the vanity but it is out of reach if you have already sat down. So for years I kept spare rolls in a basket on the floor next to the potty but I just didn’t think it was a sanitary place to store paper. So I set up a little wickerish box…paper inside, magazines on top.

So here’s my opinion about reading materials in a bathroom. First, I don’t want guests hanging out long enough to read an article in the guest bathroom…seriously, do that in your own bathroom. Second, if you have to sit there long enough to read an article, add fiber to your diet.

I needed something to set a little Christmas tree in so the little box got “repurposed.”

Anywho, I saw this little storage idea and thought “HEY! I can do that!”

I constructed mine a tad differently than Barb, but the concept is the same…and as I always suggest, use the tutorial that makes sense to YOU!

Either way, SUPER simple build! Something you could do with a miter saw and box. hammer and screw driver if you don’t have fancy power tools!

The first thing I did was use a stud finder to locate the studs then I cut into the sheet rock to measure the exact distance between studs…

…15”. Most wall studs are 16” on center so they SHOULD be 15” apart, but you never know so it is better to be safe than sorry! Just measure the distance between the studs and make your box a smidge narrower than that…or do as Barb did and “fur out” the studs to make a box a specific width.

I laid out the TP hanger (THIS is the one I used) and the spare rolls to see how tall I wanted the entire box to be…17” seemed to be perfect.

One suggestion…make sure the bar on the holder you choose “pivets”…you want the bar the paper will sit on to swing freely so you can swing it out of the box to put the paper on!

I used 1x4 (actually 3/4” x 3 1/2”) pine boards and 1/4’ luan to build the box. I cut the width pieces about 14 3/4” to give myself a little wiggle room between the studs. Basically I made a 14 3/4” x 18 1/2” box (outside measurements), then backed it with luan, cut to fit. I used wood glue and brad nails…ALWAYS glue your joints…trust me, the nails just hold everything together until the glue dries!

I used “door stop” for the face trim…it is 1/4” thick and 1 1/2’ wide and has a very simple profile! I used it when I installed the glass on my laundry room door…simple and beautiful!

After the box was constructed, I puttied the holes and caulked the joints, primed it with Bullseye primer, sanded it smooth, then wiped it down with a tack cloth.

I used the backside of the box as the “template” to mark the sheetrock, making sure it was level with a small 6” level (don’t assume your studs are level). I used a sheetrock knife to cut the sheetrock.

To install, I slipped the box between the studs, making sure the trim sat flush on the sheetrock. I drilled four 1/4 “holes approximately 3/8” deep on the inside of the box (2 on each side) and used 1 1/2” sheetrock screws to attach the box to the studs. Then I used wood putty to fill those holes and sanded it smooth after it dried.

All my trim is oil based “Swiss Coffee” (and of course I have spare paint on hand) so I painted the box with the trim paint. Again, ALWAYS use an additive when brushing or rolling paint on wood…in this case Penetrol since I am using an oil based paint. Two coats!

After the paint dried well I installed the TP holder and stocked it with spare paper.

Too stinking cute and perfect for storing extra paper and even a little “air freshener.”

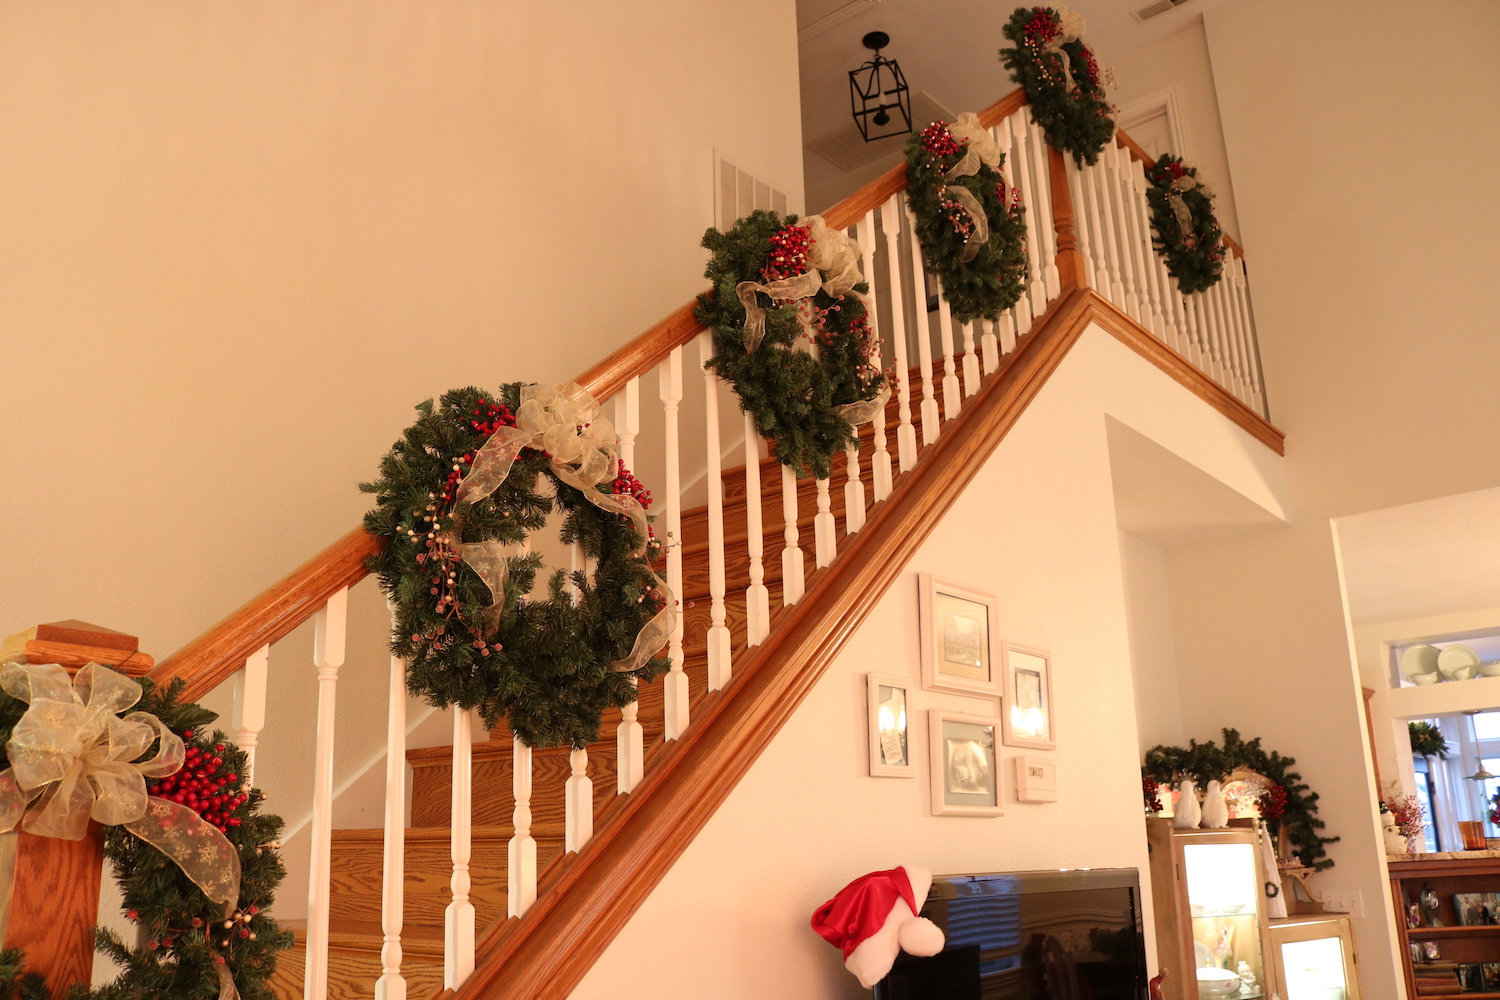
Christmas is next week and so little changes from year to year it seems almost redundant to share my Christmas decor. But I will leave you with a few pictures of our cozy holiday home…

I hope you and yours have A VERY MERRY CHRISTMAS!!!

Our annual trip out west and a little reset....

Our annual trek west! This year we had to make the trip a week early because of Brian’s work schedule so we decided to go a little bit north and try to catch the Aspens AND see a part of the country we have wanted to see for years…Jackson, Wyoming, The Grand Tetons, and Yellowstone.

The Aspens were just starting to turn so we missed them in all their glory…. but the trip did NOT disappoint! We spent a few days exploring Jackson, Wyoming, toured Yellowstone, biked in the Grand Teton National Park, toured “Mormon Row,” and took the tram to the top of Teton Village Ski Resort.

We saw critters (lots of bison, elk, mule deer, pronghorn, moose…but no bear) …

We saw Old Faithful….

We fished the Snake River IN the Grand Teton National Park…

I wish I was a “travel blogger.” I know I can not do this area justice with words or pictures. I took HUNDREDS of pictures and could post them all…but let me just say…GO!!!! See Jackson Hole, the Grand Tetons and Yellowstone for yourself! It is a trip that won’t disappoint!

As always, I love seeing new places but I am always happy to be home! And of course this trip always marks the start of my absolute favorite time of the year…fall.

Unfortunately we came home to temperatures pushing 90….YUK! Oh well, I cranked up the AC and started decorating the house for fall….

I may share a bit of my fall decor but as I have said before, little changes from year to year. I did do a little makeover in my dining room this year so I did pick up a few little things for the table and buffet.

Simple…a few faux pumpkins, faux flowers and antlers…a buffalo check cashmere scarf makes a perfect table runner.

While I was working on my fall decor I decided to rearrange one of my living room bookcases. Originally this bookcase housed one of my favorite author’s collection.

Brian has inherited his grandfather’s old cameras so I decided to try to display those…

I know I have said time and again I am NOT a knick-knack person…but I swear every single thing in this bookcase is an “heirloom.”

I like it…sometimes just moving things around gives an area of your home new life!

Happy Fall!

Herringbone dresser top....

I would love to take credit for all my incredibly creative makeovers but truth is I get a lot of inspiration from a lot of sources…Pinterest, other DIY bloggers, and random website.

This time it was my son. He found a really awesome entry bench online and built one for himself!

I shared his entry makeover here.

His girlfriend loved it so much he made her a desk for Christmas!

So when this dresser top turned out super cruddy, I decided to put a herringbone top on it.

The top is a veneer and had some “bubbling.”

I was able to sand the “bubbles” so that the top was smooth, but when I sanded, it took the stain and finish off and the gel stain just wasn’t covering it.

I could have sanded the entire top and removed all the stain and finish…or I could have painted it…. but nah….I kinda wanted an excuse to do something “different.”

Matt was out of town and couldn’t help me so he sent me THIS link…AWESOME tutorial. These girls do a bang up job on the video tutorial…if you love the look, they tell you exactly how to do it!

The top of the dresser hung over the front quite a bit so I decided to use my Kreg rip cut guide to cut down the top a tad.

My daughter got it for me for Christmas and this is the first time I was able to use it…LOVE! I have always used my “yard stick” trick to make straight cuts with my skill saw…this was SOOOO much better!!!

Using the linked tutorial, I started laying out the top. I used white pine 1x4 for the top boards and 1x2 for the edge banding.

Now, this is where I had to deviate a tad from the tutorial. Because I was covering a dresser top and not making a new top that I could flip over to cut down, I had to cut the herringbone boards from the top. If I covered the entire top before the cut, I wasn’t going to be able to “see” the edges of the existing top to know where to make my cut. So I laid all but the corner boards, used my long metal guide to draw my cut marks on all four sides, and then cut those boards first. Then I nailed down the corner pieces, marked them, and cut them.

I used a palm sander to sand all the edges before applying the trim boards around all four sides.

I puttied the holes with wood filler, let that dry, then I sanded the top and sides smooth. Remember, stain will not adhere to glue, so you want to make sure you sand well and remove any glue residue!

After sanding I applied the stain…pine does not take penetrating stain well so I used General Finishes gel stain. There will be tiny gaps between the boards…to get the stain down in between those gaps, I used a small craft brush. I sprayed on a polycrylic finish to seal it!

I had kilzed and sanded the cabinet and the drawer fronts before working on the top. After the stain dried, I painted those a “steel blue.” (Again, don’t ask me the color…it is a mix of blues and black I had on hand!)

I wanted to use the existing hardware but I wasn’t digging the original finish. I primed them with metal primer and painted them flat black…soooo much better and far cheaper than replacing it with new.

Just another “ick” saved from a life of “yuck.”

Again, you don’t have to go all fancy…I could have easily painted the top…but the tutorial on “Shanty-2-Chic” is super easy to follow!

Pretty in Pink...

If you “came of age” in the 80’s chances are you saw a John Hughes film. If you haven’t, you are missing out! “Pretty in Pink” was one of my favorites! Check them out…you won’t be disappointed and I can’t think of one that isn’t “kid friendly.”

Which brings me to pink…a color I have always loved but have never really used in my home decor. I must have gotten a “pink bug” because all of a sudden I can’t seem to get enough of it….and since next week is Valentine’s Day, this is a great time to infuse a little pink into my home decor under the guise of “decorating for the holiday.”

I found this little bench in 410 Vintage…the tag said it is walnut but I really think it is mahogany. I used this process to refinish the frame and recovered the seat with the same pink velvet I used for the club chair pillow (makeover here).

Several years ago I refinished a little piano bench to set by the closet so I would have a place to sit and put my shoes on.

In one of my “purging” marathons I moved it out but in all honesty I kinda missed it…so this little bench is a perfect little replacement!

I love my office…a simple room that is really multi purpose…a “thoroughfare” from the living spaces to the master bedroom, a “dressing room,” and of course, an office.

I featured the desk here.

I have seen a few desks over the years that peaked my interest but I still love this desk…it is perfect! Prime example of “buy what you TRULY LOVE and you will never tire of it!”

My office chair looks a lot like a Marcel Gascoin C-chair….I can’t find a picture of this exact chair so I don’t know for certain! Again, I don’t buy pieces like this for their potential value…but because I LOVE them.

I bought it years ago and share it’s little makeover here. Again, still love it!

I have replaced the dresser several times over the years but I LOVE this one! Shared the makeover here and while I loved the dresser that was here before, this one is MORE better!

The little bookcase…just adorbs!

I digress…off to the living room … I found the cutest pink pillows…

…and a yummy smelling pink candle!

The little white pillow was kind of plain so I decided to add some cute pink pom-poms I made out of “furry” yarn. I just tacked them on so they can easily be taken off when I tire of the pink.

The pink pillows will go well with the little bit of Easter decorating I do!

While digging around TJMaxx for pink pillows and candles I found a few other things I thought would be fun for the holiday….cute hedgehog mugs and fun little Valentine’s hand towels!

You don’t have to (or need to) spend a lot of money dressing your home for Valentine’s Day…but it is fun to infuse a little fun and color into an otherwise “drab” time of year!

Funny…I was wearing my pink tennis shoes and a pink vest when I was buying all this pink stuff…the check out lady remarked that I sure must like my pink…lol!

Turns out, I really do! It is so dreary and “wintery” outside and the pink just seems to brighten things up a bit!

I have some leftover pink velvet from the bench makeover…just enough for a few more pink pillows! Now if I can just being myself to sew them…eck!

Painted kitchen cabinets and a new entry...

When Matt bought his house over a year ago I promised to share the projects. One year later, I am finally getting around to keeping that promise!

As I mentioned in earlier posts, Matt first had to find his inspiration and make a plan.

His first major project was the entry makeover. My entry makeover was obviously his inspiration but his entry felt SUPER tiny compared to mine.

These aren’t the best before pictures but you can see there is a header across the top of the opening between the living room and the “entry”…so the space felt really tight and cramped…wood flooring (again, a no-no in an entry IMO)…popcorn ceilings.

The “plan” was to remove the closet and header to open up the space, tile the floor and paint the door. Simple!

Before you remove a closet, make sure you have a plan in place for the things you would otherwise store in that space. In Matt’s case, he’s a single guy with two spare bedrooms and closets, a large master bedroom closet and a nice hall pantry. He had plenty of storage space for coats and such…getting rid of the entry closet was not a big deal.

UNTIIIIIL…you start hacking into walls and removing headers that are framed with aluminum studs instead of wood. Interesting to say the least and somewhat of a challenge for a “traditional” builder such as myself.

Lots of sheetrock repair, black paint on the front door that Matt is not real fond of but is living with for the time being, new trim, new tile, new paint. Eventually I think he will replace the light fixture…but it does the job for now.

Here you can see how the entry opens into the living room…before there was a “header” that dropped down 12” and really closed that space in…removing that header not only opened up the entry but it now matches the opening into the hallway that leads to the bedrooms on the other side of the living room.

Matt built the little bench! I found the beautiful metal mirror on clearance at a home interior store.

The fireplace was pretty “dated”…he painted it last year ….

…and we replaced the dated 8x8 beige tile with the same tile we used in the entry. MUUUUCH better!

The very first thing we did before he moved in was built open shelving in the kitchen. We used the “hidden bracket” method I shared here.

His kitchen cabinets were old, nasty oak and he knew he eventually wanted to paint them…but time and finances dictated he wait…the open shelving was a pretty easy and inexpensive way to give the kitchen a tiny update. Since he had his inspiration and had a plan, he knew what colors he wanted to eventually paint the kitchen cabinets…so he knew what color he wanted to paint the shelving.

We simply removed the cabinet to the right of the sink and installed 3 shelves. The cabinet we removed didn’t go to waste…he hung it in the garage above his work bench!

Painted cabinets…this summer he was finally able to complete this part of the plan.

The kitchen before…

The kitchen after…

He hired the actual “painting” part but he did all the prep work himself. He changed out the hinges from nasty ole’ brass looking things to nice new satin nickel hinges.

He also changed out four upper cabinet doors and put reeded glass in them…

The shelves inside the cabinets were old and “sagging” so we built new shelves since you could see them through the glass.

I would like to think I was the inspiration behind that change since I am a tad partial to reed glass cabinet doors!

One element of his original plan was to change out the tile countertops to a solid surface like quartz or granite. Honestly, once the cabinets were painted neither of us found the tops to be nearly as offensive so that part of the plan got bumped to the bottom of the list. It will happen someday, but it is no longer a top priority!

This kitchen is a relatively small space…kind of a “shotgun” or “galley” kitchen if you will…brightening it up with paint and installing the glass front doors and the open shelving made a HUGE difference!

The next big project on his list is his master bathroom. He wants to remove the tub/shower insert and build a walk in shower similar to mine.

Last week I went to an auction and I was able to purchase enough 12x24 floor tile and subway tile for pennies on the dollar!!! He’s been researching the best way to build a shower pan and of course we are experts at demo! So this little project could commence any day!

In the meantime he is busy being a home owner…mowing and raking the yard, mundane chores and dealing with all the grief after a tree falls on your house during a storm! Yep, it even damaged his brand new storage building he is so proud of!

Such is the life of a home owner!

Next week is Christmas and I may take a few weeks off since the whole family will be here! I hope you and yours have a VERY MERRY CHRISTMAS AND HAPPY NEW YEAR!

Traditional Christmas!

My Christmas decor changes so little from year to year I hesitate to even share. (search Christmas on this site…you’ll see what I mean!)

But every year I add one tiny element.

If you follow along you know that Brian and I travel to Colorado every year in the fall. We do our annual guided fishing trip and enjoy the fall Aspens. And every year we take a few hours to walk around Georgetown. A precious little mining town just off I-70.

Every year I try to find something a little Christmasy. It is a “tradition” I started years ago.

This year I picked up this little troll.

Too cute. I guess this year Santa trolls are the “in” thing. Again I rarely go all out with the latest “fad” but I thought it wouldn’t hurt to pick up one little piece to add to my “Colorado collection.”

This year as I set out my little collection it dawned on me that I have no idea what year I bought what. So this year I started writing on the underside of each piece the year I purchased them. Not important now but maybe 50 years from now it will mean something to someone.

Here are just a few pieces I have picked up over the years….

The snow birds….

I shared here the realization that I have an obsession with little birds.

The birch Santa…

I think Birch trees are the closest thing we “low landers” can get to an Aspen…I even bought a birch candle stick when I changed out the mantel decor this year…

This little guy….the older I get the less I want to hang and fluff so I love anything I can just tuck in a corner…

I didn’t actually buy this little guy…we stayed in a condo in Frisco and this was a little gift from the owners…just precious! How did they know?!

A “tradition” has to start sometime by someone! Don’t be afraid to start your own…time flies and before you know it your great-grandchildren will be reminiscing about years past at Grammy’s and how she always had Lord ? displayed in her kitchen…

The matching pajamas she gifted every Christmas eve and how she made everyone shower and primp Christmas morning for family pictures before they could open presents…

The 9’ tree adorned with priceless ornaments given to their grandparents by their great-great grandmother!

Sticking with “traditions” is the way to go for so many reasons…

1) It cuts down on the cost of the holiday. Decorating for any holiday can be expensive…especially if you change your decor every year trying to keep up with the latest “fads.”

Years ago I contemplated changing out the colors in these bannister wreaths to blue and silver…

My daughter promptly reminded me that “gold and red” are traditional colors…she was right. I would have regretted spending a lot of money just to follow the “in” thing that year.
I ended up making a simple Christmas box with blue and silver and that pretty much fulfilled my desire to jump on the blue and silver decorwagon…

2) Your kids and grandkids won’t remember every gift you gave them but they will never forget the “traditions.” Whether it is the Christmas pajamas, a favorite dessert, the priceless ornaments. They don’t forget traditions…

3) While my “same-ole-same ole” holiday decor may seem a tad boring, decorating for the holiday is super simple since I pretty much know where everything goes and how everything is decorated, year to year. Little changes. It cuts down on the stress of holiday. I may pick up a few pillows or a knick-knack here and there if something strikes my fancy but most of it stays the same…i.e. easy and stress free.

This year I picked up a few “grey” holiday pillows for the couch…

But the guest bath is the “same-ole-same-ole.” I store a few trinkets under the vanity and pull it out…a festive candle, a little snowman, holiday hand towels, a holiday soap dispenser and a festive wreath I hang over the boxwood wreath. It takes me all of 2 minutes to “decorate” the guest bath.

4)Decorating for Christmas falls on the same day every year…without fail. The Friday after Thanksgiving. We fill the house with Christmas music, Brian heads to the storage building to pick up boxes while I take down all the fall decorations, and all day Friday and most of Saturday is spent decking the halls…and walls…and shelves. There is never a question of when we will find time to get ready for the holiday. Again, I may pick up a little something here and there throughout the season…but the bulk of it gets done that weekend.

Sticking with “traditional decor” (red, gold, green, silver) makes it easy to blend new with old if I see something that strikes my fancy!

5) I have no doubt that if the time comes when I can’t decorate my home myself, SOMEONE could step in and do it for me. Since little changes, all my kids know exactly how mom likes her mantle, the tree and her kitchen decorated. HOPEFULLY one of them will step up to the plate and take over the job if I am unable. Morbid? Maybe…but such is life…the day will come.

Keep the holiday decor simple and stick primarily with “traditional” vs. “the latest fad.”

These are my tips for enjoying this amazing season!

The grey couch....

If you remember, I had a booger of a time with my living room couch purchase. I ended up purchasing the “Michael” by Younger Furniture.

A year later, I love it!

One of my biggest concerns was the fact that it is grey. I wasn’t sure at the time if I was really going to like having a “grey” couch. Not grey-grey, but grey enough that I was afraid it would be dull or too trendy…or just “too.”

I felt at the time I was breaking my cardinal rule of going “trendy” on a big ticket purchase.

Truth is, it is a chameleon…it pretty much changes with whatever I throw at it. When I first got it, I had my Christmas decor up…and it looked great.

After the holidays I threw my teal and floral pillows and a teal throw on it and it looked just as awesome. (No photo…wow I need to take more pictures!)

Fall…oranges, yellows, greens, browns…wasn’t sure it was going to cut it.

But it did!

I love that it can take any color I throw at it! After the holidays I am considering transitioning to another color pallet in the living room…maybe a navy blue or olivey green. Don’t know yet but I know that whatever I do, the couch will not be a factor!

(You can see the transformations of grandmother’s chair here, the Drexel coffee table here, the club chair and ottoman here, the round walnut table here, and the large mirror over the couch here. )

And it really did turn out to be quite comfy.

Which brings me to the point I have often made…on big ticket purchases, stay neutral. I love the deep green and vibrant blue velvet couches. Beautiful! And if you KNOW you will love that couch for years to come, I say go for it. But if you just aren’t certain or you know you will want to regularly change up the look of your decor, stay neutral on the “big ticket” items and let your pillows, accent chairs, rugs, wall decor, throws, etc dictate the decor. Those elements can be easily and relatively inexpensively changed to make a big impact on the feel and look of a room!


Decorating for fall and Mr. Jinx....

Since it is time to decorate for fall and Halloween I thought I would take a minute and formally introduce one of my “rescues.” Mr. Jinx…

All fall decors should include a black cat…right?

I shared pictures of him last year at Christmas…black cats are super tough to photograph. When I look at pictures of him I understand why black is a “slimming” color…he is WAAAAY bigger than this picture reveals. The kids say he is fat…I argue he is just big boned and really fluffy.

Half the time his little fangs are showing…he can’t help it…he has big fangs. Kinda scary looking but super cute when he is stretched out on his back asleep with his little fangs and tongue sticking out…

I have more than a few pictures of him on my Iphone!


Funny story about how I acquired this kitty. He hung around the apartments for months…I knew he wasn’t a feral kitty because he was super friendly. He would rub against your legs and then roll over for a tummy rub. He loves to have his tummy rubbed!

One day I was sitting in my car talking with my manager and mentioned that we should probably take him to the shelter since he was a super friendly and beautiful kitty and someone would certainly adopt him. About that time he jumped in my car and made himself at home on my shoulder.

What was I to do?

Naturally I couldn’t bring him straight home since I didn’t know what I would be exposing my other cats to…so I took him to my vet and had him tested for all kitty diseases. Clean. My vet thought he was about 2 years old and because of his size probably a Maine Coon.

I told the vet to neuter him and give him shots.

At that point I had a small fortune invested in this cat…so I couldn’t very well take him to the shelter.

What was I to do?

Brian was NOT happy that I brought home another cat…

So I told Brian we would foster him. I promptly named him Mr. Jinx…because, well, he’s black…and black cats are suppose to be jinxed right?

This was two weeks before Christmas so with the whole family and their dogs here and all the chaos that goes with the holidays, Mr. Jinx’s nerves kicked in.

Another visit to the vet, a few nights stay, a staggering vet bill…now I REALLY had a small fortune invested in this cat.

What was I to do?

I couldn’t very well just GIVE him away…right?

Brian was still not happy there was another cat in the house (seriously, I only have four…that isn’t TOO many, right?)

But after the holidays, calm was restored and Mr. Jinx settled in…and promptly fell as madly in love with me as I was with him.

Two years later we are still “fostering” him…truth be told, you would have to pry this cat out of my cold, dead hands.

EVERYONE loves Mr. Jinx…even the dogs. He is the coolest, most chill cat I have ever owned…and while Molly was a tough cat to top, he ranks right up there with one of the best cats EVER!

Even Brian has fallen in love with this kitty!

What was he to do…lol!

DECORATING FOR FALL!

It is really tough for me to break out the fall decor when it is still in the 90s every day. But it’s my rule…the week before we leave for our annual trip to Colorado, I decorate for fall.

HOPEFULLY, when we get home it will be a bit cooler. Rarely. Usually I have to put the jeans and Ugg boots back in the depths of the closet for a few more weeks. But the decorating is done and I can sit back and enjoy my favorite time of the year!

Not much changes from year to year…a few years ago I painted these little pumpkins and changed up the window decor…

Refurbished pumpkins, deer antlers, fall picks…nothing fancy! Still like this little vignette so it won’t change this year!

A few weeks ago I changed out the dining room light fixture

I love the new fixture and I love even more that I can still add the fall garland!

I’ve added a few new elements to the den mantel…a tall vase and new candle sticks….

…but the garland and Mr. Owl are still the focal points. The same but different!

The entry…usually void of much because I still haven’t “decorated” it after it’s little makeover…but it’s a great place to infuse a little fall decor…

The seasonal box I featured here…still one of my favorite super simple projects!

I changed out a few pillows and throws….

Even grandmother’s chair got a little pop of fall…

Every year I find pieces of garland, wreaths and picks at the bottom of my storage tubs…I just scatter them here and there for little touches of fall!

Again, little changes, but I love it all the same!

So many don’t decorate for fall because of the cost of buying “stuff.” As I have mentioned before, I usually hit the home decor stores at the end of the season (which seems to be before Halloween these days) and pick up a few things here and there for pennies on the dollar! You may not get to enjoy it for a long time this year, but you will get to enjoy it for years to come!

This is also one reason I strongly recommend sticking with “traditional” vs. “fad” seasonal decor. As much as you might love those teal pumpkin pillows and chevron throws, I promise you won’t love them in a few short years.

I actually bought teal pumpkin pillows this year…

….knowing that I will tire of them quickly. No biggy…they have good forms I know I can reuse in the future!

There is no harm in spending a little money on the latest “fads” but be selective and thrifty. Create small vignettes with the latest trends but don’t blow your entire seasonal budget on it! And check out the blogs and Pinterest…there are thousands of nifty ideas for inexpensive seasonal projects that take little time, effort or money!

Fall may not be “in the air” just yet, but it is certainly “in the house.” Maybe this year it will actually feel like fall outside when we get home!

Finally...painted walls!

I finally did it...I painted the walls in the main living areas! 

Over a year ago I seriously contemplated painting the downstairs living areas. I called my painter friend and set up a time for him to paint while we were on vacation! I painted samples all over the walls...and promptly cancelled the painter and painted over the sample spots with the same ole' "Cream" paint color that has been on the walls for 19 years.

I just couldn't pull the trigger! I know one of the issues was my inability to commit to a paint color. The other issue is my inability to admit I am just getting too old to tackle these big projects.

But last year I painted my master bedroom SW Nuance (a much smaller project, but a butt-kicker all the same!) I then used the same color in the guest room makeover.

I really love it. It contrasts nicely with the Swiss Coffee trim but it's not so dark that it over powers the room. It seems to be the perfect back drop for any decor accent I want to add in a room.

After living with this new paint color in my bedroom for a bit, I kinda sorta thought I might like it in the living areas. I called my painter friend and rescheduled.

It is no secret that major changes are tough for me...so the fact that I picked a paint that wasn't TOO different from what I had before isn't surprising.

While it isn't a HUGE difference, it is indeed different. The original color was "SW Cream" and it was definitely on the "yellow" spectrum. The Nuance is more of a very light "griege" ...one shade lighter than Useful Grey on the color chart! 

You can really see the difference on the walls side by side....

When it was all said and done, I really love it...it looks clean and fresh. While I had everything off the cabinets and walls I took the opportunity to deep clean (OMGosh there was some nasty gunk lurking behind and beneath!) and rethink all the stuff I had adorning the walls and cabinet tops! 

I removed the "heirloom china" from the dining room walls and pass throughs and a few knick-knacks and china plates from the cabinet tops...not huge changes but enough to open it up a bit.

One of my favorite changes was the dining room art...

Several years ago I painted the frames and changed the mats...but I was never a huge fan of the actual prints. 

A few weeks ago I bought some botanical prints at an auction. They are numbered prints by Kate Nesslar (Google her!) and they really are beautiful! I removed the not-so-pretty black and gold matting and they fit perfectly in the red mat! And they look awesome!

I don't know why picking a paint color is so hard for me...paint is one of the simplest and least expensive ways to make a big change...and the best thing is if you don't like the color, no biggy...just repaint it. 

Hiring something to do what I could have easily done myself ten years ago is another toughy.

But in the end, I can't believe I waited this long to make this change and I certainly don't regret hiring someone else to do it for me!

The next big chore on my list of home improvements is the tub/shower in the master bath! I want to take out the whirlpool tub (that I have literally used MAYBE 3 times in 19 years) and add a large walk in shower. And that my friends will get hired out as well!

Getting older has a few advantages...

Gel stain tutorial on table makeovers...

I did it again...dove head straight into a project without taking a "before" picture. But at least this time I got an "inbetween" picture!

These little tables were simple makeovers. I picked up the side table at an auction a few weeks ago. Got it for a few dollars because, well, it was nasty, the color is pretty putrid AND the top had come unglued.

No biggy for me. I glued and clamped the top, then I sanded off the old finish on it. Yes, you heard me right, I sanded it. Two reason...first, I got glue on the top when I repaired it and stain will not adhere to glue. Second, it is solid wood and I knew I couldn't do a lot of damage to it. Light sanding...220 grit! Just enough to remove the old finish and glue residue.

I got the drop leaf table from my neighbors. I told you I am the dumping ground for neighborhood furniture...it just "appears." Again, the top is solid so I gave it a light sanding.

I knew I wanted to paint both tables but as always I have to have my fix of stained wood. So I used gel stain on both tops. 

Gel stain is SUPER easy to apply IF you use the right technique and product. As I have said before the ONLY gel stain I will use is General Finishes. It is not a brand the big box improvement stores carry so I usually order mine on Amazon. I have tried other gel stains and have not been happy with the results. The General Finishes brand never disappoints. I have used both the Java and Brown Mahogany colors.

I am going to share how I gel stain...it is a super easy application process and perfect for real wood or even that cheapo fake stuff you find on the ends of cabinets. Since it goes on fairly translucent, the wood grain (real or fake) will show through.

I have used this process on cabinets, tables, dresser tops and drawer fronts....some I have stripped down to bare wood, others I simply applied it over the existing finish.  It is a great process to use on any project where you want "stain" but know you might not get a good result by completely stripping the piece and applying penetrating stain!

First step for ANY makeover (after repairs of course)...give the piece a good cleaning. In this case, since both tops were solid wood, I also gave them a good sanding. Sanding is NOT necessary but you want to make sure that any old finish is stable and somewhat smooth. So if your old finish is flaking or a bit rough, sand it smooth with 220 grit paper.

You will need....

The gel stain...again, I ONLY use General Finishes. A quart will cost you around $30+ but it seriously goes a loooong way!!! If you just have a small project, get a pint. I have found that it doesn't store well.

The gel stain top coat...in this case I used the GF Poly wipe-on top coat. But I have used a spray on Polyurethane and Polycrylic and they work just as well. 

Disposable rubber gloves. I always have those on hand. Just the cheap latex gloves you buy in a box so you can toss when finished.

Old athletic socks. Again, I keep a stash on hand. Any time I find old socks at thrift stores or garage sales I buy them. They are perfect for applying any type of stain or finish and I can toss them when I am finished.

That's it...a relatively short list of supplies!

The trick to applying gel stain is to remember it is suppose to be somewhat "translucent." Put on a rubber glove, then an old sock over the glove...dip you finger tips into the gel stain and wipe the gel stain on the piece with the grain. The first coat will look like crud so don't try to get perfect solid coverage! Just wipe it on LIGHTLY WITH THE GRAIN....do not "glob" it or apply it thick...it is NOT paint. I usually wipe it on, then use the clean side of the sock to give it one final wipe WITH THE GRAIN...working edge to edge. 

THE FIRST COAT WILL LOOK LIKE CRUD!!!! I can not stress this enough...you are better to go light than to try to make the first coat look decent. It is not going to! If you can't see the grain through the coat of stain, it is WAY to thick.

Now, let that dry over night. Then do it again. New glove, new sock. Wipe on a second LIGHT COAT! The second coat will look a tad better, but not great. THAT IS OKAY. Keep it light and translucent! 

Let the second coat dry over night. Then with a new glove and sock, apply the third coat. NOW it should look good. The stain should allow the grain to show through!

If you feel like you have messed up....too thick, too streaky, just don't like it...you can still wash this stain off with mineral spirits if you haven't applied a top coat! 

Let the third coat dry overnight. If you are happy with the look, apply your top coat. Again, I used the GF gel wipe on poly on these tables...super easy to apply. Rubber glove, sock, wipe on. As simple as it sounds. You may want to apply 2-3 coats of the finish...especially on tops or cabinets that get a lot of use...just make sure you wipe it down with 0000 steel wool and tack cloth between coats. You will get a nice smooth finish that way!

Presto, bingo! This really is an easy application IF you don't overthink it and try to get a decent looking finish on the first and second coat...if you do, you will put the gel stain on too thick and I promise you won't be happy with it! My neighbor, Tammy, tried this process on a little side table...and sure enough she put the stain on too thick...it did not turn out well! Each coat should be light and "translucent." 

After I let the top coat dry well for a few days, I painted the rest with chalk paint...a light distressing with 220 grit sand paper and sealed with a spray on polyurethane. Again, sometimes I use polyurethane, sometimes polycrylic. I find that the urethane tends to "yellow" and give the piece a bit of an aged look...which is kind of what I was going for here. The polycrylic is a true clear coat and won't alter the color of the paint or yellow with time.

(As you can see the sun was very bright the day I tried to get decent pictures of these two tables...trust me that was the ONLY day this past week that it wasn't dreary, raining or cold as crud. I even had to cover my hostas this week to protect them from a freeze...and they are predicting another freeze this weekend...grrr!)

My recipe for chalk paint is 5 tablespoons of Plaster of Paris, 3 tablespoons of water, mix well then add two cups of flat latex paint. I usually paint two thin coats, then sand and seal.

Cute as a bugs ear and ready for another generation of use!

This week I decided I am getting too old and tired to paint my own house. I actually hired someone to paint my living room, kitchen and den! Ten years ago I would never have paid someone to do something like that! 

But just the process of getting ready to paint creates a mess and is exhausting!

This, my friends, is the reality of home improvement...normally we bloggers only share the beautifully styled and perfect "after." Truth is, most projects make a mess!

I'm a pretty clean person...or so I thought until I moved things that haven't been moved in years...yuck! 

I'm painting my living areas the same color I used in the master bedroom and guest room....SW Nuance. I'm a little nervous about painting these rooms a different color...I told you, change is hard for me. But I have lived with this color in those two rooms and I THINK I will like it! The painter will be here around 10 so there is no turning back now!

Hopefully the weather will take a turn for the better and I can finish and share a few fun projects I have waiting in the wings next week!

Until then....