Another Pantry reveal...

I had hoped to get some “in use” pictures for my daughter-in-law’s pantry but she has a toddler and a new baby so THAT’S not happening!

The only pictures I have are from right before and after I stocked a few things in it …but the transformation is AMAZING!!!!

First, go HERE to check out the “before” and a few “in process” pictures.

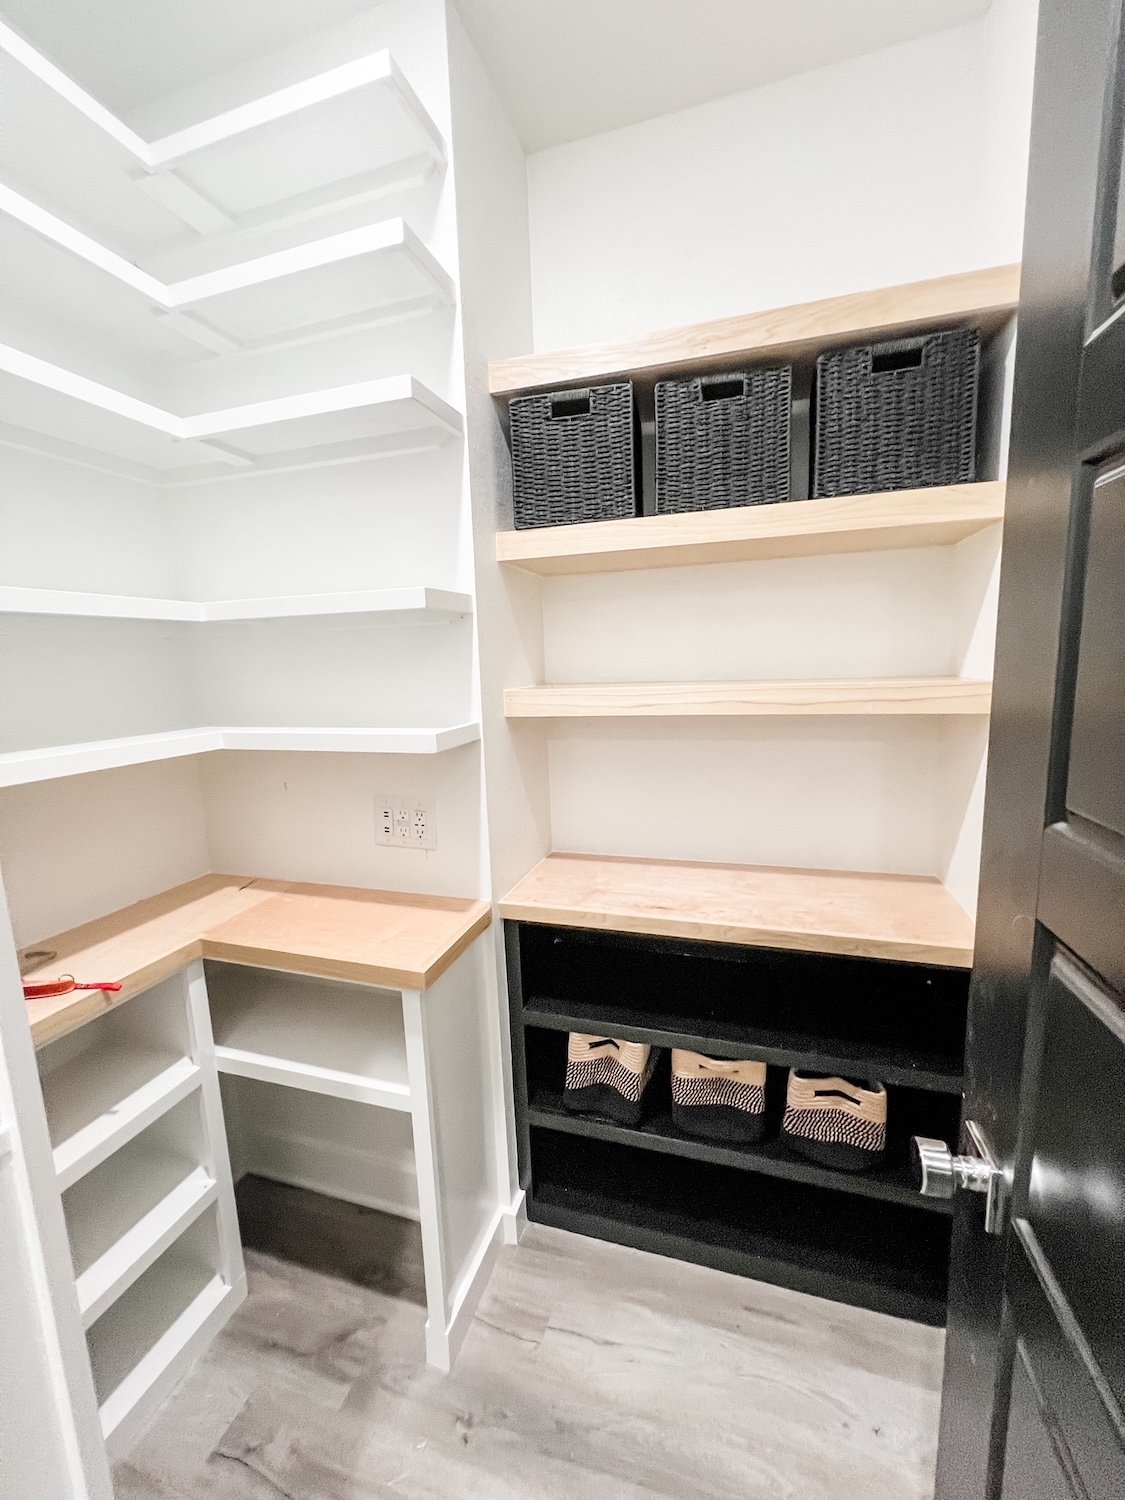
Reconfiguring the spacing of the shelving gave them so much more usable space. We also made the “focal” point of the room aesthetically pleasing which is super important when you keep the door to your pantry open most of the time!

I use my pantry as an extension of my kitchen because I don’t have a lot of upper cabinet space. Making it “pretty” encouraged me to keep it clean and organized. When a space doesn’t work for you it’s easy to just toss stuff in there and cleaning it can be a frustrating process!

So here are a few “after” pictures of their pantry.

Since the door is usually open we kept the“focal point” pretty and simple.

Finding pretty baskets to fill with goodies is always a process…gotta love Amazon’s return policy!

The open space in the base shelf on the left is for the dog food bin…

The built in wall cubby is perfect for boxes of storage bags, plastic wrap and aluminum foil, spices, fabric shopping bags, etc. A great “flex space” for what would normally be wasted space.

You can see they added under shelf lighting…I put a plug in the right side of the appliance tower for just that purpose.

The shelves in the appliance tower are the only shelving I made adjustable.

The outlets to the right have USB ports for easy charging of tablets and phones. Before ,those items took up counter space in the kitchen.

Just reconfiguring the shelf spacing made a HUGE difference…and adding a “counter” made the space flexible and functional.

Their pantry space is much larger than mine, but as I point out when I reconfigured my pantry, even a small pantry can be made much more functional!

And again, make any space pretty and more functional and I promise you will be much more likely to keep it clean and organized!

Insulating your attic access....

I am interrupting the “Pantry Reveal” (started that project HERE) to provide this important service announcement.

Get ready for winter…it is coming.

I know it is hard to even think about cold temps when it is 90 degrees out but it will be here before you know it.

I strongly suggest you start with your utility companies.

Many utility companies offer an “energy efficiency audit.” They provide a holistic view of your home’s efficiency and help you determine the best ways to adjust energy consumption, improve problem areas and ultimately keep more money in your wallet. And if you need anything to make your home more energy efficient, they may provide that service free or at low cost. I did this about three years ago and it made a huge difference in our heating and cooling costs. They sealed my ducts and air intakes, checked all my door and window seals and installed a new thermostat free of charge, and provided me with new insulation at a very low cost.

One of the worst areas for heat/cold transfer is your attic access…whether you just have a hole you have to have a ladder to access, pull down ladder, or a door to the attic area, like mine.

Unfortunately it wasn’t something they caught during my energy audit.

If your attic access is in your living space and it is not properly insulated or sealed it is like having an open window in your house…the heat and cold from the attic WILL get into your home, and you WILL being paying to heat or cool it.

Case in point….my attic access is an interior door at the top of the stairs….

Since it is an interior door, it has zero insulation.

The only thing upstairs is my “bunk room.” AKA-our seasonal storage and one bed for overflow guests! (The kids call it the forrest…lol.)

So we are blessed that we really don’t need our attic for storage…it just houses the heating unit.

But these stairs and bunk room are technically part of our “living space” and our HVAC heats and cools this space.

Imagine my surprise when I discovered that, not only is the door into the attic not insulated, but most of the wall between the attic and stairway was not insulated.

Easy fix. Not only for me but for anyone who has an attic access in their living space that isn’t properly insulated.

You can purchase attic access covers if you have a “standard” access. There are also a ton of great tutorials for insulating attic accesses…again, find a tutorial that makes sense to you and use it.

I am going to share how I did mine since it is a bit more complicated than just insulating a ceiling access.

First I took measurements of the inside of the door insert…not the actual opening but the outside edge of the frame.

That measurement was 36” wide x 48” tall.

What you will you need…

1) a board (ply, chipboard, sheetrock) cut to the size of your measurement.

2) faced insulation (I got R30 “unfaced” and regretted it…get the kind that has paper on it…just get a roll of R-19 which is what most wall insulation is)

3) a couple of handles

4) a couple of hooks (if your access is in the ceiling I wouldn’t even bother)

5) self adhesive weather stripping

In my case I decided to get two 24”x48” pieces of 1/4” plywood only because I didn’t want to get a big sheet and have to rip it down and have a lot of waste. You can use 1/4” or 1/2” plywood, sturdy foamboard, chipboard or even sheetrock if the hole is relatively small. Whatever is cheapest and fairly lightweight. (If you have the type of access that is just a cutout that drops down on trim in the ceiling, just skip all this, glue insulation to the backside and call it a day…lol!)

I cut down both pieces and spliced them together with a scrap piece of plywood, wood glue and screws. This gave me a piece that was 36’x48”.

I added two handles to the front to give me something to hold onto and two hooks to secure it to the door frame. Truthfully if your access is in the ceiling, you may not even need the hooks and handles…you can just lay it over the opening. If you are using foam board or sheetrock, you can’t just screw handles on…you will need to use a really heavy duty adhesive.

Again, I accidentally got “unfaced” insulation so I couldn’t hot glue it to the back of the “access panel.” I tried and failed. So I ended up having to put “furring strips” across the insulation and screwing that to the plywood. I didn’t like doing that because that squishes the insulation which supposedly reduces its efficiency…but whatever.

Also, I think hot glue would eventually break down in the hot and cold of an attic…maybe use the hot glue for immediate bonding, but squirt a little regular glue, spray adhesive or construction mastic on it so that the insulation holds in place long term.

As you can see I let the insulation hang off a hair.

Now take your self-adhesive weather stripping and apply it to the entire rim of the opening. I forgot to pick some up so that is something I will have to go back and do.

Before I installed the access panel, I insulated the parts of the wall that were not insulated. Again, totally baffled as to why this was not done 20 years ago!

Now it’s time to install…in my case I just set it in the inside of the opening and hooked it. If your opening is in the ceiling you can just lay it over the opening.

Now when we need to access the attic, we just unhook the panel and use the handles to move it to the side. Easy peasy.

I just went upstairs…it was always pretty toasty at the top of the stairs this time of the year.

Perfect.

Getting your home ready for winter is super important. Like I said, start with your utility companies (gas and electric) and see if either offer energy audits. Just a tiny bit of winterizing can make a huge difference.

With the rising cost of heating and cooling your home, every little bit helps!!!!

Another pantry makeover....

There was a time when I loved DIY projects and was constantly working on something…everything from room makeovers to furniture rehab.

Unfortunately the time came when my back and fingers just couldn’t take the daily beating. And truthfully I’ve pretty much done everything to this house that can be done. Except the yard…I’m still out there designing and planting and digging…when it is not 100+ out!

One of my favorite DIY projects are pantry makeovers and those I can’t resist.

HERE I shared my pantry.

HERE I shared the pantry I revamped for my son and daughter in law.

Some serious reconfigurations can make a huge difference in the functionality of the space.

My stepson and daughter in law have talked about giving their walk in pantry a makeover for years…actually since they bought the house.

Over time, it became a disorganized disaster….

The shelving was the typical “builder grade” shelving…bull-nosed MDF spaced a good 16-18” apart which leaves a ton of wasted space. Few pantry items need more than 14” head room and a great majority of it just need 10-12”. Just by reconfiguring the shelf layout you can often gain at least 2-3 additional shelves.

Okay in all fairness and in her defense she has a very rambunctious 17 month old and a 2 week old, 5 week premature baby.

So she is a little preoccupied.

Which is all the more reason to get this space in order. With a growing family, having an organized pantry is just a must.

So when they announced a few weeks ago that they were finally ready to get serious about revamping their pantry I jumped on the opportunity to go to work!!!!

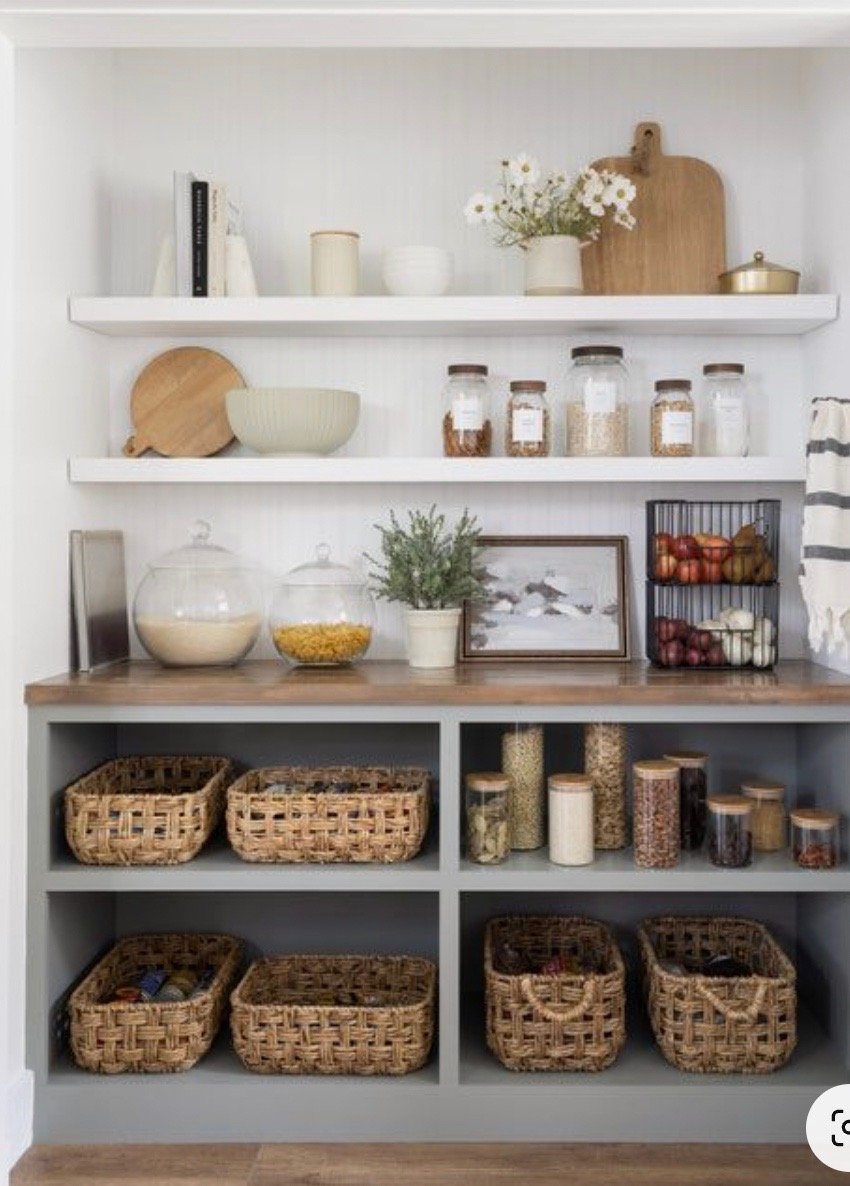
First things first…find your inspiration. I did what I always do…searched “pantry” on Pinterest. Here are a few that caught my eye…. (again, no links…I cut and paste pictures and put them in an “inspiration” folder on my computer.)

Of course it all had to be approved by the home owner. (I hate it when other people think they should have an opinion…lol!)

Fortunately, she liked many of the same looks I liked.

The most appealing thing in all the inspiration photos is the appliance tower. LOVE!

She loves the counter top look with natural wood tops. She loves the look of the floating shelves in the last picture…but she wants natural wood shelving and will paint the base black. I think it will look awesome!

So time to roll up my sleeves and go to work.

First up…take measurements and make a plan….

My plan is to make the cabinet and shelving across from the door “pretty.” This is where she would like a black base cabinet and natural wood floating shelves. They always have the door to the pantry open so we think it would be perfect to make it aesthetically appealing….pretty.

The shelving and the cabinets to the left will be “utilitarian.” A place for all their “food stuffs.” And then of course the coveted appliance tower to the left of the door. Since they have 10’ ceilings we were able to add a ton of shelving space just by reconfiguring the spacing of the shelving.

While this paper plan may make absolutely NO sense to anyone but me, it is what I need to figure out how I can reconfigure the space and what materials I will need.

After I got plan approval from my daughter in law, Brian and I went to Lowes and bought all the materials and had my son precut all the plywood for shelving and base cabinets with his table saw.

The construction of the shelving and bases will be very similar to what Lindsay did in her pantry space. She has a great tutorial for building everything so again, I am not going to reinvent the wheel. As I always say, find a tutorial that makes sense to you and use it.

Day 1….demo!!! I had my DIL empty the entire pantry and my stepson and I went to town with sledge hammers and crowbars and took out everything from top to bottom!

When you remove the existing shelving you may find sheetrock damage and you will notice that you have “lines” where the existing trim (shelf supports) was…primarily because the trim was caulked then the walls are painted…and the walls behind the trim are raw. So you will need to skim those areas with sheetrock mud, sand smooth, then spray with canned wall texture. If you don’t do this, you WILL see the lines where the old shelving was…so do it right… fix the walls, then repaint the walls before installing the new shelving.

TIP: If I am going to paint the shelving I usually paint the walls and shelves the same color…it makes it easier to paint the shelving without having to tape everything off. I use a different grade on the cabinets and shelving vs. the walls, but the same color.

I always prime and sand all the new wood before I cut and intall it…that way I don’t have to do major sanding in the house.

Right now I am still priming, cutting and installing so we have a few more days of work!

Hopefully I will have a big reveal in a week or so!!!!

Another pondless water feature...

I love my swing

It is one of my “happy places.”

But as I was hobbling back to the house after expanding my back floor bed….

…I realized it was missing something really special.

A water feature!

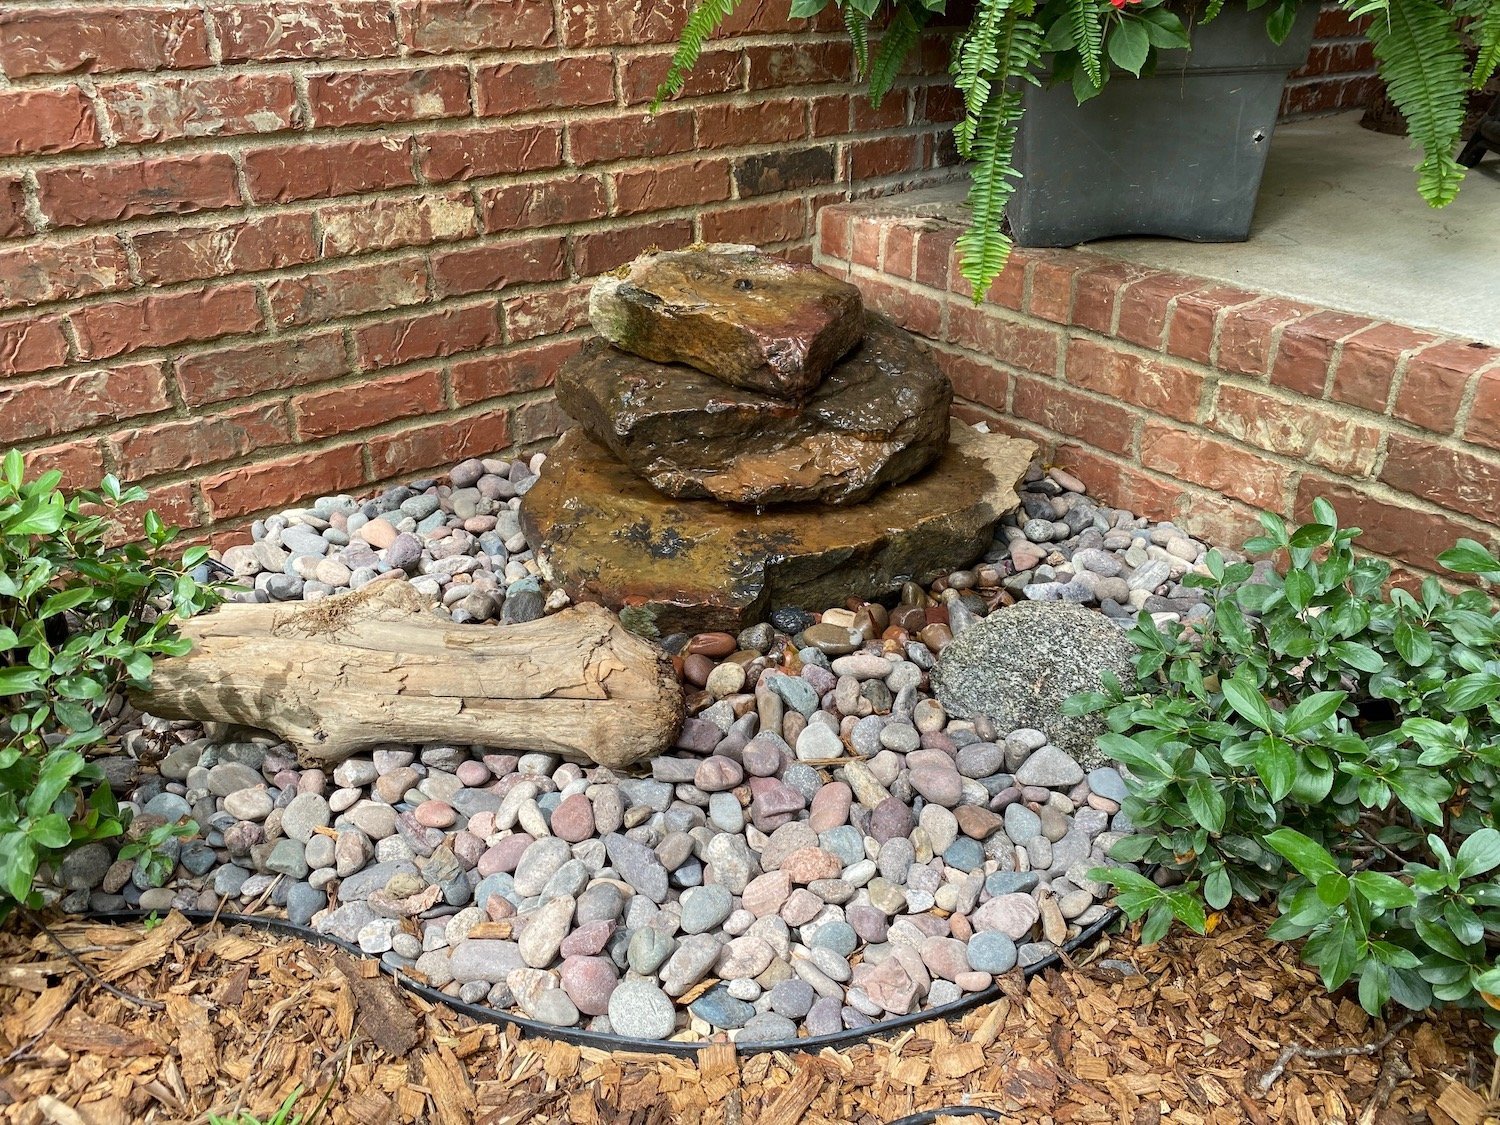
I shared HERE how I added two pondless water features next to the front porch and by the screened porch.

Relatively simple little features but I wanted something bigger next to the swing.

I would love to have an open “pond” but again, too many leaves….so another pondless feature it is…but this time BIGGER!

First thing…find some inspiration. Pinterest never fails. This is one of many I found (again, didn’t keep the link, just the pic…sorry!)

One of the first hurdles is electricity…the water pump has to have electricity. No biggy for me because I have minimal electrical skills. But if you do not, and there isn’t a power source close by, you may have to hire an electrician.

In my case I have power on the other side of the swing at the house. I ran romex through PVC underground from one side of the swing to the house. I ran the romex underground through PVC because I created a flower bed along the back of the swing and I knew that over time I would be digging around in it and don’t want to risk nicking romex. Then I added a plug (similar to THIS) to the end of the romex. I connected the other end to an exterior electric outlet attached to the back of the swing pergola.

TIP: ALWAYS put romex that will be under ground in conduit. They make a conduit specifically for electrical wiring. It is usually double the cost of plain ole’ PVC. I use plain ole” PVC.

I bought a larger tank at the livestock store. One with a bigger diameter so I could use bigger rocks and build a bigger feature. (I use livestock tubs…less expensive, better size selection and actually sturdier!)

I found a livestock tub that was about 5’ x 3’ which was the perfect size to fill the area next to the swing.

Marked the area where I wanted to put the tub and started digging. (I make this sound easy…it was not…I honestly believe we live on a rock quarry!)

CURSES! Right smack dab in the middle of my planned placement I ran into an irrigation line! Since it was a main line I really didn’t want to mess with relocating it!

This is when I had to stop and punt…in other words, best laid plans got tossed!

I relied heavily on THIS great tutorial…it is one I found that was most similar to what I was trying to accomplish.

I used a pond liner rather than a tub. A pond liner will give you flexibility on size and shape. I found a really good quality one HERE. More expensive than a livestock tub and more expensive than the pond liners at places like Lowes and Home Depot. However, this one is 45 mil thick which is double what you can buy at the big box stores. I figure if I am going to go to all the time and expense of building this thing, I want it to last. The thicker liner reduces the chances of tears or punctures.

Without the limitations of a specific tub size, I could dig the hole any size I wanted…I ended up digging a “two level” hole to work around the irrigation line.

One change from the tutorial…I don’t ever like to use wood under ground if at all possible. Eventually it will break down. So I used some scrap treated plywood to create a rigid box, then lined it with styrofoam board. They say it takes 500 years for styrofoam to decompose. I figure by that time the ground around the liner will have settle and compacted well.

In the picture you may note I did not “frame” the upper part of the reservoir…I went back later and added a “frame.”

I added the frame, then added the sand on the bottom so that it would hold the frame in place and create a nice “cushion” for the liner!

I dug out around the form about 4” deep and 8-10” around it and added small pea gravel…kind of creates a little “french drain” around the pond. This keeps dirt and silt from washing into the reservoir if there is heavy rain. The rock is 1-2” below the frame.

I used my taper to make sure the pea gravel and sand was compacted well.

I liked the way the tutorial used the cinder blocks for additional support. I used THIS metal gate as a grate and reinforced it with 1/2” rebar to set the rocks on.

After I laid the liner in the hole, I filled the pond with water to get the liner to kind of “form” to the bottom and sides.

I reset the cinder blocks, measured to make sure they were the right height and level, then placed the grate and rebar.

If the cinder blocks are too high or too low to support the grate level, you can easily reach under the liner and remove or add sand as needed. You may have to drain the pond to do this but make sure you refill it…the weight of the water will “fit” the liner to the space.

I use a shop vac to drain the water when needed.

I trimmed the liner back, topped the liner with more pea gravel, put the pump down in the water, reset the grate and rebar and then covered it all with THIS galvanized mesh. This will keep any smaller decorative rocks from falling into the reservoir.

I waited to cut the access hole for the pump until after I got the larger rocks set…I wanted to make sure I would have access to the pump without moving the large rocks.

I set the pump down into the reservoir and I ran 1/2” water line from the pump to above the grate. I knew I wanted both a waterfall and a bubble rock so I actually split the water line into two lines. I connected one line from the pump to this splitter, then connected a 1/2” line to one side, and another to the other.

Two water lines from one pump!

I made one major change from the original water features. Since I had plenty of room in this larger reservoir, I put the pump in one of THESE filter boxes….

I had a pump in my water feature at the other house in one of these. I found that the actual pump (THIS one) was less likely to clog and loose pressure when it is in a filter system box. (BTW, you will want to get a water pump for YOUR needs….the size of your feature and the flow you want)

I picked up a variety of rocks at the rock store…some flagstone, native stone, and smaller decorative rock…then I started playing with it.

This is where a little creativity and some serious muscle come in handy. Again, I knew I wanted a waterfall feature as well as a bubble rock.

I ran the water tubing through the back of the rocks for the waterfall but I had to drill a hole for the bubble rock. Not a biggy…I just used a 3/8” masonry bit…takes a little time and muscle but it is doable.

Only after I got the majority of the larger rocks placed did I cut an access into the grate with a metal grinder. I didn’t want to have to move large rocks to get to the pump. (I have learned the hard way to make the access big enough that you don’t shred your arm when you have to stick your hand down into the reservoir.)

After I cut the access I covered the hole with the wire mesh.

Once the big stones were set in place, I adjusted everything to make sure that all the water flowed back into the reservoir. This can take some time…even days. You have to watch the water level and make adjustments as needed.

TIP: When you get rock, pick up some slivers of flagstone to use as shims!

After all the adjustments, I sucked out all the water and cleaned the pond well and then I filled it with fresh water. Placed all the decorative rocks….added some plants!

After some more adjusting this is the initial placement I came up with….

It may take a few days of adjusting to make sure that all the water is flowing back into the reservoir. This is super important because you don’t want to have to be constantly filling it! Watch and wait.

Honestly, I wouldn’t even put rock over the access hole until you are certain that it is all flowing properly!

As you can see in my final pictures, I actually removed all the small rock from the top of the access and placed a few larger pieces of flagstone. Now instead of moving a bazillion little rocks, I just pick up a few larger rocks to access the system…much easier! Just make sure that any water that flows onto those rocks, flows back into the reservoir!

A few weeks after I got the feature running, I decided to create a little “walk” around the swing and feature. It ties into the walk I had added between the house and the swing….

I added a little flower bed behind the swing so I would have space to put hosta splits next spring. Unfortunately three of my hostas were getting stomped by dogs so I went ahead and moved them here…now I only have room for 2-3 hostas next year. Curses, I will have to build another bed!

I added outdoor lights behind the fountain so that at night the lights shine through the waterfall….so pretty. Unfortunately, my photography skills don’t allow for a good picture…trust me, it’s pretty!

I love this little space! The sound of the water is so soothing.

While the project itself takes a little muscle (digging, moving rock) it is certainly a doable little project. Maybe a hair more extensive than these water features. If you feel intimidated by the scale of this feature, maybe start with smaller ones first!

You don’t have to pay thousands to get a pretty water feature in your yard…and in my opinion it should go down as a mental health expense. All in all this one probably cost me less than $1000.

Nothing more soothing than a relaxing evening in the porch swing next to a water feature!

BTW, in one of the Facebook groups I am on someone was commenting about how much of a hassle a pond is to clean and maintain. It would be soooo easy to turn an open pond into a pondless feature. After all, the hard work of digging a hole is already done!!!!

These little pondless features are relatively easy to maintain. I drain them before the first freeze, cover them with plastic and then in the spring I just remove the plastic, clean out the reservoir, fill it with fresh water and fire it back up. So much easier to maintain than my open pond that had to be drained and cleaned several times a year!

Just a thought!


Utility screen....

I shared last time that I have been going from one project to another.

This past week I finished up a whopper of a project but I will share that another time.

I shared HERE something I have been “growling” at since we moved in…and it only got worse with the addition of the “wart.”

This mess…..

All these utility connections on the back of the house were just a big cluster. When we added the generator they had to add another control box and that just made it worse. There are electric panels, gas lines, phone and cable boxes, a breaker for the shop and of course the drier vent.

I feel like I was able to improve this area with the addition of the wart screen and the flagstone, so I decided to finally tackle a screening for all the utility panels and lines.

Both screens were constructed with treated lumber and that needs to cure for a time before I can stain it. Hopefully they will both be cured enough later this summer. I want to match the pergola swing.

I did what I always do…looked to Pinterest for a little “inspiration,” took measurements, drew up a tentative plan, made a material list…then off to the store I went.

Since the entire thing was going to be fairly large and heavy and we need to have access, I decided to construct a “cabinet” type enclosure.

I used 3/4” plywood, ripped down, because it was lighter weight than 2xs and I could customize the depth.

I also needed to have operable doors in the event we need to access the generator shut off quickly.

If you think there would be little need to access your utility stuff you can always built a solid panel and attach it to the “box” with screws. That would allow you access if necessary!

I built the box out of treated plywood, making sure it was perfectly square. I used my Kreg jig and screws, as well as glue, to make it is super sturdy.

I attached heavy duty steel L brackets to the brick with concrete screws.. I placed three brackets along the top (making sure they were level) and 3 brackets on each side…that way I could just “hang” the box onto the brackets, then attach the box to the bracket using exterior screws.

I left the bottom open primary for circulation. Notice I didn’t go all the way to the ground with it. The dryer vent is still exposed allowing for easy access so it can be cleaned a few times a year.

After the “box” was hung and secure, I used treated 1 x 2s to create the “face” of the cabinet.

I measured the width of the cabinet box and divided that in two to get the dimensions for the doors.

Now this is where my “blogability” fell apart. From this point forward I completely forgot to take instructional photos.

So I’ll try my best to explain how I made the doors.

I created a channel on 2x2 treated boards, 3/4” deep and wide…a “dado” as they call it….on my son’s table saw. I used them to built the frame of the doors.

You want to make sure the doors are super square!

Then I laid 1x6” treated boards into the dado (channel) in a diagonal pattern…just to give the doors a little “interest.” I used treated 1x6s and used a rooter to give them a little “edge” rather than using the heavier deck boards…just because they are lighter! I attached them to the door frame with glue and Kreg screws.

I used three non-mortise hinges to attach each door to the cabinet face frame and I used hooks on the top of the doors to secure them.

Make sure all your hardware and screws are suitable for exterior use.

Also, remember, glue is your friend. So even if you are using screws, you still want to use a good glue on all your joints, even on outdoor projects.

Also remember that stain will not penetrate glue residue…so make sure you get the glue off of any area you will eventually stain or sand it well after it has dried.

Another thing to consider when using treated wood in a project. You may notice in the first picture of the doors the “joints” between the 1x4s are pretty tight. But as the wood dries out it will shrink a tad and it will “gap.” I don’t mind on the decorative door panels…and truthfully once it is stained black you won’t even notice it. But it is something to keep in mind and certainly a good reason to use glue and screw to secure treated wood when you don’t want it to gap!

Now I wait. Again, you want treated wood to have time to dry out before you apply a stain or finish. A good way to test treated wood to see if it is “stain ready” is to spray it with water…if it beads up at all it is still not ready to absorb a stain or finish. Give it time!

Next week I will share another major project I completed last week. It is the reason I am sitting in my swing with an ice pack on my knee and back!

Until then….

Where in the world have I been?

I can’t even believe I have not posted since February. Seems like so much has been going on…baby showers, trips, projects…so much!

When last I posted THREE MONTHS AGO I was working on this project…hiding the wart!

I started out by building a “screen” around the “wart.” My original plan was to lay the flagstone first, then build the screen. Honestly, building the screen first worked out much better!

I decided to go with the “louver” look (see HERE for a link to a really good tutorial) so I built two inserts to go between the post I set. They have to be removable so we can service the generator once a year. Built the inserts then attached them to the post with carriage bolts. Threw down a few inches of sand and thats where I left off for a few months….

I needed to give the sand a little time to “level” and pack down…and I also had to get ready for a very special day for my very special son and daughter-in-law! Their baby shower….

Again I was honored to make their cake and desserts…so much fun.

Then it was off for our spring vacation. Brian had to attend a conference in Vegas so I flew to Vegas the last day of his conference, we rented a car and toured the five national parks and one state park in souther Utah. Again, I am not a travel blogger….but if you have never seen these AMAZING National Parks…just go! They will take your breath away!

I can assure you that no photo I took…or have ever seen…does them justice.

Then home for a ton of projects.

Refinishing an antique dresser for the nursery….

I used THIS process and I promise it is hands down the best process for refinishing any piece of furniture…regardless of the existing finish!

I built new shelving in my workshop…..

Not as fancy as some I have seen on the webisphere but functional for my purposes!

I finally laid flagstone around the wart screen and now I am waiting a few months to stain the screen black to match the pergola swing….

New drawers for under the bar storage cabinets. …

I have no idea why I didn’t have my cabinet guy do this when he built these cabinets. I store all my seasonal dishes and service ware under here and it really was a pain to have to shuffle things around to get to the stuff in the back. LOVE!!!!

Now that the weather is warming, I have been planting…nothing new except I decided the flower bed I added last year wasn’t big enough…so I am making it bigger!

I have moved the edging out, weedeated all the existing grass down to the nub, sprayed it with Round Up and next week I will fill it with compost and mulch. I already have a few plants in mind for this space but honestly I need some space to split hostas again next year!

While I wait for grass to die, this is the next project I am contemplating..

A screen around these gawd awful utility things. They have bugged me since day one and with the addition of the “wart controls” to the right, it has gotten worse.

My “plan” is to build a box kinda thing around them and face it out with hinged doors so that it can all be accessed if needed. I want to build it out of treated wood then stain it black to match the swing and the wart screen.

That’s the plan…we will see.

As you can see, it is never ending! Unfortunately, as I have said many times, I am a baaaad blogger. I rarely think of what I do as being “content worthy.” But hopefully the changes I make will inspire you to roll up your sleeves and make changes to your home.

I don’t do good tutorials but there are TONS out there on the blogesphere…anything you want to learn to do can be found on the web!

As I have said before…my daddy didn’t teach me how to build a wart screen, or build cabinet drawers, or bake a cake….what he taught me is how to figure out how to do something I want done.

Will you make mistakes….ABSOLUTELY! I still do and I have been doing this stuff for a lifetime!

So…GO FOR IT!!!

Because until you are willing to roll up your sleeves and dive into whatever you think you want to try or change in your life, you will never be able to ….


Hiding the wart...

There are times in any relationship when “compromises” must be made.

This is one of those times.

It is why our TVs are above our fireplaces and why we have a pergola behind the shop to shelter the humungous zero turn lawnmower we use MAYBE 5-6 times a year to pick up leaves.

This time Brian was hell-bent on having a “whole home generator,” while I was perfectly content to cruise along with the little generator that, in the event of an emergency, only runs the furnace and kitchen outlets.

In 2009 Northwest Arkansas experienced a “once in a lifetime” ice storm. Some parts of our community went weeks without power. We lost power 2-3 times for MAYBE a few hours at a time. Got a little chilly in the house but nothing a few blankets and warm socks couldn’t handle.

Yes, I had two fireplaces I could have used as a heat source…one in the master bedroom and one in the den. Unfortunately there was a tree on the bedroom roof and another tree dropping massive limbs on the den roof. I didn’t think it was real safe to light a fire in either room.

Anywho…Brian is now convinced we need a whole home generator to light up the entire house in the event of a power outage.

While I hope I never loose power for days on end, we will certainly be prepared and he will most likely tell me “I told you so.”

Again…compromise.

So why the compromise? Well, the only reasonable and affordable place to put the giant “wart” (as I affectionately call the massive eye sore) is in the flowerbed next to my back patio.

If you check out the swing pergola I built HERE, and the back yard landscaping I shared HERE, you may note that I take great pride in my yard and I spend a great deal of time enjoying my outdoor space.

So putting a “wart” in the middle of my “happy place” did not make me happy.

Compromise. With a smile..

One of the many things that make a relationship work.

SOOOOO….the wart was placed and my creative brain had to come up with a way to “hide” this monstrosity.

The vision…first screen the darn thing. Keep in mind it must have adequate airflow so I can’t just encapsulate it in something.

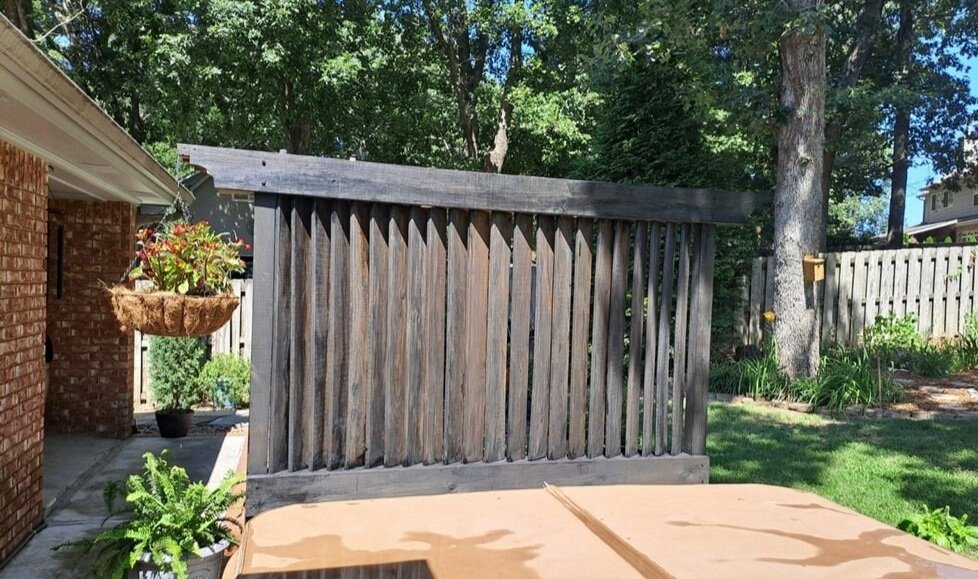
I have helped a few neighbors build screens… one around an air conditioner unit and one for a hot tub.

So I know it is doable…I just need to find something I like.

So I did what I always do…I went to Pinterest and found a few things I thought I might like.

I like the look of the more “modern” horizontal boards like we built around my neighbor’s AC unit. But because of the need for really good airflow around the “wart” I keyed in on these “louvered” panels. (HERE is a good tutorial for one)

Utilizing this “louver” look will give me good coverage but also allow for plenty of airflow.

So the plan…first I had to remove the Japanese maple I put in this flower bed three years ago.

I moved it to the front and hope like heck the darn thing survives!

I raked up all the old mulch, then I dug out the 4” of compost I put in there a few years ago with the plan to turn this into a massive flower garden (that never materialized!) I will save that for another project.

I dug out another few inches of soil then set three 4x4 posts for the screen. Then I put down a few inches of sand for the flagstone. I put that down now so that it has time to settle and compact well!

My “plan” at this point is to add flagstone like I did HERE at the other house…kind of create a little “patio” area in front of the screened wart.

After I get the flagstone down I will build a screen around the wart, then decorate the area with potted plants and maybe a little bistro table.

I think it will be easier to lay the flagstone before I build the screen. But honestly it may take a few months to get the flagstone done so I may have to put the screen up first…just don’t know how long I can stand to look at that thing.

Compromise…with a smile.

Are you thinking about retirement?

I hope you had an amazing Christmas! (HERE I shared my Christmas decor )

So many of us are looking towards the New Year so this week I want to “muse” a tad.

I want to talk specifically to those contemplating retirement.

So often everyone focuses on the “financial aspect” of retirement.

Do I have enough in savings? Will my pension be enough? Will I have my house paid off or can I afford a payment? When will social security kick in and how much will it be? What kind of medical insurance will I need?

All valid questions. Ones AARP, retirement gurus and financial institutions are more than happy to help you answer and navigate.

But there are a few aspects to retirement few discuss or focus on.

In my opinion, they are as important or maybe even more important than your financial well-being.

Your emotional and psychological well-being when you no longer have “a purpose.” A job or career that gets you out of bed and on the clock 8-10 hours a day, 4-5 days a week, 365 days a year…less of course vacations and holidays.

The commitments that a career or job requires…the social network it provides.

I want to paint the living room. I need to clean out the garage. I want to play more golf or fish or travel. I want to spend more time with my grandkids. I want to learn to paint/bake/knit.

All very valid “wants.”

But do the math.

Lets say you are just a typical 9 to 5er…5 days a week. So you basically work 40 hours a week. That is 2,080 hours a year…less vacations and holidays…so lets say 160 hours of PTO and 11 national holidays (88 hours). All said and done maybe 1,830 hours a year. That means you have somewhere in the neighborhood of, on average, 35 hours a week that is no longer dedicated to “earning a living.”

Keep in mind, that 35 hours a week you have to fill up doesn’t include commute time you no longer need or time prepping lunches or clothes for the week. Your weekends aren’t filled with grocery shopping, running errands or housework because now you have ALL week to do those things!

So you have 35+ hours a week to golf or fish or spend time with grandkids. You have all the free time in the world to paint the living room or clean out the garage. You have time to learn to paint or bake or knit. You can finally take that trip to Yellowstone or go on an Alaskan cruise. You can finally read a few good books. Maybe you even want to write a book!

Sweet.

So you think.

In reality, let me tell you what happens.

You wake up the first Monday morning and you are LOVING not having to jump up and hit the day with your hair on fire.

The week after you return from your dream vacation to Alaska or Europe you open the garage door and start cleaning out that disaster or start painting the living room…that will take a good week or two. But then it’s done.

Course there are always other “honey-dos” around the house you haven’t had time to tackle because of busy work weeks. Clean out the gutters, repair and paint the exterior of the house, purge and organize all your closets. Realistically how many weeks or months would it take to get it ALL done?

Maybe you plan golf or fishing dates with your buddies (IF they aren’t still working)….that eats up a good 8-10-12 hours a week.

You sign up for those painting or baking classes…there’s another few hours a week

Maybe you schedule ”play dates” with your grands a few hours a week.

So you spend a few months, or even a year, enjoying your retirement…doing the things you WANT to do rather than working.

Remember, if we are lucky we have another 20-30 years to fill up.

Then reality sets in.

You no longer have to hustle to make a paycheck.

You spent so much time with the people at work that they really became your primary “social network.” But they are all still working so they don’t have the time or energy you have to “socialize.”

Your “identity” was so wrapped up in WHAT you were for 20-30-40 years…now you are what?

“Retired?”

All the things you WANT to do….golf, fishing, baking, knitting, reading, grands…they may take up some of your day but not a full 40+ hours a week that use to be dedicated to your job/career.

Suddenly you find yourself feeling “guilty” that you aren’t running around with your hair on fire. You are in your pajamas at 10 a.m. still drinking coffee and watching the morning news while your spouse, friends, ex-coworkers are out there “doing.”

Suddenly you find yourself without a “purpose.”

“Purpose.” That was the word that hit me like a ton of bricks when I found myself really floundering a few months after my “retirement.”

What exactly is my purpose…and what does that even mean?

For most of our lives our “purpose” (and by default our “identity”) is wrapped up in our careers (I’m a doctor/business owner/secretary) and of course our families…I am so and so’s wife, husband, mother.

Then our kids grow up and get their own lives…we are still parents but they don’t demand as much of our time and attention.

We retire and we no longer see ourselves as “what we do.”

Suddenly we are faced with the reality that we have to find a new identity…a new purpose. Because if we are lucky we have another 20-30-40 years left on this earth.

I didn’t plan well for the “emotional/social/psychological” aspects of retirement….and what I discovered is that I really struggled with a lot of negative feelings.

Guilt. Everyone else is still working and I am doing nothing or I’m not making the kind of money I made before so I am no longer contributing to the household like I use to.

Loneliness/lack of a social life. I am stuck at home alone. I can’t travel like I wanted because my partner is still working. Most of my friends are still working so I have no one to play with.

Boredom. The garage is clean, the living room is painted, I read/knitted/baked for two hours today and played golf for 4 hours…now what!?

I could volunteer! Yes, I will volunteer! Let’s see…I can''t volunteer at the animal shelter because I would bring home every stray animal. Sick kids make me sad so I can’t volunteer at Children’s. I’m way to close to THAT so I don’t want to work with elderly people.

So what advise can I give to those who are contemplating retirement?

Finances…of course. You have to make sure you are financially sound. There are so many resources to help you prepare financially for retirement…find them and use them.

In my opinion, don’t go into retirement with debt…house payment, car payments, personal loans, credit card debt. If you need to work a few extra years to pay those things off…do it. Those debts will drain the resources you will need! Use your income to pay off debt…not your retirement funds.

Your health. Do not fool yourself into believing you will eat better, exercise, or stop smoking AFTER you retire. Do it NOW…develop healthy habits NOW. Start getting as healthy as you can NOW so that it will be easier to face the health issue that may arise because of aging.

Be realistic about your need for health insurance and make sure that factors into the “financial preparation” you do.

No, we don’t get to control every aspect of our health…but take control of the things you can control…your diet and exercise and stop the bad habits that can negatively affect your health long term. (HERE I shared my journey to stop smoking)

Mental health…whatever that means to you. For me, it meant getting rid of the “negative” thoughts in my brain.

I also use exercise (biking and walking) and eating better as part of my mental health regiment.

I did not want the negative…hatred, bitterness, envy, anger, frustration, fear, regret…to have ANY affect on my life. Let’s be honest…it’s dang near impossible to banish ALL negative from our lives. After all there are still stupid people all around us…lol!

But finding a way to manage those negative feelings and thoughts and replacing them with healthy positives is a “must do” regardless of your age. If you can’t do it on your own, find someone who can help you…NOW!

Find your purpose….When I realized I had to fill 30-40 hours a week with something other than work, I really began to search for a “purpose.” Something I could do that would be fulfilling and fill my days with positive, uplifting things.

Truthfully…unless you are just a “golf freak” or fishing fanatic, or unless you can sit and read or paint for 8 hours a day, 7 days a week, 365 days a year….you are going to have some serious down time.

Waiting til you retire is not the time to “find your purpose” or recreate a new identity.

REMIND YOURSELF DAILY…YOU DESERVE THIS!!! You worked your entire adult life. You deserve this. The only way I finally banished the “guilt” was reminding myself daily that I deserved to be in my pajamas at 10 a.m. drinking coffee. I deserved the leisurely walks with my dogs. I deserved long lunches with my friends and naps with my grandkids.

I worked my whole life to save enough to retire. I am certainly not on the “wealthy” spectrum and I don’t have the luxury of spending willy-nilly. But I have far fewer financial demands than I had while I was raising kids and I have enough to live relatively comfortable in my retirement years.

HERE I shared part of my journey to finding purpose. As I noted, it took me a good two years to figure it out. Don’t go into retirement without a purpose and spend two years floundering like I did.

So BEFORE you retire, find your “purpose.” Find what truly fulfills you before retirement and be realistic about how much time it will require.

Not hobbies, or travel plans, or projects around the house…but something you can do that will take up all the free time you will have AFTER you do those fun things.

Something that will give you real “purpose.” Something that will make you wake up every Monday morning with a plan…something you can feel good about and look forward to!

Get happy, get healthy, and really prepare yourself MENTALLY for this dramatic change in your life.

If you want to go into retirement and just putter around with a few hobbies here and there…go for it. But honestly, if you have been a busy bee for the last 40 years of your life, I can almost guarantee you won’t be happy.

Worse, you will not be physically or mentally healthy. The negatives of not having a real purpose….not having something constructive and positive to do…not having a good social support group….those will drain the physical and mental life out of you.

You will find yourself having a miserable, unhealthy last chapter of life.

You can have a great financial portfolio going into retirement….but if you are bogged down with negatives of regret, loneliness, anger or you are unhealthy mentally or physically…you will truly suffer.

Retirement can be a fulfilling time in your life….IF you plan for it!!!!


Another Christmas....

Ever year I feature my Christmas decor…every year I think not much has changed.

But it does change…a tad here and there.

Last year I shared a few little changes…same this year…a few things here and there.

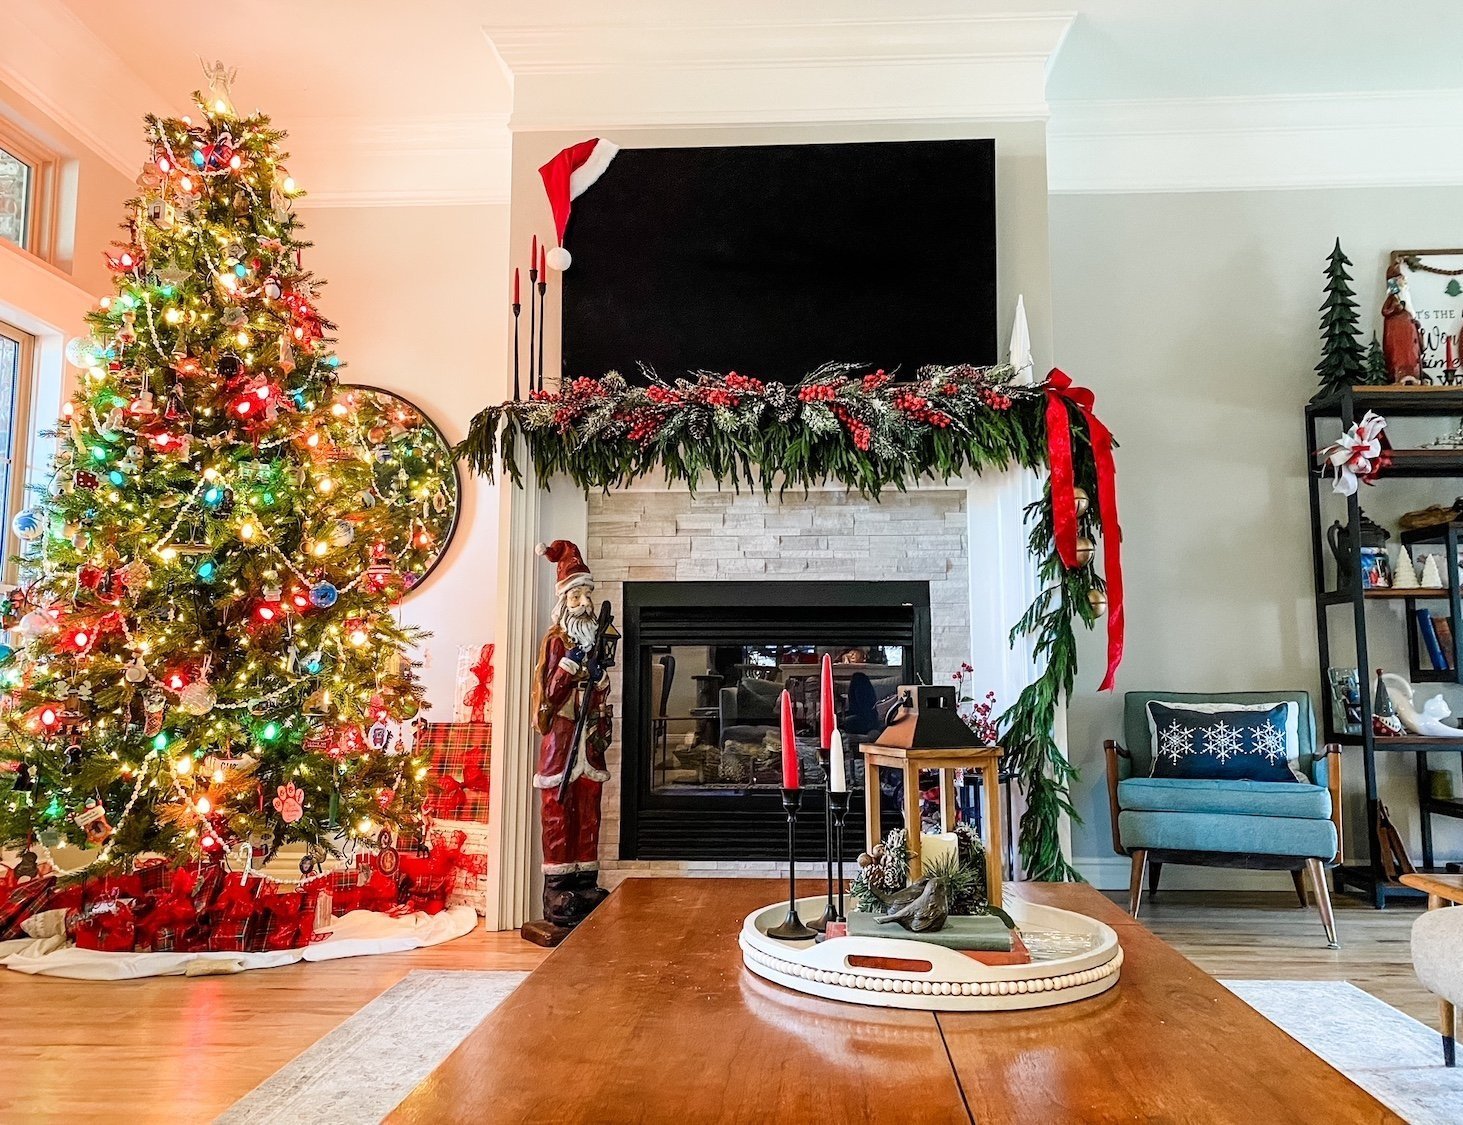
So what did I change this year? Probably the biggest change is the mantel decor….

Last year THIS soft touch garland was ALL the rage…everyone wanted it. Which is why it was sold out and on Ebay for mega bucks. So I waited until after Christmas and bought it when it was back in stock. Problem was, I forgot I bought it, several times, and by the time I brought down all my Christmas decor I had 10 strands of it along with three soft touch wreaths I have NO idea what to do with!

No biggy…while it is a beautiful garland, you really have to layer it to get a good thickness. On my living room mantel I have 4 5’ strands and 1 15’ strand.

In the den I layered 5 5’ strands….

I used Command hooks about every 1-1 1'/2’ and floral wire to secure it.

I added a red velvet ribbon and these awesome bells….

I would love to link to the bells but as usual I have NO idea where I got them. I know I ordered them but from where? Not a clue!

Last year I layered the berry picks on the mantel…this year I layered them on top of the garland…just plain ole’ picks you can get at Hobby Lobby…four on each mantel.

Another new addition is this wood Santa….

I know WHO influenced me to buy it but have no idea WHERE he came from. I follow a couple of great ladies on Instagram…Deb and Danelle…and as influencers go they get me every time. Their style isn’t necessarily my style but they feature elements I love. Truthfully I think that is where the bell inspiration came from!

What drew me to this Santa was his “girth.” He’a skinny.

Okay, so here is the deal…ALL my Santas are skinny. I have NO idea what that is all about but it seems like every time I am drawn to a Santa he is on the anorexic side.

I kid you not.

Another element I added to my decor this year are the cabinets wreaths….

For several years I have wanted to add “mini” wreaths to my upper cabinets. I finally found am inspiration for what I wanted, but honestly, when I put it all together they came out a hair too big. Hardly “mini.”

So be it…maybe next year I’ll try again…for this year it is what it is….

The precious train!

This train was a gift from Brian’s grandfather to his dad in the 40’s…it was used then. Last year we displayed it above the dining room. This year we got it up and running and put it around the tree in the office.

We didn’t put it around the main tree in the living room because 1) too many gifts under that tree and 2) the SLIGHTEST bump derails it and the living room is a high traffic area.

Not sure Callum is really old enough to appreciate it but I sure love it!!!!

And now the pièce de résistance…the final tree in my life long dream of having a tree in every room!!!

For years I swore if I had the time AND the money, I would put a tree in every room of my house. Last year the goal was complete.

The master bedroom tree!

I added a few little knick knacks on the highboy. Just a few little things from Home Goods…nothing fancy.

The office….

The wreath is new…a tad over powering. Again, I tend to “go big” and then I’m not so thrilled with the result. Meh…next year I’ll change it!

The dining room….

This is always one of my favorite rooms to decorate.. I love the neutrals even though I am drawn to all the vibrant holiday colors in the other rooms.

I like to keep the place settings out even though we don’t usually use these dishes because they have to be hand washed. Simple but elegant.

The sunroom….

I have shared this room before. It is my “Stewart plaid” room in honor of my “Stewart family.” Love it and I am always looking for more Stewart plaid elements to put in here. This year my sweet friend Carrie brought me this precious decoration from Italy!

The den…

The breakfast room….

Not all the trees have decorations…some just have lights. That’s okay. They are still pretty and the four that are decorated take enough time!

The entry…

Little has changed here…added some little wooden trees and a Christmas sign on the trim…another PJ pillow. Love the view into the office!

The screened porch….

And of course the main tree in the living room….

All these trees are connected to remotes (THIS is one I use and LOVE) and are turned on every day. I don’t even want to tell you what my electric bill is for the month of December. Suffice it to say it is cheaper to cool this 3500 s.f. house than to light it up…lol!!!

But I love it and as long as I am physically able to do it, I will. Then I may hire it done!

I love this holiday and it seems that year after year I do indeed add something new. I hope something I did will inspire you to add a little more to your home.

Starting a holiday tradition...

It is never too late.

Time flies.

Before you know it, decades have passed and that little thing you started doing 20-30-40 years ago is now a treasured tradition that will be passed down for generations.

Even if you didn’t realize it at the time…it was just something you did every year.

I’ve shared this story before…when my oldest (now 42) was a baby, my mother started giving her a few precious ornaments every Christmars. She did the same for the boys when they were babies (now 34 and 35) and again with my baby (now 26). After 40+ years of giving my 4 children a couple of special ornaments every year, my tree is bursting with heirloom treasures.

There are the wooden ornaments she gave them from her and my dad’s trip to Yellowstone…

The ornament from the year Katie and I went to New York

College graduation….

Our trip to Georgetown, Colorado….

A Lenox moose representing the year Katie shot her first deer….

Every single ornament on my tree has a special meaning….ornaments representing every milestone in our lives and souvenirs from our travels and my parent’s travels.

Even after giving Sarah all her ornaments, I still have a tree full. And now that my children are growing and creating their own homes with their own trees, they have begun the “tradition” of gifting me with ornaments with special meaning. Once all my kids have their own trees to decorate, mine will still have special ornaments from my travels and my children.

My mom is no longer here but I have carried on this little tradition she started 42 years ago. Every year I give each of my kids and grandkids an ornament from our travels or one representing something special in their lives. Baby’s first year, college graduation, a cruise to Alaska…..anything and everything special and memorable is represented on our Christmas trees.

It is never too late to start a “tradition.” We do PJs and ornaments.

What tradition will you start this year? Remember, every “tradition” starts somewhere with someone…give your children, grandchildren and great grandchildren a tradition to charish!