And another campaign dresser makeover...

I shared the "before" of this Dixie campaign dresser here....

A very desirable piece that I knew needed the perfect makeover.

I spent hours cleaning the brass hardware. One of the little doodad brackets was missing so I had to order two on Etsy....they didn't match the original hardware exactly but as my Daddy use to say "You'll never notice it on a passing train!"

A few minor repairs but all in all, it was in outstanding condition for a 50+ year old piece!

A KTSP treatment...kilz, sand, tack cloth and a high gloss oil based paint!

Gorgeous!

This was a tough one to let go! I took it to 410 Vintage at around 3:00 Tuesday afternoon and they texted me at 5:00 that it was sold....I'm so glad someone else loved it as much as I did!

These vintage pieces can be brought back to life with a little elbow grease...if you can find one, don't let the grungy old finish and dingy hardware deter you! You won't be disappointed!


An old table made new!!!

A few months ago I received an email from a reader asking for a few more details on my refinishing technique. And I think she may have been looking for just a little "push!" Sometimes all a person needs is a little encouragement...and of course a good tutorial!

This tutorial for stripping old finishes is by far my favorite post and there have been many who have benefited from the information and encouragement! 

If you are like Chantelle, you may be looking at your table (or dresser or desk or heirloom cabinet) and wanting desperately to make a change. You see the potential...you just aren't sure how to get there.

Her biggest beef was the "heavy" orange finish.

The table is amazing but I agreed...the "orange" finish was pretty bad and as she noted, it really didn't go with their "new" kitchen.

But a cruddy old finish should never be a deal breaker for a solid piece of furniture with good bones....it is not a difficult thing to change with a little know-how and encouragement.

Sometimes all we need is someone to tell us YOU CAN DO IT!!!

She emailed me this week with pictures of her finished table...."The first picture shows the table how it was originally, the second picture shows how it was once I had completely stripped it and then sanded it down (you were right, it hardly needed any sanding) and the final picture shows how the table is now, after I applied my finish!"

Absolutely stunning!!!

I asked her what finish she used...

"It's called Osmo Top Oil. Really good stuff, someone left a ring mark on the worktop from a hot cup, and it just wiped straight off. Really impressive. "

Impressed I am...so I immediately started doing a little research on the product. Definitely something I will try in the future.

I am always open to new products. Just recently another reader posted a comment on this same tutorial about the use of oxalic acid to remove dark stains on raw wood. 

"....after the table was stripped, some ugly black spots remained on the top. Google told me that it was probably water damage, if water penetrates through the finishing, some woods with high tannin content (oak) can develop such spots due to a chemical reaction between the tannin and the traces of iron in the water. They can be removed with oxalic acid, and some sources advise to use distilled water to dissolve it. The guy from the specialized wood finishing shop, where I bought the acid laughed at the idea and ensured me that tap water would do. Instead of dissolving, I just sprinkled the acid (it is crystals, looks like sugar) on the spots, and then added several drops of water just to turn the crystals to paste. I wasn't sure how long it was going to take, so checked from time to time and could see how the spots were getting lighter and then completely vanished after maybe half an hour. Sorry for the long description but maybe it would be useful for some of your readers. I myself was unsure and a little bit scared that it could damage the table but it was very straightforward."

I have used numerous processes to remove dark stains on raw wood, with little success. So I immediately ordered the acid from Amazon and will give it a shot when I run across this problem again. 

I think the best advertisement for any product is the success stories of others! The processes and products I use may not necessarily be the best process or product for you, which is why I always encourage others to do their own research and use what works for YOU! 

I'll make sure I report in on my experiences with both products. Until then, if anyone else has had any experiences with these products, I sure would like your take on them. I emailed my blog-friend Cristina at Remodelandolacasa and she had not used the acid but is anxious as well to hear the results since she just recently ran into the "stain" problem on a table she refinished!

Until then.....

Entry and stairway makeover reveal....

I started my entry way makeover here when I shared the "demo" of the coat closet! I did not realize this "weekend" project would drag out for TWO MONTHS....but that is pretty much the speed I work at around here these days!

Time flies when you are having fun! 

I had intended to post this project last week but Brian had to have shoulder surgery so his care has taken up a bit of my time. (Someone explain to me why a 53 year old man feels the need to bench press 275 pounds...even if he can!) 

Truthfully, it is not fun to demo and construct in a house you are living in. I put up plastic when I did the major sanding on the sheetrock...

... but there always seems to be a little spot here and a little spot there that needs just a little bit of sanding...before you know it it looks like a dust storm has blown through your house! 

Truth be told, this "makeover" actually started YEARS ago when I removed all the carpet from my stairs and put down oak treads and risers. I knew the day would come when I would not want to haul a vacuum cleaner up and down the stairs (that day is here!) so I wanted hardwood stairs!

My house had the typical "rough construction" stairs with pine treads and risers, covered in carpet...you can kind of see how they were constructed, and what I discovered when I pulled the carpet, in this picture....

It really was not that difficult to install new treads and risers. The biggest "hum" was finding that the 2 x 12 tread (the horizontal board you step on) lipped over the riser (the vertical board facing each step) by 1/4". To solve for that, I just applied strips of 1/4" board to the bottom of each riser and then faced them with new oak boards, cut to fit. Most home improvement stores carry prefab oak treads. I cut each to the width I needed, stained and sealed them, applied construction mastic and then nailed them into place. I applied one final coat of poly after I had installed them. Obviously I did a good job, since it took me TWO HOURS just to remove TWO of the stinking things! 

Since I was installing new travertine tile in the entry, I decided now was the time to also make some changes to the newel post and bottom steps. 

As with EVERY project, the first thing I did was "find my inspiration."  That was not difficult since I knew from the minute I laid eyes on Cassidy's stairs on Remodelaholics.com that this was what I wanted....

One of the things I really love about her staircase are the colors...the stain and the paint. Sadly THAT little detail is going to have to wait at my house. My staircase was stained to match the living room floors, which are going to be here a tad longer ...and while it isn't "technically" honey-oak, the "butterscotch oak" isn't really my cup of tea these days. But again, it is going to have to wait for now...the thought of taping and staining and painting everything right now is more than my brain can process! 

This is one of the important keys to remodeling any space...identifying what you can do (physically and financially) NOW to enhance the space...and patience! I knew I wanted the "openness" of the bottom two steps and a larger newel post. Those are things I needed to do before I installed the %$(@# travertine tile (Honestly, don't ask how much it cost. I have NEVER in my life paid THAT much for tile, but I wanted it and it is a small space...so I splurged!)

While I had intended to post a "tutorial" on this project, I realized it is like many home improvements...a puzzle that will probably differ depending on how your home was constructed and what materials were used.

So let's start at the beginning...what WAS there.

A tight entryway that required us to lift anything over 28" wide over the newel post!

A coat closet that was NEVER used and was basically just a dumping ground for anything and everything! Hardwood flooring...NOT a material one should use by an entry door. Over time wet feet will do a real number on it!

An anemic newel post that pretty much screamed 1999!

So were does one begin a sizable project like this? Again, how do you eat an elephant? One bite at a time!

So the first thing I did was demo the coat closet and remove the smaller built in bookcase...gut wrenching details here.

After the closet was gone I had to deal with moving electrical wires...a major chore for me and I would honestly suggest most call a professional. My electrical professional is my son-in-law, but since they live 2 1/2 hours away, this is another project he talked me through over the phone! After all the electrical was moved and I could move around in the space without whacking my head on dangling switch boxes, I removed the existing baseboards and hardwood flooring. 

Easy right? Um, no! First I had to mark and cut a line with my skill saw where the new flooring would meet the existing hardwood. Dust storm number one! Then I had to scrape up all the old flooring and mastic...seriously, I think you could safely attach wings to a plane with that glue! 

Next, I tackled the sheetrock repair and texture...hence the tarp to prevent a MAJOR dust storm! 

Since I was basically "patching" the sheetrock where I had removed the closet walls, I used this process! I can not stress enough how easy sheetrock repair can be if you follow these steps. Since the area I needed to texture was much larger than just a little patch, I used a "sheetrock hopper" to blow texture on the walls. I actually had a painter friend come over and help me with this step since he is a master at using the hopper and could "blend" the old with the new seamlessly! 

Then paint! I can't say it enough...there is a huge plus to knowing the exact formula for your paint. Someday soon I really want to repaint my downstairs....someday! Again, can't wrap my brain around that chore! But knowing exactly what I painted the walls with 8 years ago allowed me to paint the new patched areas and blend it with the "old." 

After the walls were repaired, textured and painted, it was time to tackle the BIG project...the staircase. That had to be done before the new tile could be installed because I was moving the existing newel post that sat at the bottom of the stairs and extending the bottom step, which changed the layout of the flooring. 

The first challenge...matching the existing stain color (as much as I dislike it!)  David, at our local Sherwin Williams, usually does a bang up job of matching existing stain. He did an AWESOME job on my kitchen stain! This time even he struggled. I think the biggest problem is that the original clear coat is poly...and poly "ambers" over time, which deepens the color. I ended up using David's "match" mixed with a premixed stain and final got a decent match. I stained and sealed all the pieces before installing!

The next big head-scratcher for me was figuring the exact angle and method to cut the existing bannister, trim and bottom rails without removing it all. After much hymning and hawing and measuring and drawing, I drug out every power tool in my arsenal and made the cuts! And did a little sanding to get a good tight fit! MAJOR dust storm!

I also had to build a new "base" for the wider bottom step. As I said, it's a "puzzle" and sometimes you just have to measure, figure, plan and execute as you go...when you are meshing new with old it can be a little more challenging than starting from scratch! 

Again, I could post a long drawn out tutorial...but honestly Google and youtube are all you need. You will find much better videos and tutorials than I could ever provide.

And this is pretty much how it sat for another week. Why...because the old adage "measure twice, cut once" only works when your brain computes properly at least once...if it computes improperly BOTH times, you will cut your special order materials wrong and have to wait on them after you reorder them! 

As soon as my special REorders came in and I was able to finish up the two steps and newel post, I installed my travertine tile. Then...it sat...AGAIN!

Why...well because I couldn't decide whether I wanted to add a little trim detail. I contemplated shiplap...maybe a decorative wainscoting...or maybe board and batten.

In the end, I went with the board and batten. I'm not totally swooning over it, but it is a nice little touch (again, find a GOOD tutorial if you plan on adding this...there are hundreds of great ones out there in blogland!)

Soooo....drumroll......get ready for a lot of pictures!

Okay...you may notice that other than a funky rug and the little walnut table, there isn't any "froo-froo" yet. As I have said before, I don't decorate for poops and giggles..."stuff" has to have some meaning or be something I truly love...and so far I haven't found either for this space!

Eventually I also want to change/add lighting... I'll know it when I see it!

I seriously love the travertine tile. I laid it in a "brick pattern." It is a 12x24 tile so I staggered it 8-16-24". I also sealed it both before grout and after, which in my opinion, is a must for travertine! 

I still need to put one more coat of poly on the bottom two steps and the newel post but I am waiting until Matt is gone for a few days so I don't have to worry about anyone going upstairs!

HUGE difference!

While I was making a few entry changes, I thought it was about time to order a new rug for the living room. The old one was only two years old, but with the addition of the new living room chair and post-Cleo-puppy, it was time! I decided to go with simple and neutral this time! 

Aside from the wall paint I want to change, and the "butterscotch oak" I would like to restain, and the new hardwood floors I want to install and the new lighting I think would look good in the entry, I'm pretty darn happy with the changes. 

One upside to the "dust storms" this project created was it forced me to "purge" ALL my bookcases, even the ones in the den and my room....dust goes EVERYWHERE when you project! I had to pull all the books to clean so I decided it was time to get rid of 30 years of collecting! I saved two collections of my favorite authors (most notably my autographed John Grisham collection...thank you Matt!) and a few of my favorite books, but over 150 hardback books will soon be finding a new home...right now they are packed in egg boxes in my dining room! Now most of my shelves are scantly decorated with antique books, framed photos and a few family heirlooms!

Ahhhhh....room to breathe.....


The unwanted chair....

I run a shelter for unwanted furniture.... injured, abused and neglected. Before a neighbor hauls off a piece of furniture, they usually call me first to see if it is something I might want. Or they just drop it in my driveway...I have come home on more than one occasion to find an abandoned piece of furniture on my door step!

My next door neighbors brought me this busted chair a few months ago.

The chair my neighbor, Paula, brought me was a little on the "formal" side...needlepoint fabric, upholstery nail heads, intricate carvings...but it had a busted leg. . Fairly easy fix for me...a little glue and clamping! 

The hardest part of redoing these chairs is removing the billions of tiny upholstery nails. I ordered those nifty staple and nail removal tools. Forget about it! In the end I used a flat head screw driver, a hammer and needle nose pliers. 

After I removed all the nails, staples and upholstery, I chalk painted, distressed, and sealed the wood frame and then reupholstered it. These little chairs really don't take a lot of fabric so I decided to use some scraps I had on hand from another project! 

The fabric may be a tad "casual" for such a regal chair, but personally I think it brings it down a notch...not so houtie-toutie!

Rather than use upholstery nails, I went with gimp trim...much simpler!

I've been pretty swamped the past few weeks. My oldest daughter graduated from college and my youngest daughter moved home for a few weeks until her condo is ready. In the meantime, we are building, stripping, upholstering and painting pieces for her new home.

One thing about little sis...she is learning that if you want something nice, sometimes you have to roll up your sleeves and do a little work. A lesson my dad taught me! Her first major project was this oak library table....now I think she has "the bug!"

So this past week Katie has been a busy little bee (funny since she actually raises bees!) She even attempted to make a dove tail coffee table...after all, she watched youtube videos and it didn't look too difficult. I tried to tell her those guys have been doing that kind of detailed work with VERY sharp tools their entire life. After she dang near sliced two of her fingers off with a chisel she decided to put that project on hold for a time. I ended up buying a beautiful MCM coffee table and she promptly went to work stripping the old yellow finish off! I am making her entertainment cabinet and we still have a few chairs to reupholstery! 

Busy, wonderful time. I have several "resale" projects I need to be working on but I have learned that time with and for my kids is what is really important. I can't remember 1/2 of the stuff I have repurposed and sold over the years but I remember every skill my dad taught me. 

There are things that will last a lifetime...and beyond. 

USB a mess....

Everyone in my family has an IPhone, IPad AND a laptop...a few of us even have electronic readers.  I have this stuff because I get them as gifts or hand-me-downs, NOT because I intentionally go out and buy stuff that requires I learn a new skill!​ Frustrating but I eventually learn enough to make them useful!

But my biggest frustration was never having a convenient place to charge all these gadgets!  And to top it off, my kids were always stealing my charger cords and adapters when they misplaced theirs.  ​

So last year, when I was snooping around the electrical supply store looking for kitchen lighting, I found this AWESOME little outlet/USB port combo!  Totally cool and can easily be installed in an existing outlet!!!​ Not only can you use it to charge your gadgets without the bulky adapters, you still have functioning outlets!

Lowes has one that has one outlet and two USB ports, but I like this one because it has two outlets and two ports!  And seriously, YOU CAN DO THIS!!! It really is relatively easy!  I installed my daughter's today in less than 20 minutes...and took pictures while I did it!

IMG_8726.JPG

​You will need the new outlet ($20-$25, depending on the type and where you get it), needle nose pliers if you have them and a phillips and flat head screw driver.  If you have an outlet tester that is great....if not, you can use a mixer or blow dryer to test the outlet.  Also, I keep these little "head lamp" lights handy just in case I need additional light while working. Soooo much handier than a flashlight!!!

IMG_8719.JPG

After turning off the power at the box, CAREFULLY check the outlet with a tester or something (lamp, mixer, blow dryer) that requires power (I use the tester AND at least 2-3 things that require power).  Just make sure there is no power to the outlet.  And trust me, don't ask someone else to do this for you!!!​

​BEFORE YOU START ANY ELECTRICAL PROJECT TURN OFF ALL POWER TO THE AREA YOU ARE WORKING!!  ​Find your circuit box and flip the switches to OFF. If you only turn off the switches labeled for the area you are working, you are ASSUMING it is labeled correctly.  Not me!  I turn it ALL off (I need to reset all my clocks anyway!)  And if you are really paranoid, you can always call the electric company and see if they will turn off your city block.  They wouldn't do it for me, but you never know! 

IMG_8730.JPG

Once you are certain there is NO power to the outlet, unscrew the cover and remove it.  Then unscrew the two little screws holding the outlet in the box, and pull the outlet out.  You will see either 2 black, 2 white and 1 bare wire attached to the outlet, or 1 black, 1 white and 1 bare attached.  If there are two black, two white and one bare, that just means there is power "coming in" to the outlet and there is power "going out" to another outlet. ​

IMG_8733.JPG
IMG_8734.JPG

The black will be on one side and the white will be on the other.  Remove all the wires from the old outlet! Unscrew the little screws and then carefully "pry" the wires off!

This is where needle nose pliers come in handy! Normally the wires are "looped" around the screw...you may have to pry the loop open a tad to be able to slip it off the screw!  Sometimes, the wires may be stuck into the back of the outlet.  If that is the case, just loosen the screw and pull the wire out of the back!

My son-in-law Joel taught me an easy way to remember what goes where..."black to brass."  So the black wire(s) will be attached to the brass screw(s) on one side and the white wire(s) will be attached to the silver screw(s) on the other.  The bare wire (neutral) will always attach to the little green screw!  If you have two sets of wires (2 black/2white/1bare) you will use both brass and both silver screws.  If you only have one set (1 black/1 white/1 bare) you will attach one black to a brass screw, the white to a silver, the bare to the green, and just tighten down the extra brass and silver screw. 

Working with electrical wires is NOT as easy as it looks...they are very stiff and a tad difficult to manipulate.  Needle nose pliers are great if you have stiff hands like mine!  Once you get the wires "hooked" around the screws, tighten the screws down! ​

IMG_8735.JPG
IMG_8736.JPG

​After all your wires are secure, carefully insert the new outlet back into the box, secure with the two screws at the top and bottom of the outlet and put the faceplate back on! 

Now you can turn all your power back on...sometimes you have to make sure you flip the switch all the way to OFF and then flip it back to ON.!  Test your outlet again, and make sure you have power!!!​

IMG_8739.JPG

Whether you install this in your kitchen, bedroom or entry hall, you really will enjoy the convenience of being able to leave your charger cords in the ports and still have complete use of the outlet for normal stuff like lamps and clocks. 

Super easy project!!!  JUST MAKE SURE YOU TURN THE POWER OFF FIRST!!!!!​

I was featured at Creativity Unleashed!

Practically Functional

Pathetic little shed no more....

Time flies... I didn't understand why my 4-5 year old shed looked so pathetic and was already showing signs of rot in places...then I realized that it was actually 9-10 years old and had never really had a makeover other than adding some little window planters!

I didn't want a "typical" storage building in my backyard.  So when I bought the "kit" at Meek's originally and contracted them to build it, I had them put a higher pitch on the roof and use architectural shingles.  I designed a cute little "cottage" style door for them to build and I also added two inexpensive windows and shutters. Cost a few pennies more, but is much more attractive than your typical storage building!!!  

But now it is time to spruce up the little place.​

I really just wanted to paint the shutters and door black, but as you can see, the door had a few issues....like a serious case of rot!  As did the siding on the side...and I have always wanted to add little "scallops" above the door and paint the hinges black and add cute little lantern style light fixtures...

Even the simplest little projects turn in to complete "rehabs" around here!!!​

But that is when you learn that doing this stuff is not THAT difficult! Sometimes the only thing stopping you from making a change is FEAR of it being too big....how do you eat an elephant...one bite at a time ;)  

How do you start a project....just be willing to take the first bite!!!!

So we begin...I took down the shutters...marked them on the back so I would know where they go (remember...paint fumes cause memory issues...this has nothing to do with age!) Gave them a good little bath and then used good ole' spray paint!  Beautiful!​

I also took all the screws from the shutters and the hinges, stuck them in an old styrofoam lid, and sprayed them with black paint!!  Easy way to paint screws to match!​

​I pre-primed and pre-painted all the trim I was going to be using on the building and door.  I still have to caulk and do paint touchup after it is installed, but it makes that job a little easier!!!

I took the door off and left the hinges attached to the trim on the building...but I have always wanted the hinges black, so I taped them off and sprayed them with black spray paint as well.  The siding on the side of the building had some "rot issues" from years of standing water, so I chipped away the rotted material and put a ​new piece of trim along the bottom of the building to "hide" the rot. (Before you do this, make sure the area is now VERY dry and there are NO termite issues...look for little ant creatures with wings or their little "tracks" in the wood.  If you see ANYTHING that is remotely suspicious, call your termite company!)

On to the fun part....rebuilding the door.  Unfortunately, I was so focused I didn't take pictures along the way.  But I basically used the old door as a "pattern."  Any time you need to replace or rebuild, examine closely what is there....what materials were used...how is it put together.  Fortunately, this door was a pretty easy read for me...so I bought the materials, measured, cut, glued and nailed.  And presto...I have a new door.​

After cutting the door out of the wood siding material, I had enough left over to make the little scallop things I wanted to put above the door.  This took a little creativity, but I had made a scallop fascia for a little cabinet I made for my daughter years ago, so I pretty much knew how to make it.  I took 6" strips of the leftover wood siding material, used a coffee can to mark the scallops and then cut them out with a jig saw!  I then installed them on the little building by overlapping one row on top of the other and painted them!   No biggy!​

I added some little lantern style fixtures! (they don't REALLY work....there is no electricity in the building...but they are kinda cute! But I think I need bigger ones) 

I still need to repaint the little porch railings...and I can't wait to get the planting done in the beds...but all in do time! ​

For now, the MAJOR work is done! And my little garden shed has new life!

This may seem like a HUGE and daunting task for a novice DIYer.  But seriously, if I can do this YOU CAN DO IT!  Before you can complete any rehab or makeover, you just have to START IT!  Take it slowly and examine what is already there...but conquer your fear and start!​

My father did not teach me to rebuild a storage building door.  He didn't teach me to make scallop siding...he didn't teach me to tile or sheetrock or install hardwood on my stairs.  He taught me to DO....to think...to look at something you want to change and figure out what you have to do to change it!  ​Really if you think about it, DIYing is kind of like life...if you don't like something change it...but you have to be willing to take the first bite! And honestly, if you get stuck, you have to be willing to ask for help when the going gets tough....but never quit or give up!

We are soooo fortunate to have the internet...you can Google just about anything and find a ton of places that will tell you how to do just about anything!  They may differ in some respects, but that is where you have decide what you are comfortable doing....and what makes sense for the project you want to complete!  ​

Dad didn't have internet...he just had a lifetime of experience and knowledge...I get very sad when I think of all he took with him.  I am grateful for the knowledge he gave me...but more than anything I am grateful for the confidence he gave me to start any project and figure it out!  ​

If I can give you just a "smidge" of that confidence, you will have received a tremendous gift!​

Window sills....

I've been working hard the last few days on my little garden shed...want to paint the shutters, but if I paint the shutters, I have to paint the door, but the door is rotten so it needs to be rebuilt, and while I'm doing that I might as well...blah, blah, blah.  NEVER ending.  But I'm almost done and I will share soon!​

In the mean time, I wanted to share a SIMPLE project... 

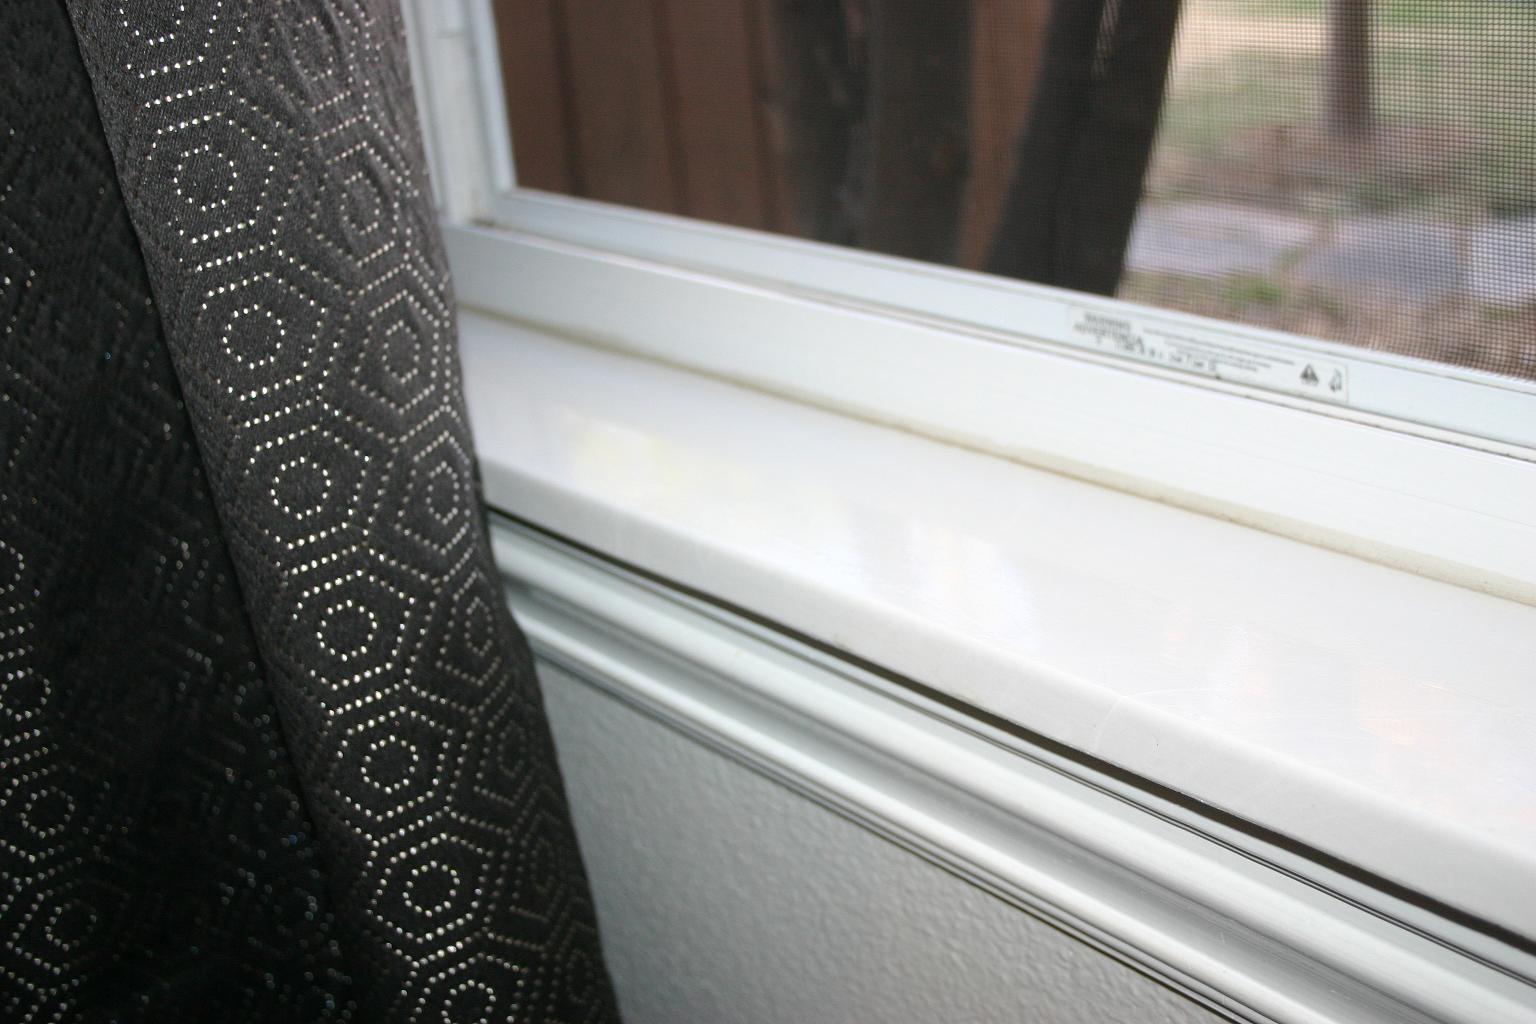
Marble window sills (or any solid surface material for that matter!)  Have you ever noticed the nasty black crud (i.e. mildew) on your window sills...or how the paint flakes and chips, especially after they get rained on a time or two.​​

IMG_8707.JPG

Easy solution!!!​ Cultured marble window sills.  Such an easy, inexpensive solution.  Now honestly, if you had to do them ALL at once, it would be a tad expensive.  But start with one or two...maybe the few that get left open the most in the spring (oops!) and over time replace all your sills with marble. I usually pay around $25 per sill.

It really is simple!  Take a VERY sharp utility knife and carefully "score" (cut through) all the caulk around the existing sill.  Basically between the existing window sill and the window, wall and trim.  ​Then take a flat tool (a chisel, flat screw driver, metal putty knife) and use a hammer to tap it between the sill and the trim under the sill.  Your objective is to lift the sill up...so however you can do that carefully....it doesn't matter if you scar up the sill, but you don't want to make too big a mess of the wall or trim.  Once you have the sill off take it to a culture marble manufacturer (easy to find in your phone book) and they can use it as a template for your new marble sill.  I usually get "white on white"...will match any white trim color.

If you are going to do more than one, make sure you number or somehow label your pieces so you will know what goes where!  You may THINK all your windows are 3' wide...trust me, there is a good chance there is a hair difference!​

IMG_8708.JPG
IMG_8709.JPG

To install your new marble sill, first "dry fit" it to make sure it fits properly!  You can make minor adjustments with sandpaper and even a skill/jig/tile saw IF you know what you are doing and feel comfortable doing so (cultured marble is NOT difficult to cut) If you can't make the adjustments yourself, mark where the cuts need to be on the marble with a permanent marker and take it back to the marble shop.

You will probably have a small gap (1/8" +/-)  all the way around...that's okay, you will fill that in with caulk.  If it fits properly,  just put a good thick "squiggly" of silicone caulk on the framing board the sill will sit on, install the sill and press firmly.   (If there is a gap between the actual window and "framing sill" you will want to run a nice heavy bead of silicone caulk to prevent air from getting in.  If the gap between the window and framing sill is BIG, you might consider stuffing it with insulation before installing your new sill!)

Now, here is the tricky part...you really should use silicone caulk to fill the gaps...and that stuff is NOT for the novice.  A 100% silicone will not clean up with water AND most are not paintable.  So if you are not a GREAT caulker, I would suggest using a "painter's caulk."  Easy clean up and you don't have to worry about it if it gets on the wall or trim...because it will hold paint.

IMG_8617.JPG

Remember my instructions about caulk...cut the tip small and at a 45 degree angle, with a very sharp razor blade.  When you caulk a gap, squeeze the gun trigger gently and keep it moving along the gap.  The deeper and wider the gap, the slower you will want to move the gun....the narrower or shallower the gap, the faster.  Again, it is a learned art....practice does make perfect.  But caulking is a necessity with MOST DIY projects!!!​

If you are really afraid you are going to make a big mess, take the time to tape off the area...run masking/paint tape along both sides of the "gap"...caulk...wipe with your finger...immediately pull up tape!!!  If you are going to attempt using silicone caulk, I would highly recommend doing this!!!  Keep mineral spirits handy for clean up!​

After you run a bead of caulk, take your finger and run it along the caulk/gap.  You want a nice, smooth "line."​

Caulk between the sill and the window/wall/trim...all the way around.​ If you are using painter's caulk, it will easily clean up with water...silicone caulk cleans up with mineral spirits. 

The entire process really isn't that difficult...and in the end you have a beautiful window sill that will never rot or chip, is super easy to clean and is very forgiving when you leave the window open during a thunderstorm!  

​BTW, if you are having a new solid surface installed in your kitchen or bathrooms I would highly recommend having the installer cut and install a new sill for any windows from the solid surface you are using...I had my granite installer cut a window sill for my kitchen window!  Looks beautiful and no more worries when I forget to shut the window before it rains!

Comment
Share

Bathroom makeover on the cheap....

I told you earlier in the week this time change thing would be the death of me. I. AM. DYING.  It makes me work too late in the day.  Today I started rebuilding my storage building door and painting the shutters...a project I will share when I am done.  Funny thing is, with all the work I do, I threw my back out this morning WASHING MY TRUCK!  Immediately went the chiropractor, came home and started taking down shutters and building a new door...and I wonder why I feel like death tonight!!!  Geez.

But on to something fun!!! Since I didn't get today's project ready to share, I'll share an oldie but definitely awesome!​

When I first bought my 1800 s.f. 4 bedroom, 2 1/2 bath home it was plenty for my family then.  After a year I added a den and a year later I added a "master suite."  But I have always known that a big master bathroom was something I could easily live without.  I basically shower, primp and do "other" business in there...rarely do I have time to lounge around in my whirlpool tub with candles and a good book.  As a matter of fact, I think I have tried out the whirlpool maybe twice in 13 years.​  When my house was under construction I added a glass block window over the tub before I tiled. (I bought the house while it was being built but did a lot of the finish work myself!) The mistake I made was not adding an operable window at the time.

While they were installing the GOLD shower doors, I was thinking "EWWWWW! What was I thinking when I picked THAT!" I disliked it from day one...but I attempted (unsuccessfully) to decorate around them for 12 years!  ​I also tried to add much needed storage by adding a little white cabinet.  But try as I might, I could never get the bathroom to "feel" and work the way I needed it to.  The ONLY thing I liked about it were the beautiful maple paprika cabinets I have throughout my house...to this day I still love my kitchen cabinets!  But in the bathroom...not so much!

master before.JPG

So last year I decided to do a "semi" makeover in my bathroom.  I had just bought some beautiful granite at an auction...enough for my kitchen and all three bathrooms (again, I promise to tell you about that ubber sweet deal!) This is what I ended up with....​

IMG_5034.JPG
master after.JPG
IMG_5038.JPG

​Okay, where do I start.  Very tight budget so I had to spend wisely!

Paint, that is a given in any room makeover...light, clean...gallon at the most! I did paint the ceilings but after 13 years, it was time!​

​All the tile was fine. Thank goodness because that can be costly!  But the shower doors HAD to go...gold...seriously, what was I smoking?  Removing old shower doors is seriously the EASIEST and one of the biggest changes you can make in a bathroom.  Remove the doors. Just lift up and tilt out.  Take a hammer and carefully knock the top bar "up."  Be careful that it doesn't hit you in the head (yeah, I really do learn these things the hard way).  Now, MOST shower doors have just 3 little screws securing the side brackets to the wall/tile/insert.  So take the little screws out and "pop" the side rails off the wall.  Usually silicone is used as an adhesive, so you may have to do a little prying on the side rails and the bottom rail, but they will come up.  After all the rails are removed, take a razor blade and gently scrap the silicone off the walls/tile/tub.  The three little holes...just take a little bit of silicone and "fill" them.   Haul the entire insert to the curb and say "bye, bye!" Buy a pretty rod and spa curtain and say good bye to soap scum and that nasty black crud that grows in the rails!

Cabinets.  I bought new cabinets. Big expense. But in a bit, I am going to share a way to change the entire look of your cabinets and bathroom without spending a lot of money!!!​  Seriously...you WANT this!  

I was going for "modern" so I decided to go with brush nickel fixtures and hardware.  I priced the cabinet hardware at a local home decor store....$28 A PIECE...​I only needed 7 but really...$28 for a stupid little handle?  That is when I discovered myknobs.com  Found the hardware for around $8 a piece....SWEET!

Originally I was going to put in two mirrors...but I bought this one on sale at Hobby Lobby for the hall bath and  it didn't work in there so I hung it in the master bath and loved it....so I put in the totally awesome pendant light fixture instead! Well, okay, my totally awesome son in law installed it when he put in the recess lights (not pictures)! 

There is only me...and it's a small bathroom...so two sinks was a waste in my opinion. I decided to add much needed storage and just have one sink.  I got the sink and faucet on Overstock.com!  They have great prices on bathroom fixtures.  Always check them before you buy any fixtures or lighting!

Again, great deal on the granite top.​ Glass tile back splash...yum!  A small amount of glass block in a bath back splash can add A LOT of style and class for very little! (That will be a great tutorial...it's super easy!)

The biggest change was the new window.  That required some pretty serious construction and vinyl and sheetrock repair but it was doable.  ​And having an operable window in a small bathroom is a must have in my opinion!!!  I put in one of those nifty "crank out" kinds and I loooove it!!!  It is so nice to be able to air out the bathroom on nice days!

And of course when you do a "remodel" there are always those "little surprises."  Like the wad of pine needles and leaves I found in the HVAC vent....no air was getting through those vents....but some critter obviously had during construction.  I also discovered that when the plumber installed the wall plumbing behind the cabinets (tech term, rough in) he tore out the sheetrock and insulation, and then the cabinet guys just set the cabinets right over the gaping hole in the wall....you could literally see daylight when I removed the vanity.  I always wondered why the floor was soooo cold!!  And I never could figure out how water pipes I KNEW were in the floor managed to freeze when it was bitter cold. ​

So I promised an inexpensive cabinet makeover....a process that will change the entire look of your bathroom and is ubber easy!!!​  Seriously, it is soooo easy that it totally offended my "craftsman" senses.  Keep in mind, I just came to terms with painting wood furniture...so "refinishing" cabinets with this process really offended my senses.  But I tried it in my kid's bathroom and my guest bath and I LOVE it!  My daughter has refinished her bathroom cabinets, I have used it in the kitchen in my manager's house, and one of my friends just refinished her entire master bath!  It is amazing!

I found this process on Pinterest....which linked me to "Monica Wants It."  Monica gives a GREAT tutorial on refinishing cabinets...follow it to the T...do not deviate. ​(Monica used this on oak cabinets...I have maple...worked great on both! I also used it on unfinished oak and it worked just fine!)  I have used it three times, and it has never failed me!  Nor my daughter nor my friend!  Totally awesome.   (I wish my photography did it justice...but it doesn't!)

guest bath after.JPG
kids bath after.JPG
SARAHS CABINET AFTER.jpg

If you need to make an inexpensive change in your bathroom, use this tutorial to refinish the cabinets (don't forget the hardware!), get rid of that nasty shower door, give the walls a fresh coat of paint and update your lighting!  You would be surprised what a few little changes will make!  ​And YOU CAN DO IT!

Oh, and one personal tip...over the years I have changed all my towels to WHITE!  Why?  Because I can bleach them and they always smell fresh...no more musty towels.  And they look awesome in my new bathroom!​ Very "spa" like!  And TJMaxx or Marshalls always have great prices on shower curtains and bath rugs!!!

Bathrooms are a great place to learn to DIY.  You can go big and do big, or you can start small and do a little at a time!  ​Budget, time and desire dictate!  

Have questions on how you can "change" your bathroom...email some pictures and I will give you some suggestions!​ beckcampbell@cox.net

TDC Before and After

Please sir, may I have some more pillows....

I'm telling you, even when I try to be clever with my post titles, all I do is show my age...grrr.

Pillows....LOTS of pillows. And for a reason, not just because I LIKE to sew...because honestly, I REALLY dislike sewing.  I can do it...and IMO everyone should know how to do the simplest things on a sewing machine. Sew a hem, make a decorative pillow, make curtains.  Simple stuff...not necessarily make a tailored jacket or Easter dress, but simple stuff.  My mom had me take sewing lessons when I was a teenager.  Didn't necessarily like them, but I am grateful I can use a sewing machine now.  If you can't, sign up for a class at your local craft or fabric store and learn.  Buy the cheapest, simplest sewing machine and learn how to use it. My machine basically sews straight stitch and zig-zag.  I think it does button holes too, but I don't...

So back to WHY I had to make a bunch of pillows. First, last year I decided I didn't like the big fluffy cushions on my couch.  Haven't really liked them since I bought the couch.  But they were expensive and filled with down fill.  If you have ever bought stuffing for pillows, you know it is expensive....not something to waste.  So I bought some inexpensive white cotton material, measured out 19 x 19 and 13 x 21 squares for pillow forms ( allowing for a 1/2" seam all around), sewed them together and stuffed them with the down stuffing from the too fluffy cushions.  I think they call that upcycling now....much better adjective than cheapo. I ended up with 5 oblong and 5 square ones....wow!  he reason I made and stuffed forms, is because as you may know, some down feathers are "pokey."  Having the form in the pillow helps protect your guests from being speared by a feather.  If you are just using plain old "fill" (without feathers) no need for the forms. Just make the pillows and stuff them!

Once I had all these pillow forms, I started digging through my leftover material from past projects.  Mostly upholstery projects.  I found enough to make these pillows....

IMG_8672.JPG

I had material from the dining room chair recover, the peacock chair, my wingback chair and my daughter's houndstooth chair.  The white cable knit is actually a sweater I bought at Goodwill for $2, and used to make a pillow!  ​

Depending on the amount of material I had, I cut some 19 x 19 and some 13 x 21.  Two for each pillow.  ​

I trimmed all of them (except the cable knit) with piping.  YOU DO NOT HAVE TO DO THIS!  I just like the way it looks...start simple and forget the piping if this is your first attempt!

Now piping CAN be tricky.  You can buy it already made and ready to sew into your pillow....but that is a tad expensive....they have some inexpensive premade but they also have some really nifty ones with beads and all kinds of stuff!  If you have enough material, you can actually make your own piping.  But most people don't understand that piping material MUST be cut on the bias....which means it has to be cut at a 45 degree angle across the material or it puckers reeeeal bad...which means you have to have A LOT of material to make the bias for your piping.  Confusing, I know. 

Easiest, and by far the cheapest, is buy "premade" bias tape and cover piping with it.  It comes in all colors and you are sure to find one to accent any pillow you are making!

Just iron the bias tape flat, fold in 1/2 and sew in the piping with your zipper foot (seriously, learn to sew a straight line!) and then sew it onto one side of your pillow....then pin the other side of the pillow, face down, and sew again...leaving an opening to stuff the pillow form or batting.  Then just "whip stitch" the opening. Seriously, NO biggy if you can do the basic stuff on a machine!  ​(Seriously, take a lesson or have a friend teach you!)

God knew what he was doing when he decided I would not have a lot of money.  He knows I am a creative person and would miss out on the joy of learning to do things like refinish furniture, painting a room, and designing and building if I had money to PAY someone to do it.  And honestly, if I won the lottery tomorrow, I would still do those things because I enjoy them.​

But I probably would never sew again....I just really don't enjoy it.  But I do enjoy having nice thing...little treasures throughout the house...and decorative pillows are little treasures. ​

So I sew......​

Comment
Share